In this tutorial, I will show you the process I took to Create this Warrior Drawing Dark Energy from Surrounding Elements Scene in Photoshop.
This is a intermediate level difficulty tutorial and can be a bit tricky to complete, but why not have a try!
Note: The Photoshop tutorial is done in Photoshop CC – therefore some screenshot may have slighting different layout as in the earlier version. Some brushes are exclusive to Photoshop CS6 or above.
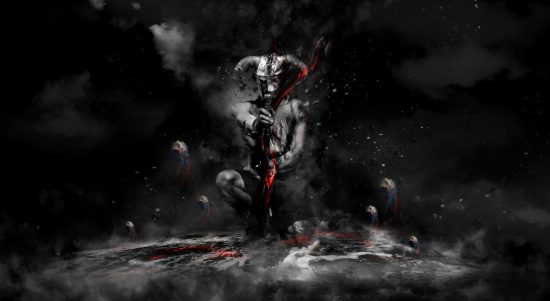
Here is a preview of the final effect I have for this tutorial: (click to enlarge)

PSD File Download
You can download the PSD File for this tutorial via the VIP Members Area for only $6.95/Month (or less)! You will not only get this PSD File, but also 200+ other PSD Files + Extra Goodies + Exclusive Photoshop tutorials there. Signup now and get exclusive :) Find out more about the VIP Members Areas

OK Let’s get started!
To complete this tutorial, you will need the following stocks:
Some Cloud/Smoke Brushes (Download a few from the list)
Step 1
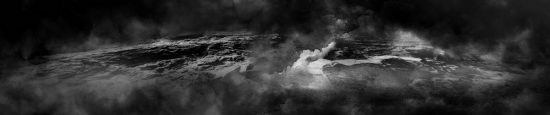
Create a new document sized 1440*800px with black background. Use the cloud/smoke brush you downloaded, paint some background effect as shown below:

Load the rock stock into Photoshop, use the Lasso Tool to select a piece of it:

Copy and paste the selection to our document, place it at the bottom and use the free transform tool to adjust its shape:

Use a soft eraser to fade the bottom of the rock texture:

Apply the following image adjustments to this rock ground layer:
Black and White

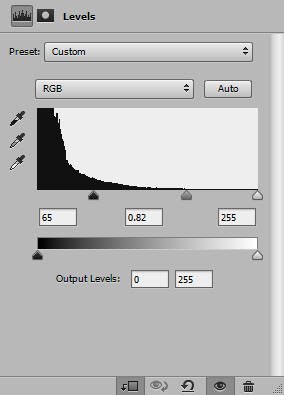
Levels

and here is the effect so far:
Step 2
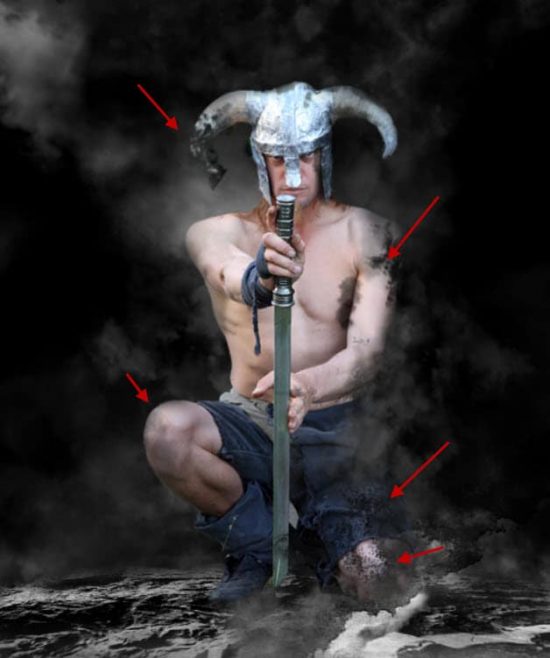
Load the warrior model image into Photoshop. Cut out the model and paste it to centre of the canvas:

Use a soft eraser, remove the following portions of the model – we will add some break-apart effect later in the tutorial:
Apply the following image adjustment layers as clipping masks to this warrior layer:
Black & White

Levels
and here is the effect so far:

Step 3
We will apply some rock texture to the warrior. Go to the rock stock image and select the following piece:

Copy and paste the selection to our document, adjust its size and place it over the right side of the warrior. Change the layer blend mode to “Hard Light” for this rock layer:

Repeat this process, add a few more rocks to the model:

Step 4
Load the flowing lave stock image into Photoshop. Select the top right lava with lasso tool:

Copy and paste the selection to cover the sword of the warrior:

Change the blending mode to “Vivid Light” for this lava layer:

and here is the effect:

Repeat this process and add some lava effect on the ground:

We will add some floating rocks around the warrior. Select the following piece from the rock image:

Copy and paste the selection to our document, place it next to the model:

Add more rocks around the model as shown below by duplicating this new rock layer, make sure you adjust the size of each layer:

Add some lava effect below the rocks using the same method as above. You will need to reduce the size of the lava according to the size of the rock:

Step 5
We will add some flying rocks around the warrior. Go the rock image and create a new layer, paint some particles using a particle brush:

Select this new layer:

Go back to the background layer and maintain the selection, press Ctrl + C and make a copy:

Paste the rock particles to our document, adjust its size and place the new layer around the warrior. You can make a few duplicated layers for extra effect:
Hint: As you add the rocks, use a soft eraser to fade some parts of it, this will create more depths for the image.

and here is the effect so far:
Step 6
We’re almost done! For some final touch-ups, I flattened the image, duplicated the background layer and apply this Accented Edges filter to the duplicated layer:

Add the following layer mask to the duplicated layer, so the filter effect doesn’t cover the whole image:

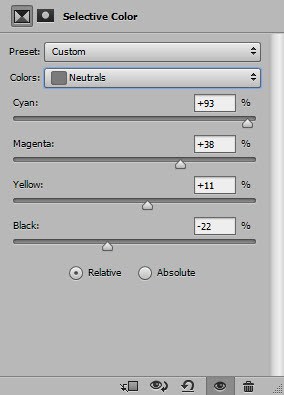
Apply the following image adjustment layers on top:
Selective Color


Color Balance


Layer mask on the above color balance adjustment layer:

Brightness/Contrast

and this is my final effect: (click to enlarge)
That’s it for this tutorial! Hope you enjoy it and find it useful! If you have any questions about the steps, please contact me or leave a comment below. I will try my best to answer them.
Till next time, have a great day!
The post Create Warrior Drawing Dark Energy from Surrounding Elements Scene in Photoshop appeared first on Photoshop Tutorials, Digital Art Tutorials and Showcase - PSD Vault.