In this tutorial, I will show you the process of making a beautiful alien landscape with floating rocks in Photoshop (similar to the movie “Avatar”). We will use several interesting object blending techniques to combine several stock images, in order to form the final effect. Have a try!
The PSD file of this tutorial is available to buy on PSD Vault Shop, or via the PSD Vault VIP members area.
Image may be NSFW.
Clik here to view.
This is a beginner-intermediate level tutorial.
Note: The Photoshop tutorial is done in Photoshop CC – therefore some screenshot may have slighting different layout as in the earlier version. Some brushes are exclusive to Photoshop CS6 or above.
Here is a preview of the final effect I have for this tutorial: (click to enlarge)
Image may be NSFW.
Clik here to view.
PSD Vault VIP Membership
You can download the PSD File for this tutorial via the VIP Members Area for only $6.95/Month (or less)! You will not only get this PSD File, but also 200+ other PSD Files + Extra Goodies + Exclusive Photoshop tutorials there. Signup now and get exclusive!
Image may be NSFW.
Clik here to view.
Let’s get started!
To complete this tutorial, you will need the following stocks:
Step 1
Create a new document sized 1440px * 900px with the default white background. Fill the background layer with the Gradient Fill tool with the following colour (light blue as foreground colour, white as background colour)
Image may be NSFW.
Clik here to view.
Load the mountain stock into Photoshop, select a portion of it, copy and paste your selection to our document. Place it to the bottom half of the canvas as shown below:
Image may be NSFW.
Clik here to view.
Use a soft eraser to fade the top edge of the mountain layer, so that it blends into the background layer:
Image may be NSFW.
Clik here to view.
Apply the following Lens Blur filter to this new mountain layer:
Image may be NSFW.
Clik here to view.
Image may be NSFW.
Clik here to view.
and here is the effect so far:
Image may be NSFW.
Clik here to view.
Step 2
Load the Rock stock image into Photoshop and select a portion of it:
Image may be NSFW.
Clik here to view.
Copy and paste the selection to our document. Reduce its size and rotate it upside down, move it to the following position:
Image may be NSFW.
Clik here to view.
I used the Burn tool to darken the right side of the rock, and erased parts of the rock:
Image may be NSFW.
Clik here to view.
We can add some extra rocky pattern to this rock layer. Load the Cliff stock image into Photoshop and select a portion of it
Image may be NSFW.
Clik here to view.
Copy and paste the selection to the rock layer, set it as clipping mask. Set its layer blend mode to “Hard Light”:
Image may be NSFW.
Clik here to view.
and here is the effect so far:
Image may be NSFW.
Clik here to view.
Step 3
We will add native plants around the rock in this step.
Load the Tree 1 stock image into Photoshop, select a small portion of it with the Lasso Tool:
Image may be NSFW.
Clik here to view.
Copy and paste the selection to our document. Use the free transform tool to adjust the shape and angel of this new layer. Repeat this process, cover the rock with plants as shown below:
Image may be NSFW.
Clik here to view.
You can even break apart your plants with eraser tool (use the chalk brush) to make the plants look more realistic:
Image may be NSFW.
Clik here to view.
Load the Temple stock image into Photoshop and select the template portion:
Image may be NSFW.
Clik here to view.
Copy and paste the template onto the top of the rocks, blends it with the surrounding trees/rocks:
Image may be NSFW.
Clik here to view.
Load the Waterfall stock into Photoshop, select the waterfall:
Image may be NSFW.
Clik here to view.
Attach the waterfall to the right side of the rock, as shown below:
Image may be NSFW.
Clik here to view.
Step 4
We can add more floating rocks in this step, simply by repeating step 4. Ensure each rock looks different from each other with various sizes and tree placement:
Image may be NSFW.
Clik here to view.
Image may be NSFW.
Clik here to view.
Once you’re happy with the rocks, merge their layers into a single layer. Use the Blur tool, blur the following objects around the canvas to create depth of field:
Image may be NSFW.
Clik here to view.
Image may be NSFW.
Clik here to view.
Step 5
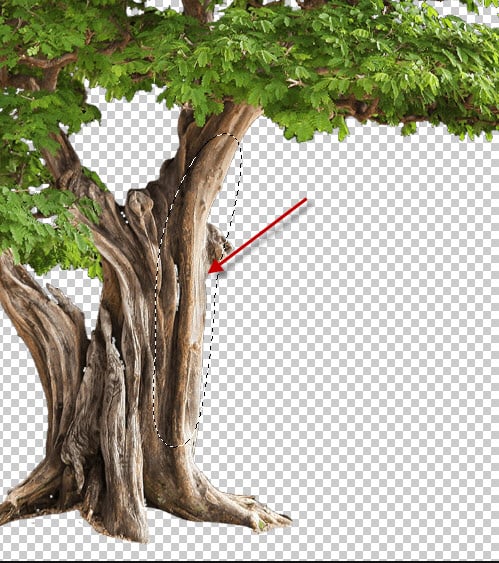
I added a natural linkage between the 2 smaller floating rocks in this step. Select the following piece from “Tree 2” stock image:
Image may be NSFW.
Clik here to view.
Copy and paste selection our document, resize and use the Warp tool to bend it as shown below:
Image may be NSFW.
Clik here to view.
Duplicate this layer, add some greens to them with the tree leaves:
Image may be NSFW.
Clik here to view.
Use the Blur tool to blur them slightly:
Image may be NSFW.
Clik here to view.
Here is the effect so far:
Image may be NSFW.
Clik here to view.
Use a cloud brush or cloud filter, add some cloud effect over the canvas:
Image may be NSFW.
Clik here to view.
I further added the contrast and colour balance of the image, and this is my final result of the beautiful alien landscape: (click to enlarge)
Image may be NSFW.
Clik here to view.
The post How to Create Beautiful Alien Landscape with Floating Rocks in Photoshop appeared first on PSD Vault.