In this tutorial, I will show you the steps I used to create this “Urban Assassin” scene in Photoshop. We will combine a model image with several other objects such as street, building, dragon, and finish up with smoke/cloud overlay. Also will be adding some blood effect with relevant splatter brushes.
This is an intermediate level tutorial and prior knowledge of layers, image adjustments, masks are required.
Note: The Photoshop tutorial is done in Photoshop CC – therefore some screenshot may have slighting different layout as in the earlier version. Some brushes are exclusive to Photoshop CS6 or above.
Here is a preview of the final effect I have for this tutorial: (click to enlarge)

PSD File Download
You can download the PSD File for this tutorial via the VIP Members Area for only $6.95/Month (or less)! You will not only get this PSD File, but also 200+ other PSD Files + Extra Goodies + Exclusive Photoshop tutorials there. Signup now and get exclusive :) Find out more about the VIP Members Areas

OK Let’s get started!
To complete this tutorial, you will need the following stocks:
Model by KaylaDavion
Splatter brushes (Pick any one you like)
Step 1
Create a new document sized 960px * 1200px with black background. Load the model image into Photoshop and select the model on the left:

Copy and paste the selection to our document, re-size and place it to the position shown below:

Apply the following adjustment layers as clipping masks to the model:
Black & White

Layer mask for the above black and white adjustment layer:

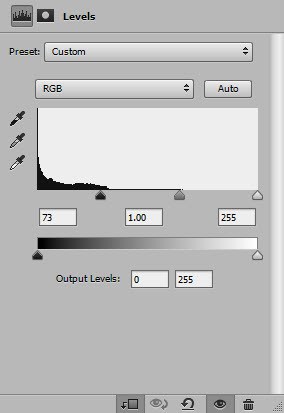
Levels

Layer mask for the above levels adjustment layer:

Curves

and here is the effect so far:

Step 2
Load the building image into Photoshop and select the street:

Copy and paste the selection to our document, place it below the model layer and use a soft eraser to fade the edges as shown below. Also slightly rotate this street layer clockwise:

Apply the following adjustment layers as clipping mask to this street layer:
Black & White

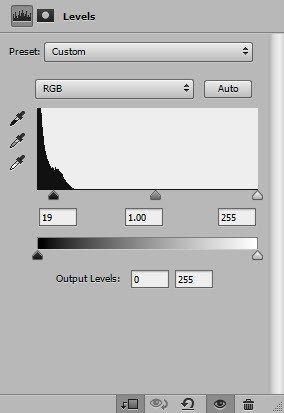
Levels
Step 3
Go the same building image, select this part of the building show below:

Copy and paste the selection to our document and again place it below the model layer. Resize and place it to the position shown below. Rotate it to the same angle as the street.
Use the cloud brush you downloaded as eraser, erase parts of the building as arrows indicated:

Apply the following adjustment layers as clipping mask to this building layer:
Black & White

Levels

and here is the effect so far:

Step 4
Go the building image again and select the pub portion of the image:

Place it on the right side of the model as shown below. Also rotate it to the same angle as the street:

Apply the following adjustment layers as clipping masks to this layer
Black & White

Levels
and here is the effect so far:

Use the cloud brush or the cloud filter, add some cloud/smoke effect around the canvas:

Step 5
Load the dragon image into Photoshop and select the whole image:
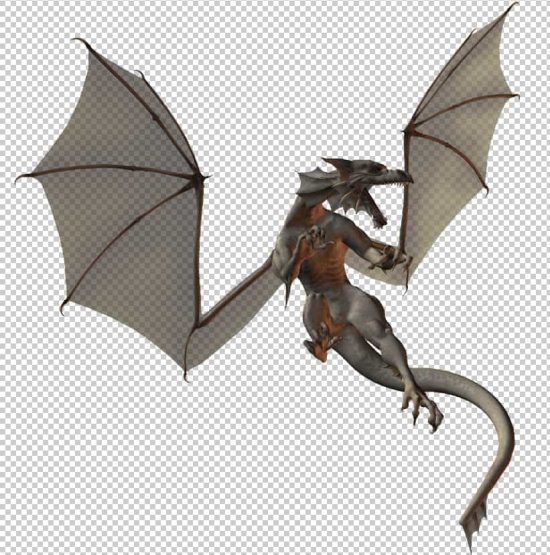
Copy and paste the selection to our document, re-size and place it on the right of the model:

Add one more dragon to the top on the model as shown below:

Step 6
Load the machete image into Photoshop and select it:
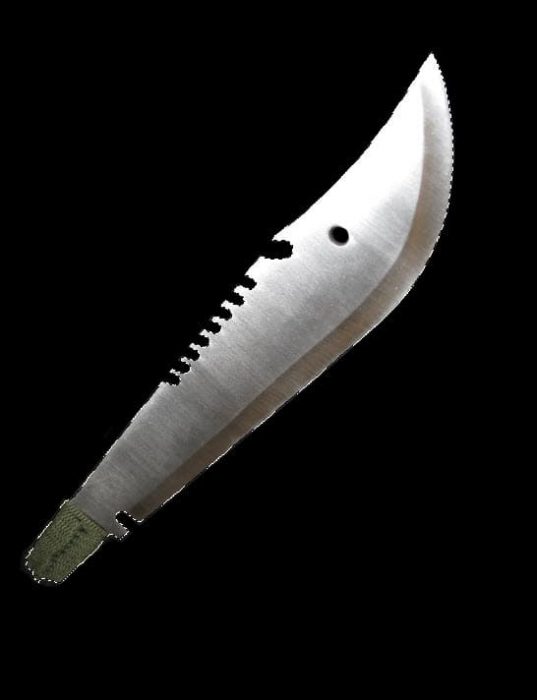
Copy and paste the selection to our canvas, resize and place it to the position shown below. Apply the following Motion Blur filter to add some motion to it.
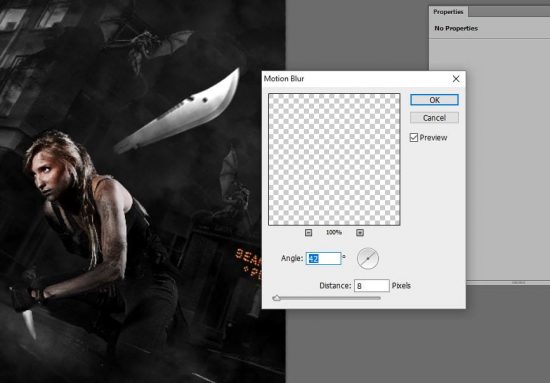
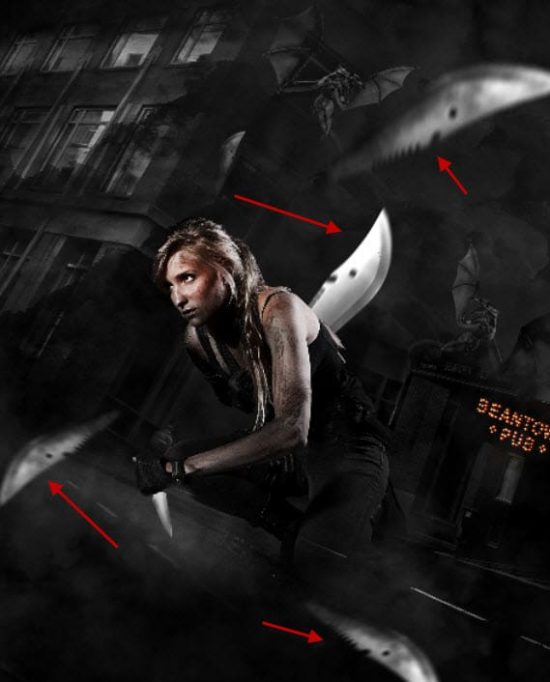
Add a few flying machetes to the image. Adjust their sizes and also apply relevant motion blur to them:
Hint: Use Ctrl + F to apply motion blur repeatedly to fine-tune its effect
Step 7
We will add some extra cloud and blood effect to the image. Use the cloud brush to paint some cloud around the arms:

Use a red splatter brush, paint some random blood over the body and the machete:
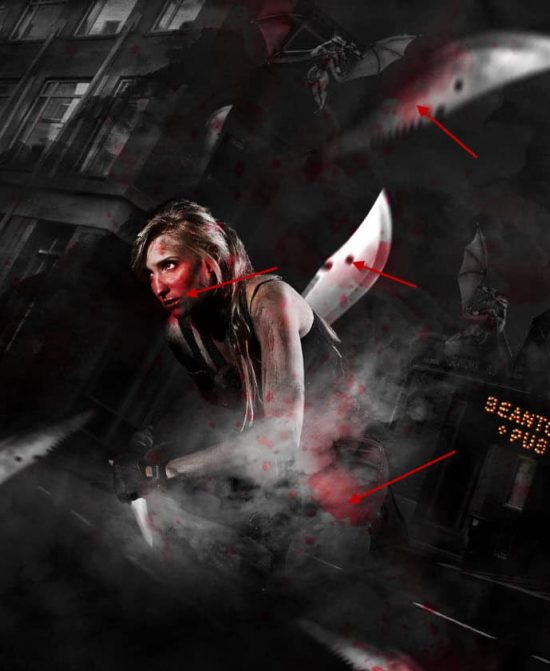
Make sure the layer blend mode of the blood layer is set to “Overlay”:

Optionally, we can also add some smoke traces around the body using a Fractal Brush:


and here is the effect so far:
Step 8
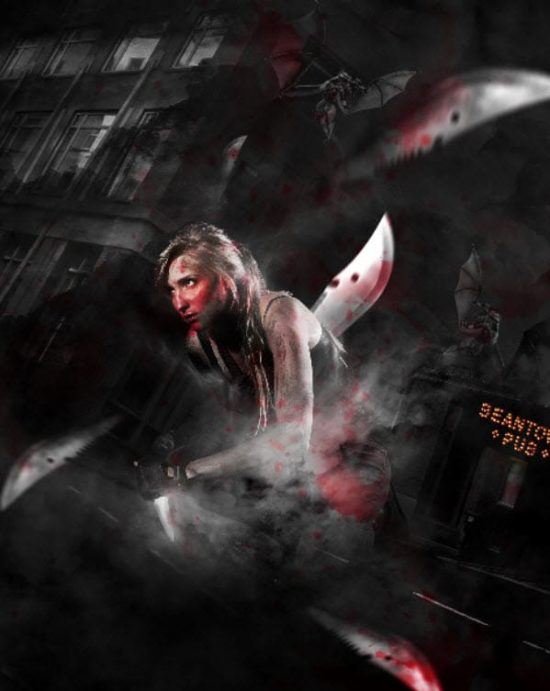
In this final step, I decided to add a brush stroke filter to this building on the top left.
I flattened the image and duplicated the background layer. I then made a selection of the building, and chose the “Ink Outlines” filter as shown below:

Apply this above filter to the building, reduce the layer opacity of the duplicated layer to around 55%, and here is the effect:

I further applied some colours to the image using a couple of colour balance adjustment layer, and here is my final effect: (click to enlarge)
Please feel free to experiment your own colour scheme, and see what results they bring you.
That’s it for this tutorial! Hope you enjoy it and find it useful! If you have any questions about the steps, please contact me or leave a comment below. I will try my best to answer them.
Till next time, have a great day!
The post Create a Urban Assassin Scene in Photoshop appeared first on Photoshop Tutorials, Digital Art Tutorials and Showcase - PSD Vault.