In this tutorial, I will show you the steps I used to create this “City in Flame” Digital Montage in Photoshop. We will mix several objects such as city buildings, solider, vintage car, plane and flame in order to the achieve the final result. Have a try!
This is an intermediate level tutorial and prior knowledge of layers, image adjustments, masks are required.
Note: The Photoshop tutorial is done in Photoshop CC – therefore some screenshot may have slighting different layout as in the earlier version. Some brushes are exclusive to Photoshop CS6 or above.
Here is a preview of the final effect I have for this tutorial: (click to enlarge)

PSD File Download
You can download the PSD File for this tutorial via the VIP Members Area for only $6.95/Month (or less)! You will not only get this PSD File, but also 200+ other PSD Files + Extra Goodies + Exclusive Photoshop tutorials there. Signup now and get exclusive :) Find out more about the VIP Members Areas

OK Let’s get started!
To complete this tutorial, you will need the following stocks:
Step 1
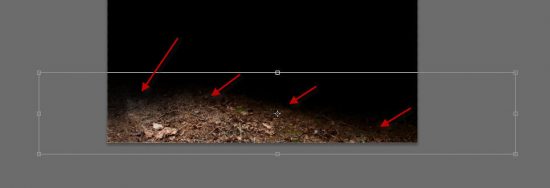
Create a new document sized 900px * 1200px with black background. Load the vintage car stock image into Photoshop and select the following piece from the ground:

Copy and paste the selection to our document, place it at the bottom of the canvas and use a soft eraser to fade the top edge as shown below:
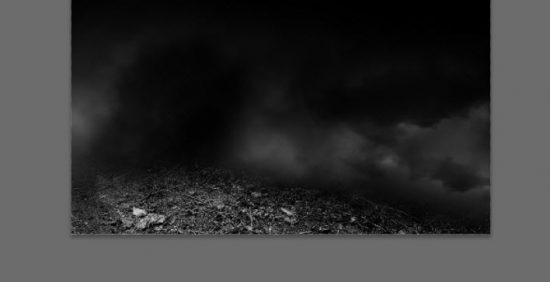
Apply the following black and white adjustment to this ground layer:

Use a cloud/smoke brush (plenty of these over the web) to paint some smoke effect above the ground. Here is the effect so far:
Step 2
Load the soldier stock into Photoshop and cut out the solider. Place it to the following position on our canvas. Use a soft eraser to fade the following edges of the model so it blends into the background:

Apply the following image adjustment layers to this model layer:
Black and White

Levels

Mask on the levels adjustment layer:

Curves

Mask on the curves adjustment layer:

And here is the effect so far:

Step 3
Load the building stock into Photoshop and select the right portion of the building:

Copy and paste the selection to our canvas and place it to the right side of the solider. Move this new building layer below the solider layer.

Use a crack brush to add some cracks to the building:

Apply the following adjustment layers for this building layer:
Black & White

Levels

and here is the effect so far:

Step 4
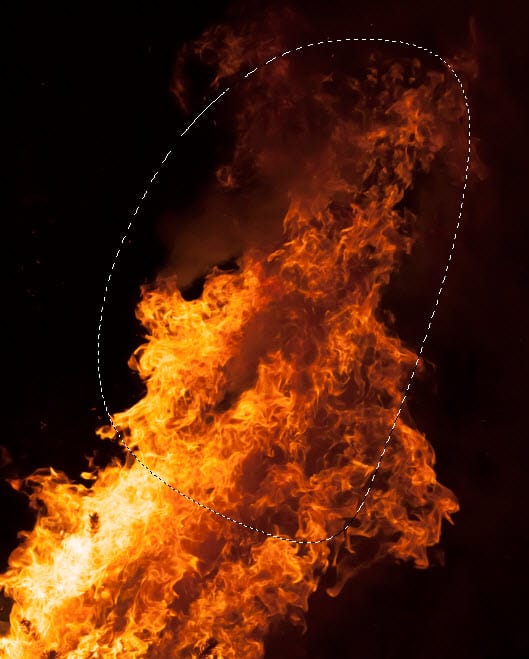
Load the flame stock image into Photoshop, and use the Lasso Tool with 40px feather to select the following portion:

Attach the flame to the building and set its blend mode to “Screen”:

and here is the effect so far:

Add a couple more buildings to the following portions with the same process. Adjust the opacity of the buildings so they are slightly darker than the first building.
Also make sure to reduce the size of these 2 buildings you added:

Step 5
Load the vintage car stock image into Photoshop and select the car:

Place the selection to the following position, fade the bottom of the car with a soft eraser:

Apply the following black and white adjustments to the car layer:

Go to the flame stock into the select the following portion of the flame:
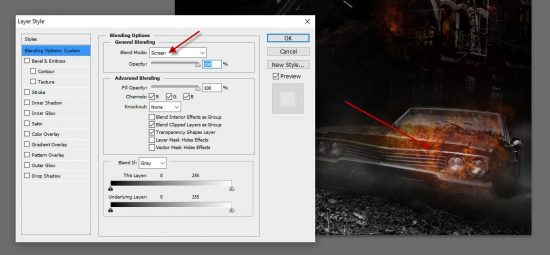
Attach the fire to the car and set its blending mode to “Screen”. You may need to adjust the size of the fire to fit the car:
Add some fire to the ground as well using the same process:

Step 6
Load the plane stock image into Photoshop, select the plane and place it to our document. Use the free transform tool to flip the plane horizontally:
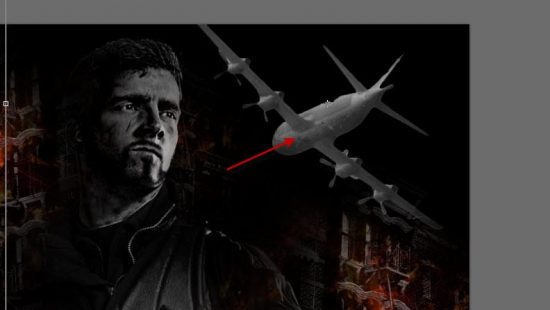
Apply the following Levels adjustment to the plane layer:

Select the following portion of the flame stock

Attach the selection to the place and set its blending mode to “Screen”:

And here is the overall effect so far:

I further adjusted its colours with a couple of colour balance adjustment layers. This is my final result: (click to enlarge)
That’s it for this tutorial! Hope you enjoy it and find it useful! If you have any questions about the steps, please contact me or leave a comment below. I will try my best to answer them.
Till next time, have a great day!
The post Create “City in Flame” Digital Montage in Photoshop appeared first on Photoshop Tutorials, Digital Art Tutorials and Showcase - PSD Vault.