Quantcast
Channel: Photo Effect Archives - PSD Vault
Viewing all 248 articles
Browse latest View live

Design a Natural Abstract Photo Manipulation in Photoshop

$
0
0

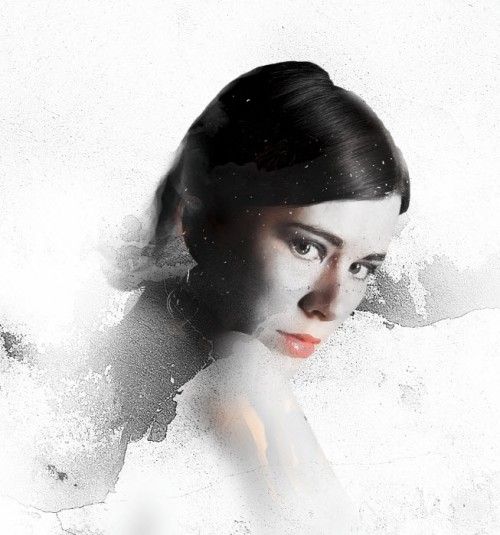
In this tutorial, I will show you the steps I took to Design a Natural Abstract Photo Manipulation in Photoshop. This is an intermediate tutorial so some steps can be tricky, but why not have a try :)

Along the way, we will apply some basic Photo Manipulation techniques such as layer blending and masking, we will also practice some selection techniques with Pen Tool and some photo retouch skills.

Put your design expertise on paper postcards, they’re great for showing off all of your skills.

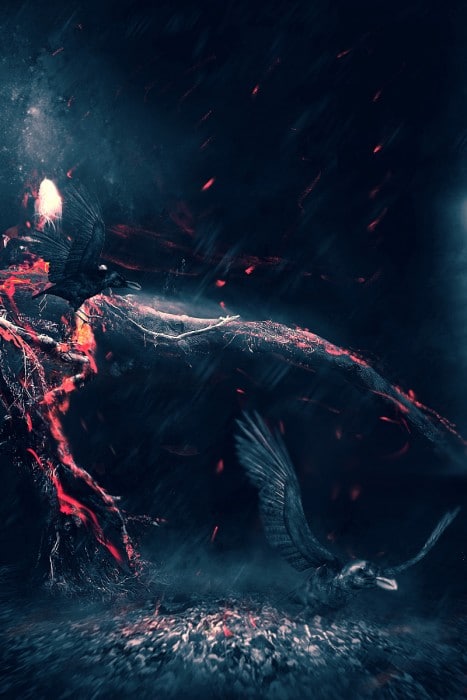
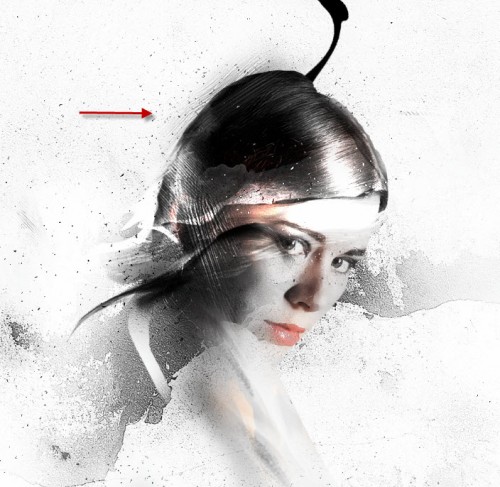
Here is a preview of the final effect I have for this tutorial: (click to enlarge)

parrot model flatten 500x300 Design a Natural Abstract Photo Manipulation in Photoshop

PSD File Download

You can download the PSD File for this tutorial via the VIP Members Area for only $6.95/Month (or less)! You will not only get this PSD File, but also 70+ other PSD Files + Extra Goodies + Exclusive Photoshop tutorials there. Signup now and get exclusive :) Find out more about the VIP Members Areas

vip sign up 250 Design a Natural Abstract Photo Manipulation in Photoshop

OK Let’s get started!

To complete this tutorial, you will need the following stocks:

Model

Parrot 1

Parrot 2

Tree

Some Grungy Brushsets

Step 1

Create a new document sized 1200px * 720px with white background, use the gradient fill tool (G) to fill the background with the following gradient:

1 gradient 500x298 Design a Natural Abstract Photo Manipulation in Photoshop

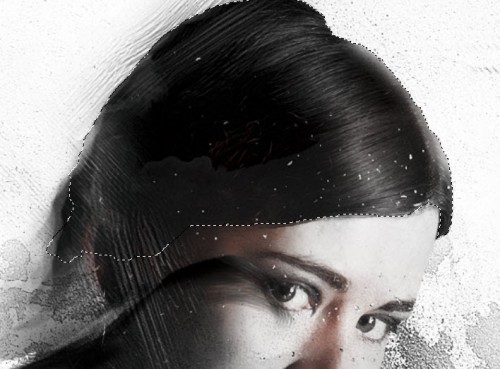
Load the model image into Photoshop, cut out the upper body of the model and paste it onto our document, use the eraser tool (around 85% hardness) to remove the lower parts as shown below:

1 paste 500x469 Design a Natural Abstract Photo Manipulation in Photoshop

Tidy up the edges of the model with a 70% hardness eraser tool:

1 erase 500x433 Design a Natural Abstract Photo Manipulation in Photoshop

Apply some slight dodge and burn effect with the dodge and burn tool (set exposure to around 10%) on the model”

1 dogde burn 500x299 Design a Natural Abstract Photo Manipulation in Photoshop

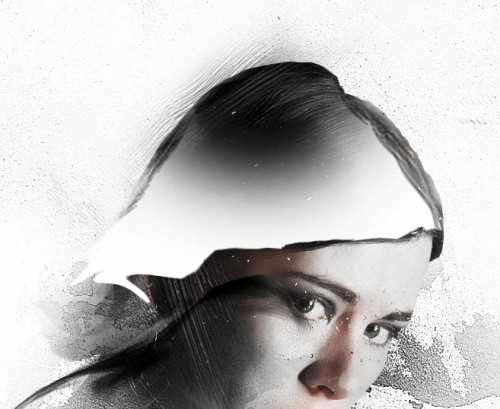
Use the grungy brushset as eraser, remove some parts of the model as shown below:

Hint: resize the brush to a smaller size before you erase.

1 erase 2 500x361 Design a Natural Abstract Photo Manipulation in Photoshop

Step 2

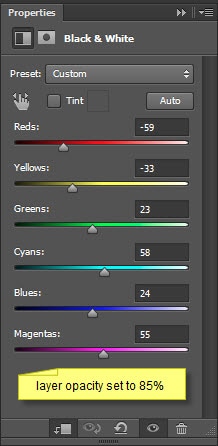
Let’s add the following image adjustment layers as clipping mask on the model layer:

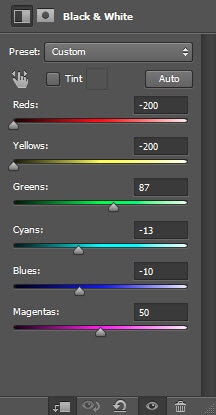
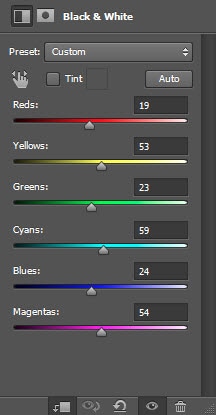
Black and White

2 bw Design a Natural Abstract Photo Manipulation in Photoshop

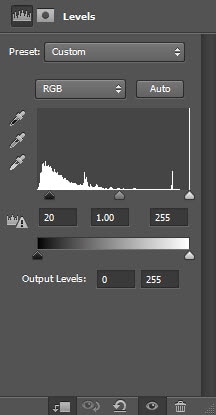
Levels

2 lv Design a Natural Abstract Photo Manipulation in Photoshop

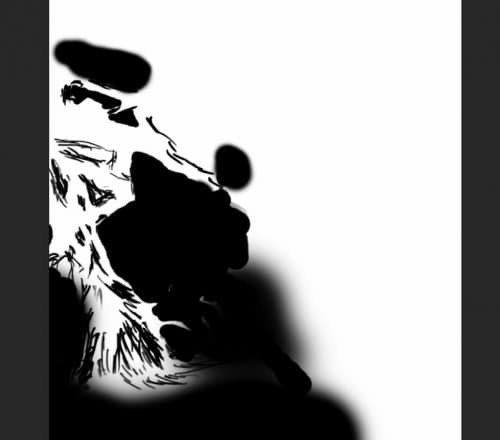
Apply the following layer mask on the Levels adjustment layer:

2 lv mask 500x331 Design a Natural Abstract Photo Manipulation in Photoshop

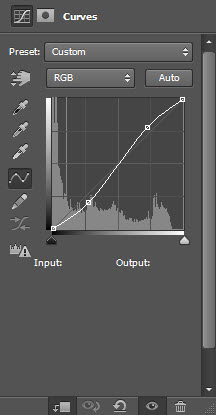
Curves

2 curves Design a Natural Abstract Photo Manipulation in Photoshop

Brightness and Contrast

2 bright Design a Natural Abstract Photo Manipulation in Photoshop

and you will have the following effect:

2 effect 500x357 Design a Natural Abstract Photo Manipulation in Photoshop

Step 3

Load the “Parrot 1″ image into Photoshop, cut out the parrot and paste it onto our document, resize and position it as shown below:

3 parrot paste 500x345 Design a Natural Abstract Photo Manipulation in Photoshop

Use a soft eraser to remove the following parts off the parrot as shown below:

3 erase Design a Natural Abstract Photo Manipulation in Photoshop

Add the following 2 adjustment layers as clipping mask to this parrot layer:

Black and White

3 bw Design a Natural Abstract Photo Manipulation in Photoshop

Curves

3 curves Design a Natural Abstract Photo Manipulation in Photoshop

and you will have the following effect:

3 effect 500x315 Design a Natural Abstract Photo Manipulation in Photoshop

Step 4

We can add the second parrot into the manipulation. Load the “Parrot 2″ image into Photoshop and copy out the parrot, paste it onto our document and resize it, as shown below:

4 paste 500x349 Design a Natural Abstract Photo Manipulation in Photoshop

Use a soft eraser (with 40% flow and opacity) to erase the following parts of the parrot to give it some extra lighting effect:

4 erase light 500x461 Design a Natural Abstract Photo Manipulation in Photoshop

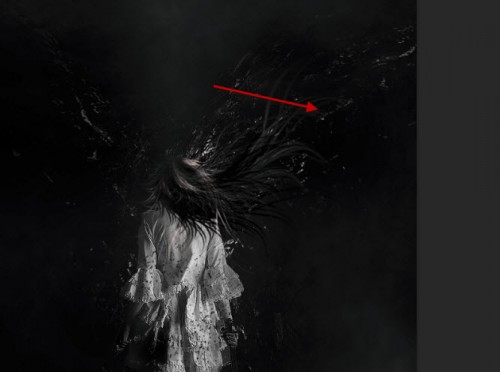
Duplicate this layer a few times, rotate and resize each layer, and hit Ctrl + U on each layer to adjust its Hue, for some variety in the image:

4 more 500x275 Design a Natural Abstract Photo Manipulation in Photoshop

Step 5

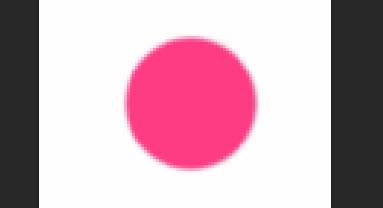
We can now add a red circle around the model for some abstract effect – create a new layer and use a hard brush to paint a big circle:

5 red 500x338 Design a Natural Abstract Photo Manipulation in Photoshop

Erase the centre bit with a slightly smaller eraser:

5 erase 500x411 Design a Natural Abstract Photo Manipulation in Photoshop

Use the grungy brushes as an eraser (set flow and opacity to around 40%), remove some parts of the circle off:

5 erase grunge Design a Natural Abstract Photo Manipulation in Photoshop

Duplicate this circle layer a few times and resize them, attach them around the model:

5 dup 500x330 Design a Natural Abstract Photo Manipulation in Photoshop

Step 6

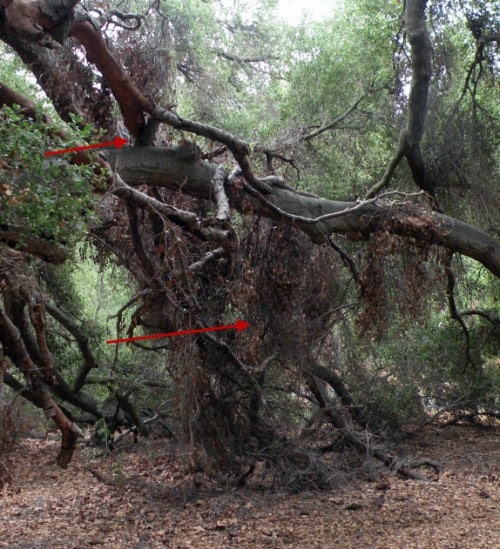
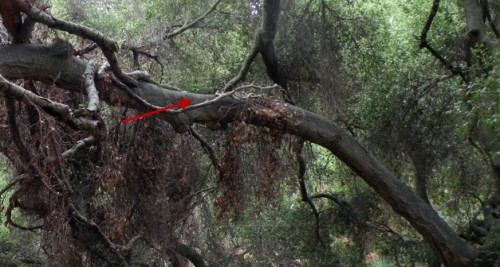
We want to add some tree texture to the model – load the tree stock image into Photoshop, use the Pen tool to draw a path as shown below:

6 tree select 500x468 Design a Natural Abstract Photo Manipulation in Photoshop

Right-click and make a selection with the feather radius of 1px:

6 tree sel set Design a Natural Abstract Photo Manipulation in Photoshop

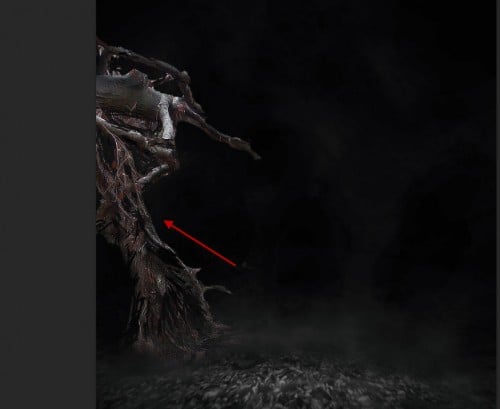
Copy and paste the texture into our document, resize it and fit to the lower half of the model:

6 paste 500x303 Design a Natural Abstract Photo Manipulation in Photoshop

Use the liquify filter to apply some liquid effect to this tree texture, just to give it some artistic feeling:

6 liquify 500x223 Design a Natural Abstract Photo Manipulation in Photoshop

Use the grungy brushes as an eraser (reduce their size), set the eraser flow and opacity to around 40%, erase some part of the tree texture as shown below:

6 erase 500x279 Design a Natural Abstract Photo Manipulation in Photoshop

Add the following 3 adjustment layers as clipping mask for this tree texture layer:

Black and White

6 bw Design a Natural Abstract Photo Manipulation in Photoshop

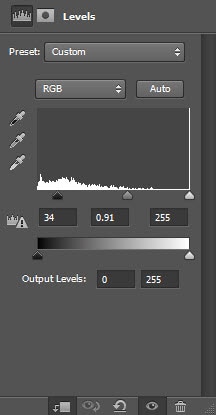
Levels

6 lv Design a Natural Abstract Photo Manipulation in Photoshop

Curves

6 curves Design a Natural Abstract Photo Manipulation in Photoshop

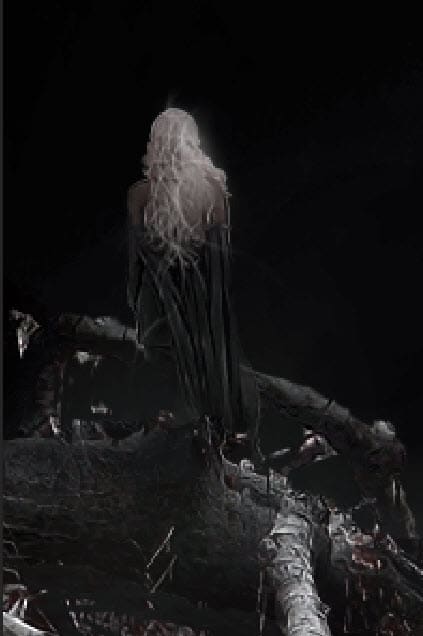
and you will have the following effect:

6 effect Design a Natural Abstract Photo Manipulation in Photoshop

Step 7

OK we’re almost done! For some final retouches, we can add some more textures around the model with the grungy brushsets:

7 texture 500x308 Design a Natural Abstract Photo Manipulation in Photoshop

Use the Pen Tool to draw some curvy path and stroke a with a 3px brush to add some lines around the model and the parrots:

7 lines 500x263 Design a Natural Abstract Photo Manipulation in Photoshop

Either use a cloud brush or the cloud filter to add some cloud and paint some shadow under the model:

7 cloud 500x336 Design a Natural Abstract Photo Manipulation in Photoshop

You can add some more particles with a hard brush (with 40% flow and opacity) under the model:

7 particles Design a Natural Abstract Photo Manipulation in Photoshop

Use a soft round white brush to paint some highlight around the model for some extra lighting effect:

7 highlight 500x312 Design a Natural Abstract Photo Manipulation in Photoshop

and you will have the following effect so far:

7 effect 500x434 Design a Natural Abstract Photo Manipulation in Photoshop

I then further added some colour and light adjustments and here is the final effect I have: (click to enlarge)

parrot model flatten 500x300 Design a Natural Abstract Photo Manipulation in Photoshop

That’s it for this tutorial! Hope you enjoy it and find it useful! Till next time, have a great day!


Design Dramatic Planet Impact Scene (Inspired by Mass Effect 3) in Photoshop

$
0
0

In this tutorial, I will show you the steps I took to Design this Dramatic Planet Impact Scene (Inspired by Mass Effect 3) in Photoshop. This is an intermediate tutorial so some steps can be tricky, but why not have a try :)

Along the way, we will be practising how to produce the meteor effect, the impact effect, particle and fire effect, as well as some layer blending tips.

This effect is inspired by Mass Effect 3 in-game graphics, which is just really awesome :)

For custom sticker printing orders look for an online printer who offers an easy file upload process.

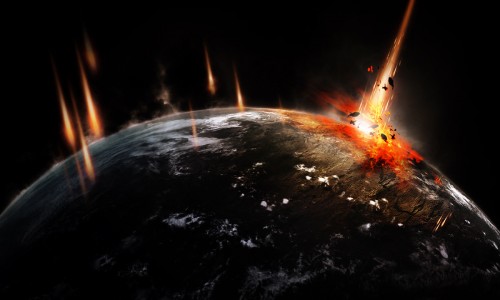
Here is a preview of the final effect I have for this tutorial: (click to enlarge)

planet impact scene flatten 500x300 Design Dramatic Planet Impact Scene (Inspired by Mass Effect 3) in Photoshop

PSD File Download

You can download the PSD File for this tutorial via the VIP Members Area for only $6.95/Month (or less)! You will not only get this PSD File, but also 70+ other PSD Files + Extra Goodies + Exclusive Photoshop tutorials there. Signup now and get exclusive :) Find out more about the VIP Members Areas

vip sign up 250 Design Dramatic Planet Impact Scene (Inspired by Mass Effect 3) in Photoshop

OK Let’s get started!

To complete this tutorial, you will need the following stocks:

Planet

Fire texture

Cloud brush (optional)

Step 1

Create a new document sized 1200px *720px with black background. Load the planet PSD file into Photoshop, drag all layers onto our document, resize it as shown below:

1 paste1 500x300 Design Dramatic Planet Impact Scene (Inspired by Mass Effect 3) in Photoshop

Expand the “Cloud” folder, go to the “Cloud Shadow” layer, and reduce the layer opacity to around 30%:

1 decrease 500x375 Design Dramatic Planet Impact Scene (Inspired by Mass Effect 3) in Photoshop

Use a soft eraser, erase the edge of the render layer so it blends into the background a bit:

1 erase1 500x151 Design Dramatic Planet Impact Scene (Inspired by Mass Effect 3) in Photoshop

Use either the cloud filter, or the cloud brush you downloaded, add some cloud effect on the edge of the planet:

1 cloud 2 500x285 Design Dramatic Planet Impact Scene (Inspired by Mass Effect 3) in Photoshop

1 cloud 1 500x245 Design Dramatic Planet Impact Scene (Inspired by Mass Effect 3) in Photoshop

Step 2

On top of the planet layers, let’s go and add the following the adjustment layers:

Black and white

2 bw1 Design Dramatic Planet Impact Scene (Inspired by Mass Effect 3) in Photoshop

Layer mask on the black and white adjustment layer:

2 bw mask 500x289 Design Dramatic Planet Impact Scene (Inspired by Mass Effect 3) in Photoshop

Colour Balance

2 color bal Design Dramatic Planet Impact Scene (Inspired by Mass Effect 3) in Photoshop

Levels

2 lv1 Design Dramatic Planet Impact Scene (Inspired by Mass Effect 3) in Photoshop

Layer mask on the levels adjustment layer:

2 lv mask1 500x294 Design Dramatic Planet Impact Scene (Inspired by Mass Effect 3) in Photoshop

Curves

2 curves1 Design Dramatic Planet Impact Scene (Inspired by Mass Effect 3) in Photoshop

and here is the effect so far:

2 effect1 500x289 Design Dramatic Planet Impact Scene (Inspired by Mass Effect 3) in Photoshop

Step 3

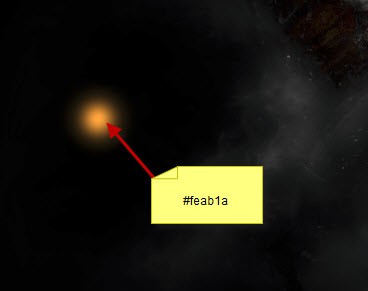
Now let’s try and make this meteor effect. Create a new layer and grab a 30% hardness round brush, paint an orange dot as shown below:

3 paint Design Dramatic Planet Impact Scene (Inspired by Mass Effect 3) in Photoshop

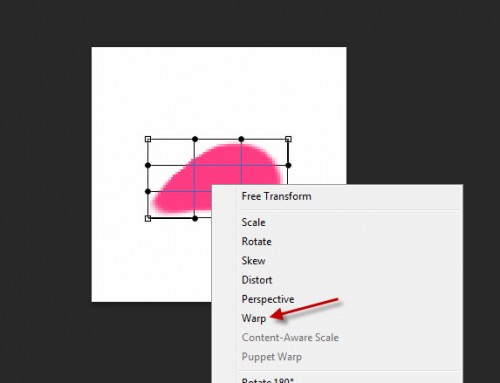
Distort this dot twice, as shown below: (Ctrl + T, right-click to choose distort)

3 distort 500x570 Design Dramatic Planet Impact Scene (Inspired by Mass Effect 3) in Photoshop

3 dis 2 500x433 Design Dramatic Planet Impact Scene (Inspired by Mass Effect 3) in Photoshop

Duplicate this layer, and apply the following Hue/Saturation  (Ctrl + U) settings to this duplicated layer:

3 hue Design Dramatic Planet Impact Scene (Inspired by Mass Effect 3) in Photoshop

This will make the duplicate layer colour brighter than the original – Reduce the size of the duplicated layer slighting and move it to show the glowing part in the centre

3 resize Design Dramatic Planet Impact Scene (Inspired by Mass Effect 3) in Photoshop

Duplicate this layer again, apply the following Hue/Saturation settings:

3 hue white Design Dramatic Planet Impact Scene (Inspired by Mass Effect 3) in Photoshop

This will turn the last layer to white – again we resize it and then merge all three layers together, compress it down as shown below:

3 compress 500x507 Design Dramatic Planet Impact Scene (Inspired by Mass Effect 3) in Photoshop

Duplicate this merged layer a few more times to make the meteor trail path wider and longer, and here is the effect so far:

3 duplicate Design Dramatic Planet Impact Scene (Inspired by Mass Effect 3) in Photoshop

Step 4

We will now work on adding more effect for the impact. For this tutorial, I firstly use a soft white brush to paint some highlights on a new layer, use free transform tool to adjust the light shape if necessary:

4 highlight 500x316 Design Dramatic Planet Impact Scene (Inspired by Mass Effect 3) in Photoshop

We can then duplicate this meteor effect around the planet, as shown below:

Hint: add some smaller ones around the main (first) meteor for more effect, adjust the size of each one for more depth.

4 dup 500x222 Design Dramatic Planet Impact Scene (Inspired by Mass Effect 3) in Photoshop

Step 5

We will now design the impact site – I decided to apply the fire texture to it – go and select a portion of the fire texture:

5 select Design Dramatic Planet Impact Scene (Inspired by Mass Effect 3) in Photoshop

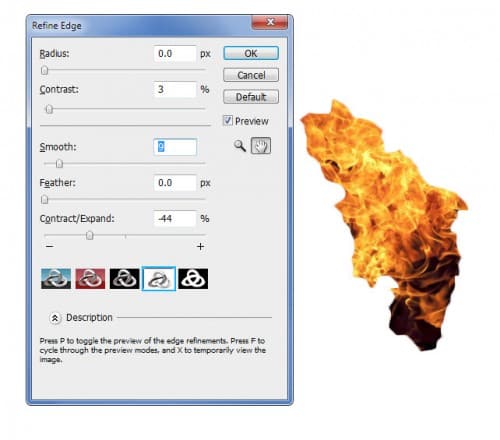
Copy and paste the selection onto our document, place the new layer below the meteor layer and above the last adjustment layer for the planet. Refine the edge as shown below: (Ctrl + Alt + R)

5 refine 500x440 Design Dramatic Planet Impact Scene (Inspired by Mass Effect 3) in Photoshop

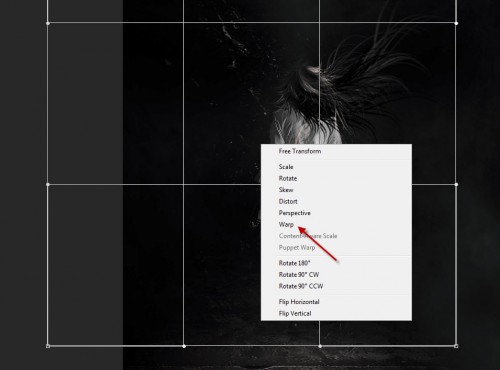
Distort and warp this layer as shown below:

5 dist 500x284 Design Dramatic Planet Impact Scene (Inspired by Mass Effect 3) in Photoshop

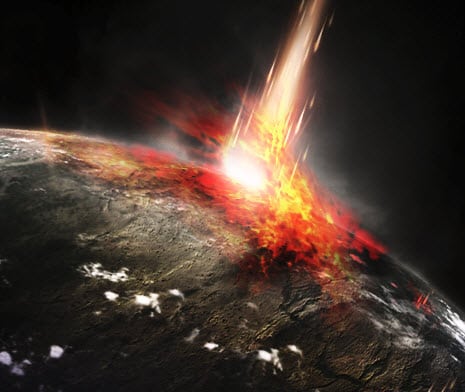
Change this layer blending mode to “Hard Light”, 70% opacity:

5 blend 500x350 Design Dramatic Planet Impact Scene (Inspired by Mass Effect 3) in Photoshop

Duplicate this fire layer a few more times, change the layer blending mode to either “hard light” or “vivid light”, adjust the layer opacity accordingly. Try warping the fire texture as well to create a splashing effect:

5 more Design Dramatic Planet Impact Scene (Inspired by Mass Effect 3) in Photoshop

Step 6

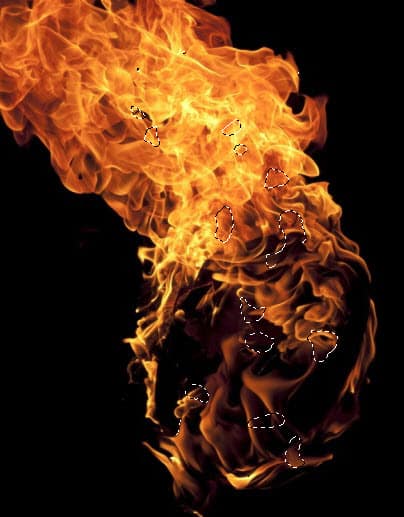
We’re almost done! Finally we can add some particle around the area of impact with the fire texture – this time, we select some small pieces of the texture, as shown below:

6 sel Design Dramatic Planet Impact Scene (Inspired by Mass Effect 3) in Photoshop

Copy and paste the selection onto our document, then we can resize and distort it a bit to fit the angle of the planet, as shown below:

6 paste1 500x374 Design Dramatic Planet Impact Scene (Inspired by Mass Effect 3) in Photoshop

Duplicate this layer a few times, resize and attach them around the impact site:

6 paste 2 500x500 Design Dramatic Planet Impact Scene (Inspired by Mass Effect 3) in Photoshop

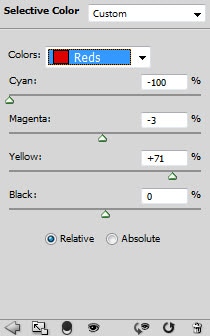
I also added this selective colour image adjustment setting to fine-tune the colour of the image a bit:

6 red Design Dramatic Planet Impact Scene (Inspired by Mass Effect 3) in Photoshop

6 blue Design Dramatic Planet Impact Scene (Inspired by Mass Effect 3) in Photoshop

and here is the final effect I have: (click to enlarge)

planet impact scene flatten 500x300 Design Dramatic Planet Impact Scene (Inspired by Mass Effect 3) in Photoshop

That’s it for this tutorial! Hope you enjoy it and find it useful! Till next time, have a great day!

Design Conceptual Disintegration Effect in Cinema 4D and Photoshop

$
0
0

In this tutorial, I will explain you the steps to design a conceptual digital composition with 3D and photography in Cinema 4D and Photoshop. This is an intermediate tutorial, mainly because not many of you may not be familiar with Cinema 4D, but we will get trough every step so you can understand all the process in an easy way.

We will start by creating a simple sphere in Cinema 4D into a exploded sphere with lights and textures. After that we will jump onto Photoshop to mix our 3D with photography using simple techniques such as selections and layer blending, masking, adjustments.

Utilize colorful poster printing layouts to promote events like trade shows, concerts and raves

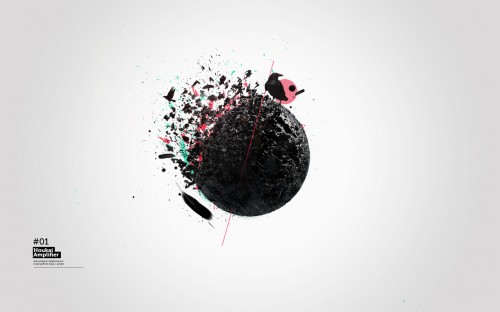
Here is a preview of the final effect I have for this tutorial: (click to enlarge)

Houkai Amplifier 1280x800 500x312 Design Conceptual Disintegration Effect in Cinema 4D and Photoshop

PSD File Download

You can download the PSD File for this tutorial via the VIP Members Area for only $6.95/Month (or less)! You will not only get this PSD File, but also 70+ other PSD Files + Extra Goodies + Exclusive Photoshop tutorials there. Signup now and get exclusive :) Find out more about the VIP Members Areas

vip sign up 250 Design Conceptual Disintegration Effect in Cinema 4D and Photoshop

OK Let’s get started!

To complete this tutorial, you will need the following files:

Photoshop Displacement Map for the sphere wiggle effect.

GreyscaleGorilla HDRI Light Kit Pro for Cinema 4D studio light render. (Not Free)

In this tutorial I used many different style of brushes/images for mostly free websites. List them would be really big, but the ones used here are nothing too complex. You can find some similiar at your favorite websites.

Part 1 – Cinema 4D

Cinema 4dOpen a new file on Cinema 4d. Go to Objects – Primitive and add a Sphere. Go to the Attributes panel, select Objects tab and edit the Segments property into 45 so we have more geometry in our sphere to work with:

c4d01 500x312 Design Conceptual Disintegration Effect in Cinema 4D and Photoshop

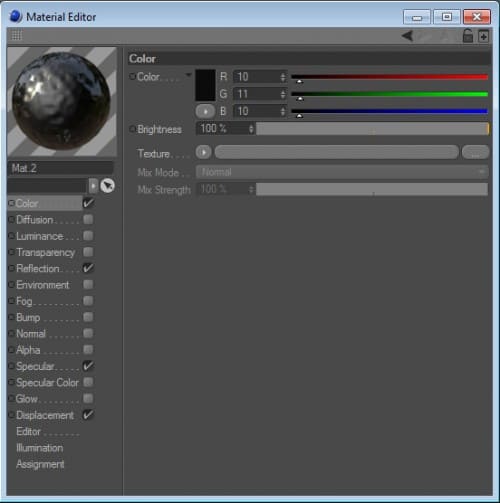
Go to the Materials Panel and create a new Material with the same values as the images below:

c4d02 500x503 Design Conceptual Disintegration Effect in Cinema 4D and Photoshop

c4d03 500x503 Design Conceptual Disintegration Effect in Cinema 4D and Photoshop

c4d04 500x503 Design Conceptual Disintegration Effect in Cinema 4D and Photoshop

c4d05 500x503 Design Conceptual Disintegration Effect in Cinema 4D and Photoshop

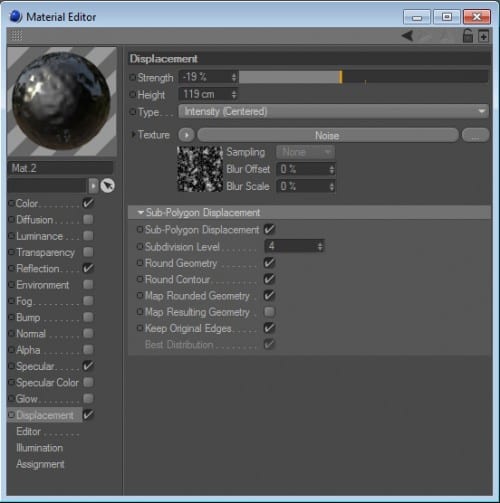
Inside the Displacement tab, click on Noise to go to the Shader Property and edit the values to the match the image below:

c4d06 500x617 Design Conceptual Disintegration Effect in Cinema 4D and Photoshop

Go to your Objects tab and select your sphere. Now click C to convert this parametric object into a polygon object. You can see the icon changed. Apply your Material to the Shape, simply by dragging it to your object. You can see the color has changed in the preview window:

c4d07 500x312 Design Conceptual Disintegration Effect in Cinema 4D and Photoshop

Go to the Menu – Objects – Scene – Background, to add a new background. Or use the shorcut like the image show:

c4d08 500x312 Design Conceptual Disintegration Effect in Cinema 4D and Photoshop

Add a new Material to your background. You MUST pick a fushia or lime color so you can remove the background in a easy way on Photoshop. This also help us to create a good contrast when we render with lights:

c4d09 500x312 Design Conceptual Disintegration Effect in Cinema 4D and Photoshop

Press ctrl+r / cmd+r or go to Menu – Render – Render View to render the composition to see the effect we applied into the shape:

c4d10 500x312 Design Conceptual Disintegration Effect in Cinema 4D and Photoshop

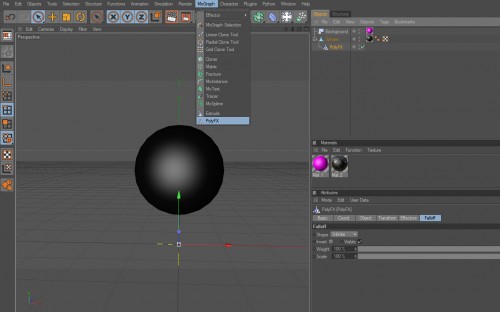
Now go to – Mograph and add PolyFx. Go to your Objects Tab and grab it and place it inside your Sphere:

c4d11 500x312 Design Conceptual Disintegration Effect in Cinema 4D and Photoshop

After that go to – Mograph – Effector and add Random. Place it inside your Sphere as well:

c4d12 500x312 Design Conceptual Disintegration Effect in Cinema 4D and Photoshop

Go to attributes and edit the values to the match the image below:

c4d13 500x320 Design Conceptual Disintegration Effect in Cinema 4D and Photoshop

c4d14 500x320 Design Conceptual Disintegration Effect in Cinema 4D and Photoshop

c4d15 500x320 Design Conceptual Disintegration Effect in Cinema 4D and Photoshop

Go to your preview scene and drag your Random Effector near the sphere. You can see in the Preview tab that the sphere is exploding into pieces:

c4d16 500x312 Design Conceptual Disintegration Effect in Cinema 4D and Photoshop

Press ctrl+r / cmd+r or go to Menu – Render – Render View to render the composition to see the effect we applied into the shape:

c4d17 500x312 Design Conceptual Disintegration Effect in Cinema 4D and Photoshop

We’re almost done in C4D. Go to Menu – Deformer and add Explosion FX or trought the shortcut showed in the image. Go to your Objects Tab and grab it and place it inside your Sphere:

c4d18 500x312 Design Conceptual Disintegration Effect in Cinema 4D and Photoshop

Go to attributes of the Exposion FX and edit the values to the match the image below:

c4d19 500x320 Design Conceptual Disintegration Effect in Cinema 4D and Photoshop

c4d20 500x320 Design Conceptual Disintegration Effect in Cinema 4D and Photoshop

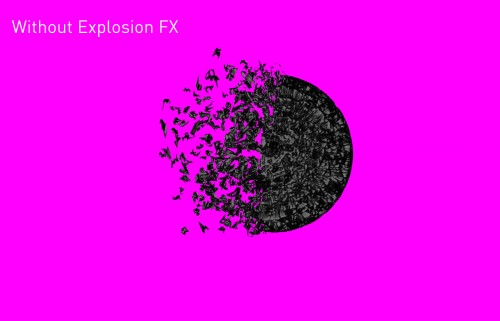
The Explosm FX gives you extra explosion elements to your sphere, but this step is optional. Check the difference below:

c4d21 500x321 Design Conceptual Disintegration Effect in Cinema 4D and Photoshop

c4d22 500x321 Design Conceptual Disintegration Effect in Cinema 4D and Photoshop

The sphere is pretty flat. It’s time to add some light’s. I used a OverHead Softbox and HDR Sky from GreyscaleGorilla.com – HDRI Light Kit Pro for Cinema 4D. For more info on how to download/install/use check he’s awesome website:

c4d23 500x312 Design Conceptual Disintegration Effect in Cinema 4D and Photoshop

c4d24 500x312 Design Conceptual Disintegration Effect in Cinema 4D and Photoshop

Shift+r to Render your image to picture view and go to File – Save as – select TIFF for the best quality. We need to save two images. One with the effects (Random+Explosion), and the other with disabled FX’s (just click on the green check mark to disable it) so we can mix a clean sphere with a “exploded” Sphere in Photoshop:

c4d25 500x312 Design Conceptual Disintegration Effect in Cinema 4D and Photoshop

Part 2 – Photoshop

Open a new document on Photoshop. Create a new document sized 1280 * 720px:

ps01 500x366 Design Conceptual Disintegration Effect in Cinema 4D and Photoshop

Edit your background to Gradient Overlay to Radial 90º and Scale 15%. Use #f9f8f8 at 40% and #d2d2d3:

ps02 500x386 Design Conceptual Disintegration Effect in Cinema 4D and Photoshop

ps03 Design Conceptual Disintegration Effect in Cinema 4D and Photoshop

You will get this simple and smooth background:

ps04 500x312 Design Conceptual Disintegration Effect in Cinema 4D and Photoshop

Import your 3D polyfx images you saved into Photoshop and center both:

ps05 500x312 Design Conceptual Disintegration Effect in Cinema 4D and Photoshop

ps06 500x312 Design Conceptual Disintegration Effect in Cinema 4D and Photoshop

Place the sphere without effects bellow and mask both layers to the get a nice effect:

ps07 500x312 Design Conceptual Disintegration Effect in Cinema 4D and Photoshop

Duplicate the original sphere layer (without explosions) and go to Filter – Distort – Displace and add the follow values:

ps08 500x312 Design Conceptual Disintegration Effect in Cinema 4D and Photoshop

ps09 Design Conceptual Disintegration Effect in Cinema 4D and Photoshop

Photoshop ask you to open a file. Select the Displacement Map PSD file. This is how your layer should look like:

ps10 500x312 Design Conceptual Disintegration Effect in Cinema 4D and Photoshop

Place it above the two images and mask it to give a good look:

ps11 500x312 Design Conceptual Disintegration Effect in Cinema 4D and Photoshop

ps12 500x312 Design Conceptual Disintegration Effect in Cinema 4D and Photoshop

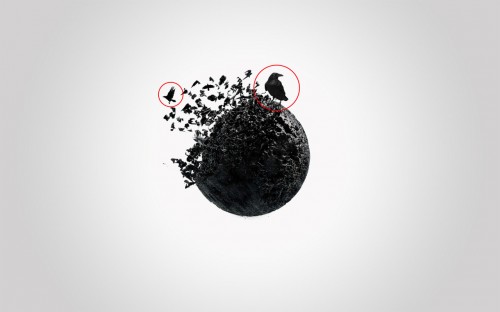
Go to google or your favorite stock image website and search for some crow’s. Once you select the one you like, import it into Photoshop and remove the background with pen tool:

ps13 500x127 Design Conceptual Disintegration Effect in Cinema 4D and Photoshop

Add the image into your composition and rotate/scale it:

ps14 500x312 Design Conceptual Disintegration Effect in Cinema 4D and Photoshop

Find more images in different perspectives and add them to the comp:

ps15 500x312 Design Conceptual Disintegration Effect in Cinema 4D and Photoshop

Search a feather image and paste into photoshop:

ps16 500x312 Design Conceptual Disintegration Effect in Cinema 4D and Photoshop

Add the following Adjustments to the feather:

ps17 Design Conceptual Disintegration Effect in Cinema 4D and Photoshop

Add more feather’s to the comp:

ps18 500x312 Design Conceptual Disintegration Effect in Cinema 4D and Photoshop

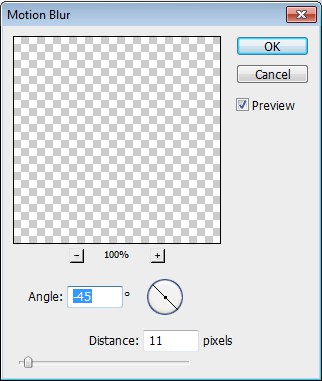
Select the first feather we added and go to Filter – Blur – Motion Blur and values to the match the image below:

ps19 Design Conceptual Disintegration Effect in Cinema 4D and Photoshop

Choose your favorite splatters brushes and add them behind the spheres to give a nice integration with the sphere 3d explosion:

ps20 500x312 Design Conceptual Disintegration Effect in Cinema 4D and Photoshop

Duplicate the sphere without FX’s. Scale them along the main comp:

ps21 500x312 Design Conceptual Disintegration Effect in Cinema 4D and Photoshop

Grab your favourite paint brushes and and paint with a nice cyan color to give it contrast. Use some tiny splatters too:

ps22 500x312 Design Conceptual Disintegration Effect in Cinema 4D and Photoshop

To create more contrast use some red abstract brushes too:

ps23 500x312 Design Conceptual Disintegration Effect in Cinema 4D and Photoshop

Add some extra elements like a line (mask it so it fades on the sphere) and a red circle:

ps24 500x312 Design Conceptual Disintegration Effect in Cinema 4D and Photoshop

We’re almost done. Now go to Filter – Render – Lens Flare and use a 50-300mm Zoom with 100% Brightness. Make it Screen with 25%:

ps25 500x312 Design Conceptual Disintegration Effect in Cinema 4D and Photoshop

ps26 500x312 Design Conceptual Disintegration Effect in Cinema 4D and Photoshop

Add Curves and tweak and bump up a little bit of the blacks:

ps27 Design Conceptual Disintegration Effect in Cinema 4D and Photoshop

Add some text in Museo Slab. Creat a simple black and white contrast. Play around with sizes to give a good feel:

ps28 500x312 Design Conceptual Disintegration Effect in Cinema 4D and Photoshop

That’s it for this tutorial! Hope you have enjoy it and if you have any question, simply drop a comment below or email kyrielicious@gmail.com.

About the author

My name is Flávio Silva, also known as in the web has kyrielicious. I’m a 27 year old designer currently living in Portugal. I’m truly passionate about design of all kinds, I’m always looking for new challenges and inspirations. If you like to know more about me or get in touch visit my website kyrielicious.com or mail me at kyrielicious@gmail.com. Thanks for reading!

401214 2416704865013 1473096899 31913624 136318250 n 150x150 Design Conceptual Disintegration Effect in Cinema 4D and Photoshop

This “Houkai Amplifier by kyrielicious” artwork is licensed under a Creative Commons Attribution 3.0 Unported License. Permissions beyond the scope of this license may be available at http://creativecommons.org/about/licenses/.

Design Surreal Concept Manipulation with Alien Structures in Photoshop

$
0
0

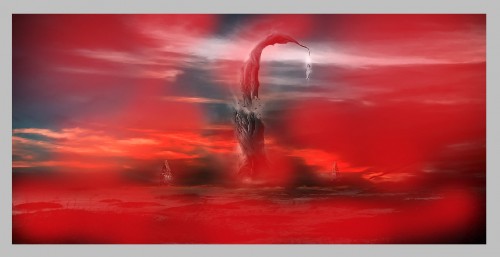
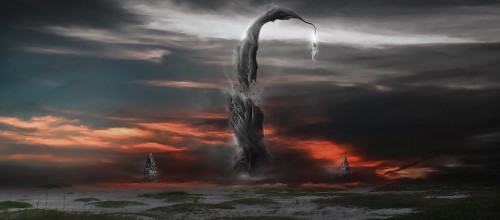
In this Photoshop tutorial, I will show you the steps I took to Design this Surreal Concept Manipulation with Alien Structures in Photoshop. This is an intermediate level tutorial so some steps can be tricky, but why not have a try!

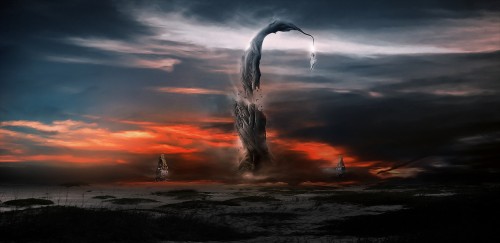
The idea for this manipulation is that I would like to create some sort of out-of-this-world structure (alien alike) and add it to a open space (desert, dry land) with dark sky. Overall, these objects create a surreal feeling and a fantasy environment.

Here is a preview of the final effect I have for this tutorial: (click to enlarge)

time less sky flatten 2 500x243 Design Surreal Concept Manipulation with Alien Structures in Photoshop

PSD File Download

You can download the PSD File for this tutorial via the VIP Members Area for only $6.95/Month (or less)! You will not only get this PSD File, but also 100+ other PSD Files + Extra Goodies + Exclusive Photoshop tutorials there. Signup now and get exclusive :) Find out more about the VIP Members Areas

vip sign up 250 Design Surreal Concept Manipulation with Alien Structures in Photoshop

OK Let’s get started!

To complete this tutorial, you will need the following stocks:

Desert

Sky

Tree

Female Model

Cliff

Step 1

Create a new document sized 1440px * 700px with black background. Load the desert image into Photoshop, select the sand portion of the image, copy and paste it onto our document, resize it to fit as as shown below:

1 paste 500x136 Design Surreal Concept Manipulation with Alien Structures in Photoshop

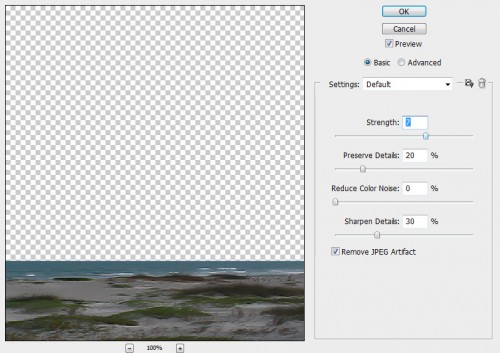
Duplicate this desert layer once and apply the following reduce noise filter (filter > noise > reduce noise) to this duplicated layer:

1 reduce no 500x353 Design Surreal Concept Manipulation with Alien Structures in Photoshop

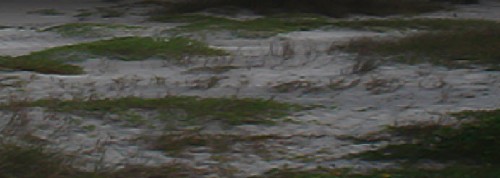
And you will add some soften effect to the sand texture after applying this filter:

1 after red 500x178 Design Surreal Concept Manipulation with Alien Structures in Photoshop

Add a layer mask to this duplicated desert layer:

1 mask 500x254 Design Surreal Concept Manipulation with Alien Structures in Photoshop

and you will fade the top edge of the texture, as shown below:

1 after mask 500x69 Design Surreal Concept Manipulation with Alien Structures in Photoshop

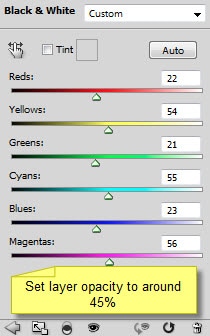
Add the following 2 image adjustment layers:

Black and White

1 bw Design Surreal Concept Manipulation with Alien Structures in Photoshop

Levels

1 lv Design Surreal Concept Manipulation with Alien Structures in Photoshop

and you will have the following effect:

1 effect1 500x114 Design Surreal Concept Manipulation with Alien Structures in Photoshop

Step 2

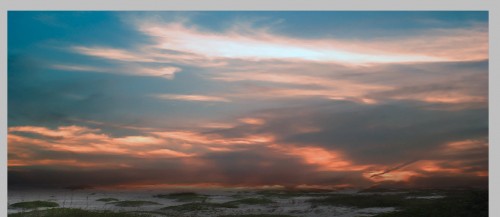
Load the sky image into Photoshop, select a portion and paste it onto our document, above all previous layers:

2 paste 500x217 Design Surreal Concept Manipulation with Alien Structures in Photoshop

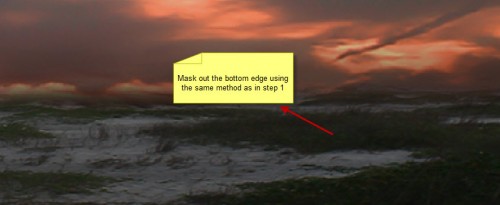
Fade out the bottom edge with the layer masking technique mentioned in step 1:

2 mask 500x205 Design Surreal Concept Manipulation with Alien Structures in Photoshop

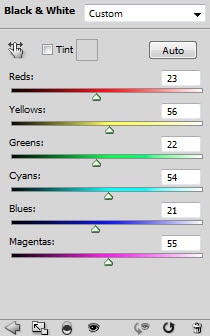
Add the following 2 image adjustment layer as clipping mask to the sky layer:

Black and White

2 bw Design Surreal Concept Manipulation with Alien Structures in Photoshop

Layer Mask on black and white adjustment layer:

2 bw mask 500x235 Design Surreal Concept Manipulation with Alien Structures in Photoshop

Levels

2 lv1 Design Surreal Concept Manipulation with Alien Structures in Photoshop

Layer mask over levels adjustment layer:

2 lv mask 500x238 Design Surreal Concept Manipulation with Alien Structures in Photoshop

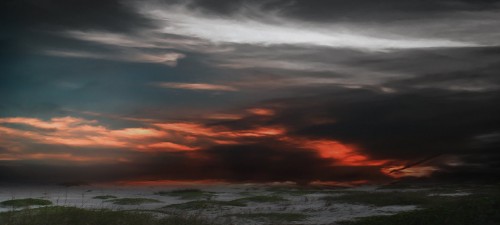
and here is the effect you will have so far:

2 effect1 500x225 Design Surreal Concept Manipulation with Alien Structures in Photoshop

Step 3

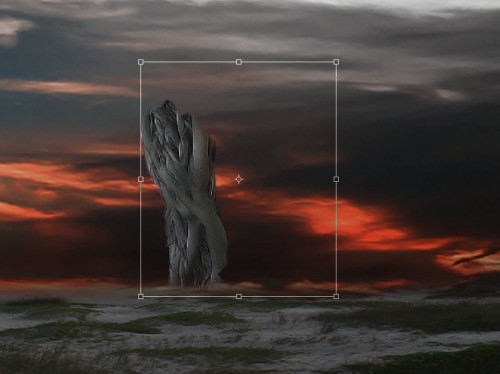
Let’s add some surreal structure into the image. I decided to manipulation a tree image and turn it into some sort of alien style object. So load the tree image into Photoshop, use the quick selection tool to select a portion as shown below:

3 sel Design Surreal Concept Manipulation with Alien Structures in Photoshop

Copy and paste the selection onto our document, resize and position it as shown below:

3 paste 500x374 Design Surreal Concept Manipulation with Alien Structures in Photoshop

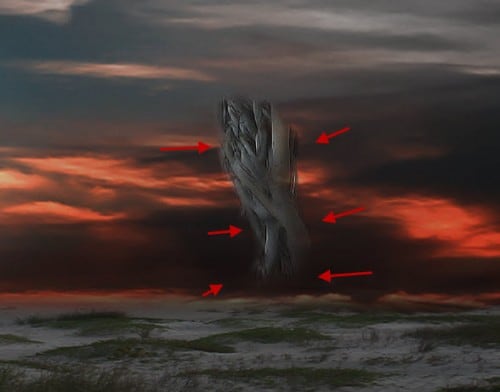
Erase the edge with a soft eraser:

3 erase1 500x392 Design Surreal Concept Manipulation with Alien Structures in Photoshop

Add the following 2 adjustment layers as clipping mask to this tree layer:

Black and white

3 bw Design Surreal Concept Manipulation with Alien Structures in Photoshop

Levels

3 lv Design Surreal Concept Manipulation with Alien Structures in Photoshop

Layer mask on the levels adjustment layer:

3 lv mask Design Surreal Concept Manipulation with Alien Structures in Photoshop

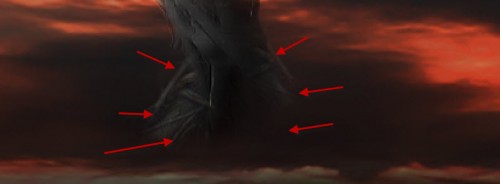
You will repeat this process and add a few more tree texture onto the bottom of this Alien structure:

3 more tree 500x184 Design Surreal Concept Manipulation with Alien Structures in Photoshop

Step 4

I decided to add one more tree texture on top of the first one, just to create a break-apart effect. So go back to the tree stock image, select another piece and paste onto our document:

4 add 500x318 Design Surreal Concept Manipulation with Alien Structures in Photoshop

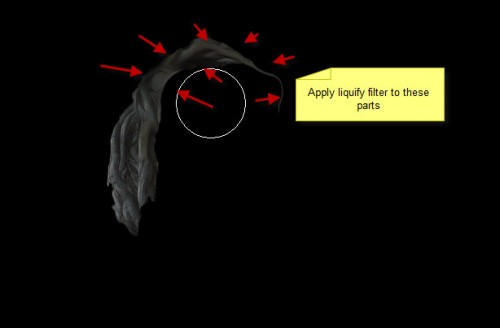
You will notice I apply some liquify filter effect to this layer, to create a flowing effect around the edge:

4 liq 500x328 Design Surreal Concept Manipulation with Alien Structures in Photoshop

Add a Black and White adjustment layer as clipping mask to this layer:

4 bw Design Surreal Concept Manipulation with Alien Structures in Photoshop

and here is the effect so far:

4 effect1 500x411 Design Surreal Concept Manipulation with Alien Structures in Photoshop

We can add some particle effect to the image – Go back to the tree image and select some small pieces with quick selection tool:

4 sel part Design Surreal Concept Manipulation with Alien Structures in Photoshop

Copy and paste them over to our document, resize them to a very small scale, place them under the second tree layer:

4 paste part 500x308 Design Surreal Concept Manipulation with Alien Structures in Photoshop

Step 5

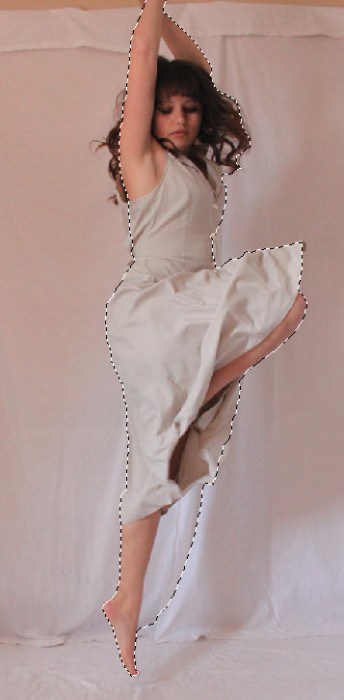
Load the model image into Photoshop and cut it out:

5 select model 344x700 Design Surreal Concept Manipulation with Alien Structures in Photoshop

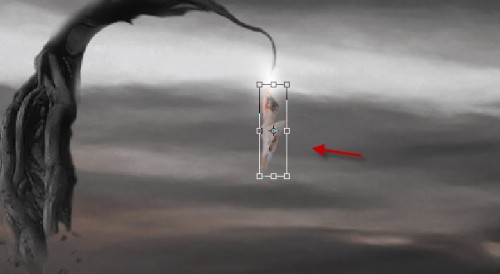
Paste and resize the model, position it under the tip of the structure as shown below:

5 paste1 500x274 Design Surreal Concept Manipulation with Alien Structures in Photoshop

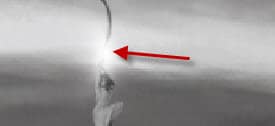
Add some light above the model image just to create some surreal effect:

5 light Design Surreal Concept Manipulation with Alien Structures in Photoshop

Step 6

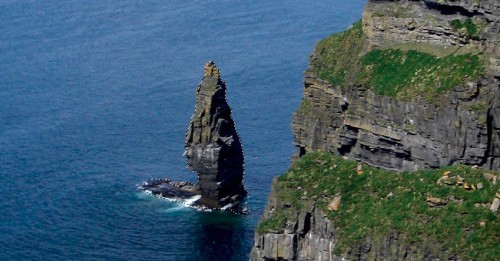
Load the cliff image into Photoshop, select the small rock in the sea and cut it out:

6 select rock 500x261 Design Surreal Concept Manipulation with Alien Structures in Photoshop

Paste it onto our document, reduce its size a bit with free transform tool:

6 paste Design Surreal Concept Manipulation with Alien Structures in Photoshop

Use a soft eraser to erase the bottom edge, so it blends into ground texture:

6 erase 500x237 Design Surreal Concept Manipulation with Alien Structures in Photoshop

Duplicate this rock layer once and flip it horizontally, reduce the size of the duplicated rock a bit and move it to the right:

6 right 500x116 Design Surreal Concept Manipulation with Alien Structures in Photoshop

Step 7

We’re almost done! Flatten the image (don’t forget to save first) and duplicate the background layer, apply some unsharp mask filter to it:

7 unsharp Design Surreal Concept Manipulation with Alien Structures in Photoshop

Mask out the following area on the sharpened layer:

7 unsharp mask 500x257 Design Surreal Concept Manipulation with Alien Structures in Photoshop

Add some cloud around the structure to add some dramatic effect with either cloud brush or filter:

Hint: use free transform and eraser tool to adjust the cloud shape and size.

7 cloud 500x316 Design Surreal Concept Manipulation with Alien Structures in Photoshop

and here is the effect so far:

7 effect 500x220 Design Surreal Concept Manipulation with Alien Structures in Photoshop

I then further added some colour effect onto the image, and here is the final effect I have: (click to enlarge)

time less sky flatten 2 500x243 Design Surreal Concept Manipulation with Alien Structures in Photoshop

That’s it for this tutorial! Hope you enjoy it and find it useful! Till next time, have a great day!

Design a Unique Wooden Face with Fiery Eye and Tear in Photoshop

$
0
0

In this Photoshop tutorial, I will show you the steps I took to Design a Unique Wooden Face with Fiery Eye and Tear in Photoshop. This is an intermediate level tutorial so some steps can be tricky, but why not have a try!

The idea of this manipulation comes from browsing some ancient stone statue image on the internet – I decided to make something similar in Photoshop.

Here is a preview of the final effect I have for this tutorial: (click to enlarge)

grunge fire face flatten 2 500x588 Design a Unique Wooden Face with Fiery Eye and Tear in Photoshop

PSD File Download

You can download the PSD File for this tutorial via the VIP Members Area for only $6.95/Month (or less)! You will not only get this PSD File, but also 100+ other PSD Files + Extra Goodies + Exclusive Photoshop tutorials there. Signup now and get exclusive :) Find out more about the VIP Members Areas

vip sign up 250 Design a Unique Wooden Face with Fiery Eye and Tear in Photoshop

OK Let’s get started!

To complete this tutorial, you will need the following stocks:

Face

Tree Bark

Fire

Step 1

Create a new document with a black background (size doesn’t matter), load the face image into Photoshop, use the pen tool to draw a path as shown below:

1 select face 500x422 Design a Unique Wooden Face with Fiery Eye and Tear in Photoshop

Make a selection of this path by right-clicking within the path and choose “Make Selection”: (set to 1px feather)

1 make sel Design a Unique Wooden Face with Fiery Eye and Tear in Photoshop

Copy and paste the selection on our document, resize and centre it:

1 paste1 500x502 Design a Unique Wooden Face with Fiery Eye and Tear in Photoshop

Use a soft eraser to remove the edges of the face (especially the back) as shown below:

1 erase2 500x446 Design a Unique Wooden Face with Fiery Eye and Tear in Photoshop

Step 2

Add the following adjustments layer over the face layer as clipping mask:

Black and white

2 bw1 Design a Unique Wooden Face with Fiery Eye and Tear in Photoshop

Levels

2 lv2 Design a Unique Wooden Face with Fiery Eye and Tear in Photoshop

Layer mask on the levels adjustment layer:

2 lv mask1 500x587 Design a Unique Wooden Face with Fiery Eye and Tear in Photoshop

Curves

2 curves Design a Unique Wooden Face with Fiery Eye and Tear in Photoshop

and you will have the following effect:

2 effect3 500x569 Design a Unique Wooden Face with Fiery Eye and Tear in Photoshop

Step 3

Now we will add the wood texture. Load the tree bark image into Photoshop, select the following area:

3 sel tree 500x500 Design a Unique Wooden Face with Fiery Eye and Tear in Photoshop

Copy and paste the selection onto our document, resize and rotate it as shown below:

3 rotate 500x516 Design a Unique Wooden Face with Fiery Eye and Tear in Photoshop

Make this layer a clipping mask, and change the blending mode to “overlay”:

3 overlay 500x528 Design a Unique Wooden Face with Fiery Eye and Tear in Photoshop

Add the following 2 adjustment layers as clipping mask again for this wood layer:

Black and white

3 bw layer opacity Design a Unique Wooden Face with Fiery Eye and Tear in Photoshop

Levels

3 lv1 Design a Unique Wooden Face with Fiery Eye and Tear in Photoshop

Go back to the wood layer, use a soft eraser to remove some parts of the wood texture to reveal some skin:

3 erase2 500x519 Design a Unique Wooden Face with Fiery Eye and Tear in Photoshop

and you will have the following effect so far:

3 effect2 500x520 Design a Unique Wooden Face with Fiery Eye and Tear in Photoshop

Step 4

Now we will make the fiery eye. Load the fire image into Photoshop and select the following portion:

4 sel 500x368 Design a Unique Wooden Face with Fiery Eye and Tear in Photoshop

Smooth the edge out with the following refine edge filter settings:

4 refine Design a Unique Wooden Face with Fiery Eye and Tear in Photoshop

Warp the fire texture as shown below to adjust its shape:

4 warp Design a Unique Wooden Face with Fiery Eye and Tear in Photoshop

Change the blending mode of this fire layer to “hard light”, and remove the edges with a soft eraser:

4 hard light 500x286 Design a Unique Wooden Face with Fiery Eye and Tear in Photoshop

Duplicate this fire layer once and change the layer blending mode of the duplicated layer to “Screen”, layer opacity to around 50%. You will have the following effect:

4 screen Design a Unique Wooden Face with Fiery Eye and Tear in Photoshop

Step 5

We will now add some tear drop to the eye. Use the fire image and select the following portion:

5 tear Design a Unique Wooden Face with Fiery Eye and Tear in Photoshop

Copy and paste the selection over the image, resize it and attach the smaller version to the eye, use a soft eraser to remove the edges to form a teary effect:

5 resize 500x499 Design a Unique Wooden Face with Fiery Eye and Tear in Photoshop

Use either a cloud brush or cloud filter to add some cloud effect around the face (this cloud layer should be under the face layer):

5 cloud 500x520 Design a Unique Wooden Face with Fiery Eye and Tear in Photoshop

Step 6

Now let’s add some shining hair for the model. To do this, create a new layer and paint a white dot as shown below:

6 dot 500x347 Design a Unique Wooden Face with Fiery Eye and Tear in Photoshop

Use the liquify filter to warp the line as shown below, until it forms some sorts of hairy effect:

6 liq Design a Unique Wooden Face with Fiery Eye and Tear in Photoshop

Duplicate this layer a few times and attach them to the head area:

6 attach 500x522 Design a Unique Wooden Face with Fiery Eye and Tear in Photoshop

I then use some abstract brushes to add some textures around the model, you can find plenty of those brushes on the internet:

6 paint 500x580 Design a Unique Wooden Face with Fiery Eye and Tear in Photoshop

I then further added some colour effect onto the image, and here is the final effect I have: (click to enlarge)

grunge fire face flatten 2 500x588 Design a Unique Wooden Face with Fiery Eye and Tear in Photoshop

That’s it for this tutorial! Hope you enjoy it and find it useful! Till next time, have a great day!

VIP Exclusive Photoshop Tutorial – Create “Moon Dance” Photo Manipulation in Photoshop

$
0
0

Welcome to another Exclusive Photoshop tutorial written specifically for the PSD Vault VIP Members. In this tutorial, we will explain the design process involved in making this “Moon Dance” Photo Manipulation in Photoshop. Hope you enjoy it :)

If you’re VIP member, you can log in to the VIP Members Area and click on Exclusive Tutorial button to download the tutorial. If you’re yet to become a VIP member, you can simply click on the banner below to signup:

vip sign up 250 VIP Exclusive Photoshop Tutorial – Create Moon Dance Photo Manipulation in Photoshop

To find out more about PSD Vault VIP Membership, check out: http://www.psdvault.com/vip

Final Image Preview

(Click to Enlarge)

Finished 471x700 VIP Exclusive Photoshop Tutorial – Create Moon Dance Photo Manipulation in Photoshop

VIP Members Only Tutorial

This tutorial is written exclusively by Bram Vanhaeren for PSD Vault VIP members:

Bram is 21 years old and studies cross media design. He’s been developing his style since his first pen tool experiments in Illustrator about 5 years ago. Bram’s style ranges from simple illustrations and typography to mixed media artwork.

Visit Bram’s Blog

What You Will Learn

In this tutorial, we will explain the design process involved in making this “Moon Dance” Photo Manipulation in Photoshop.  Techniques included are the use of selection tool, adjusting contrast, hair creation, and a clever usage of blend tool for making circles.

Tutorial Spotlights

image 08 471x700 VIP Exclusive Photoshop Tutorial – Create Moon Dance Photo Manipulation in Photoshop
 

image 14 500x357 VIP Exclusive Photoshop Tutorial – Create Moon Dance Photo Manipulation in Photoshop 

image 15 500x328 VIP Exclusive Photoshop Tutorial – Create Moon Dance Photo Manipulation in Photoshop

Interested? Log in to your VIP members area to download it now :)

Not a member yet? Click on the banner below to sign up now:

vip sign up 250 VIP Exclusive Photoshop Tutorial – Create Moon Dance Photo Manipulation in Photoshop

To find out more about PSD Vault VIP Membership, check out: http://www.psdvault.com/vip

Hope you enjoy it and find it useful! Thank you for your support and have a nice day!

Create Abstract Dark Photo Manipulation with Splatter Brushes in Photoshop

$
0
0

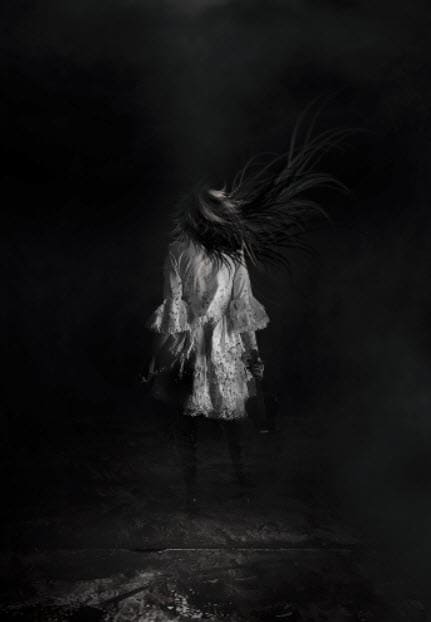
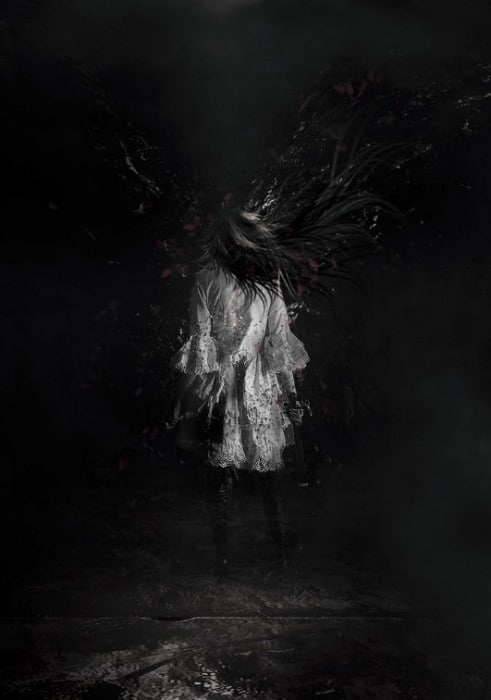
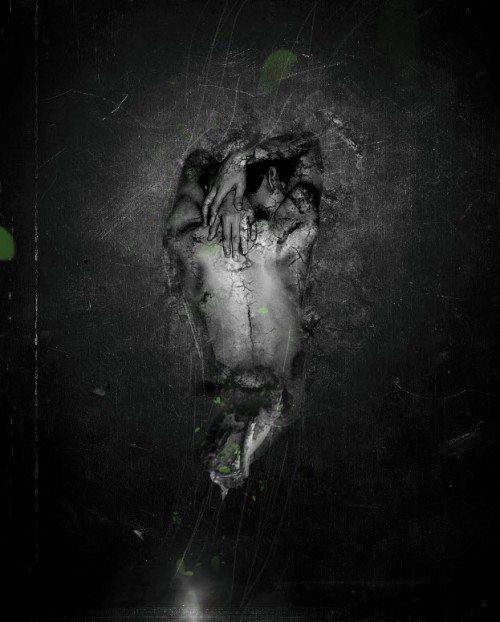
In this tutorial, I will show you the steps I took to Create Abstract Dark Photo Manipulation with Splatter Brushes in Photoshop. This is an intermediate level Photoshop tutorial and some steps can be a bit tricky, but why not have a try!

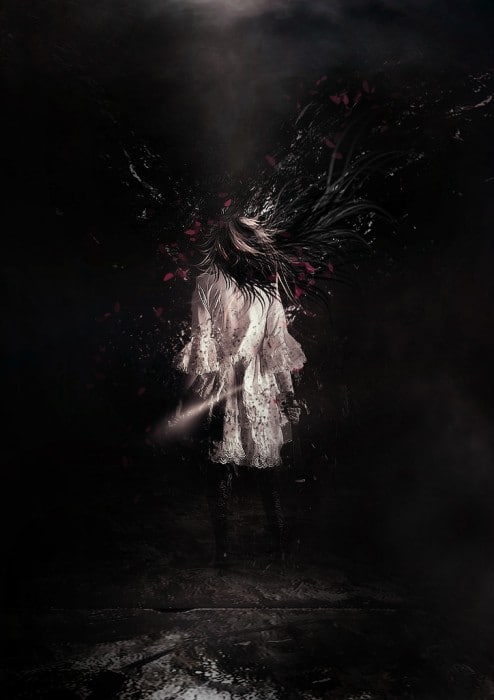
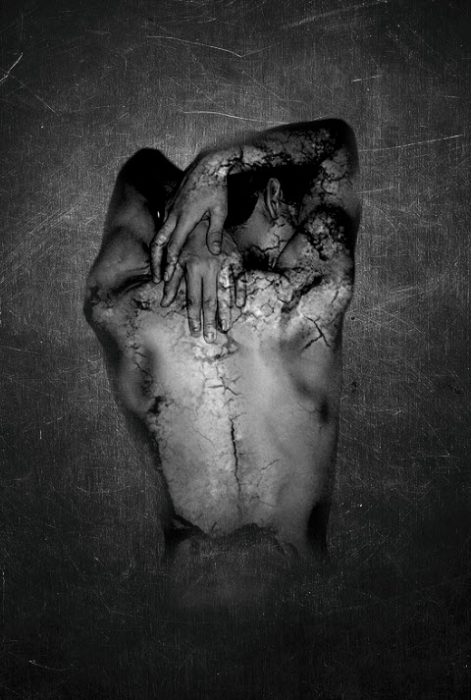
Here is a preview of the final effect I have for this tutorial: (click to enlarge)

abstract model dark flatten 418x700 Create Abstract Dark Photo Manipulation with Splatter Brushes in Photoshop

PSD File Download

You can download the PSD File for this tutorial via the VIP Members Area for only $6.95/Month (or less)! You will not only get this PSD File, but also 100+ other PSD Files + Extra Goodies + Exclusive Photoshop tutorials there. Signup now and get exclusive :) Find out more about the VIP Members Areas

vip sign up 250 Create Abstract Dark Photo Manipulation with Splatter Brushes in Photoshop

OK Let’s get started!

To complete this tutorial, you will need the following stocks:

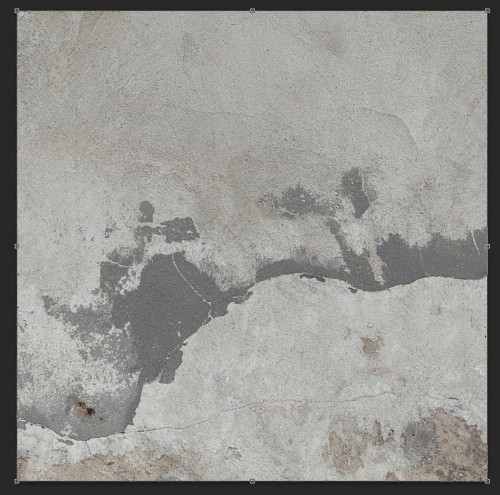
Cracked Wall

Model – by faestock

Splatter Brushes

Step 1

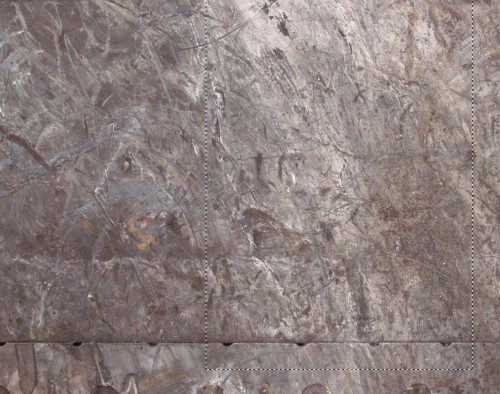
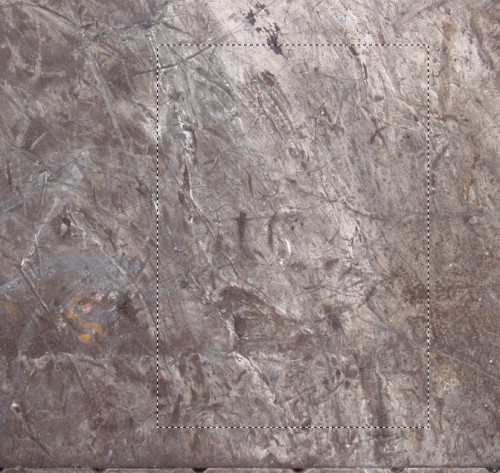
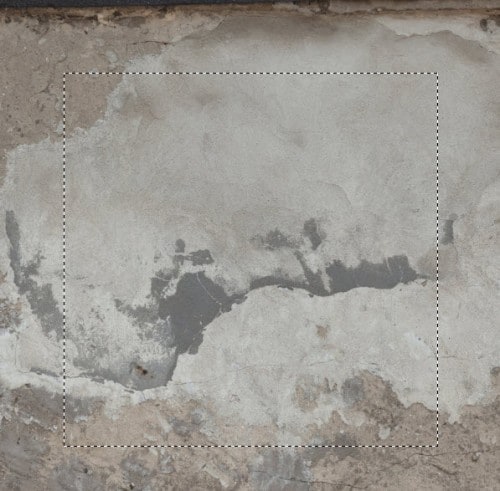
Create a document size 660px * 1100px with black background. Load the cracked wall image into Photoshop and select a piece as shown below:

1 select 500x304 Create Abstract Dark Photo Manipulation with Splatter Brushes in Photoshop

Copy and paste the selection onto the canvas, resize it to fit the width:

1 paste 431x700 Create Abstract Dark Photo Manipulation with Splatter Brushes in Photoshop

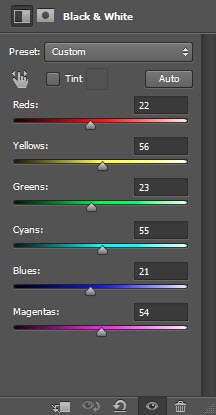
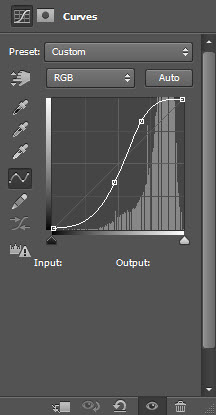
Add the following 3 adjustment layers over the texture layer:

Black and White

1 bw Create Abstract Dark Photo Manipulation with Splatter Brushes in Photoshop

Levels

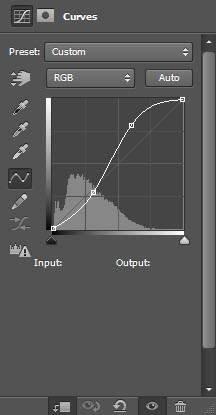
1 lv Create Abstract Dark Photo Manipulation with Splatter Brushes in Photoshop

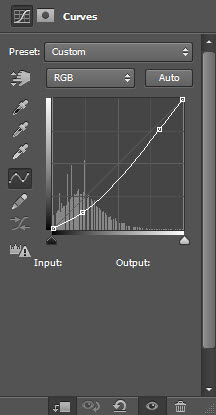
Curves

1 curves Create Abstract Dark Photo Manipulation with Splatter Brushes in Photoshop

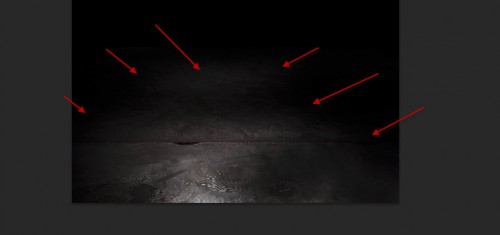
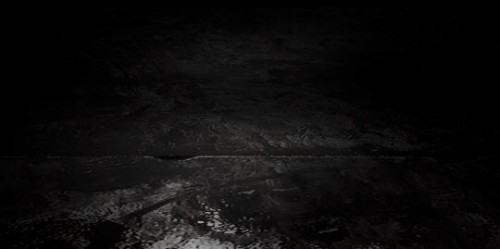
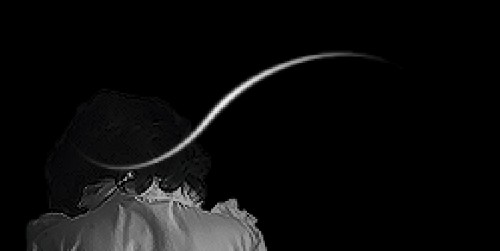
Use a soft eraser to remove some parts of the cracked texture layer, and aim to achieve this effect as shown below:

1 erase 399x700 Create Abstract Dark Photo Manipulation with Splatter Brushes in Photoshop

Step 2

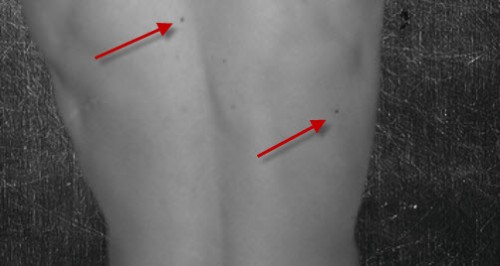
Load the model image into Photoshop, and cut the body of the model out and paste it onto our canvas, resize and position it to the centre:

2 paste 415x700 Create Abstract Dark Photo Manipulation with Splatter Brushes in Photoshop

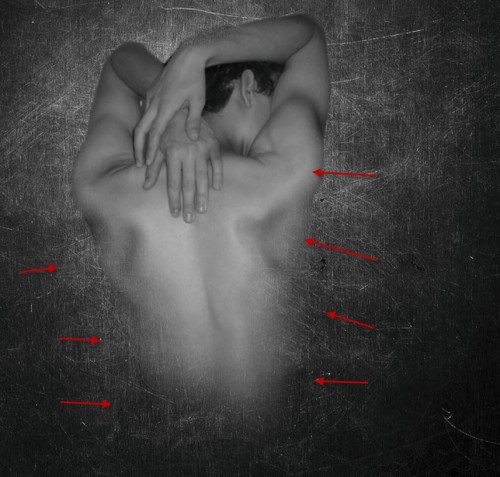
Use a soft eraser to erase the edge of the model as shown below:

2 erase1 425x700 Create Abstract Dark Photo Manipulation with Splatter Brushes in Photoshop

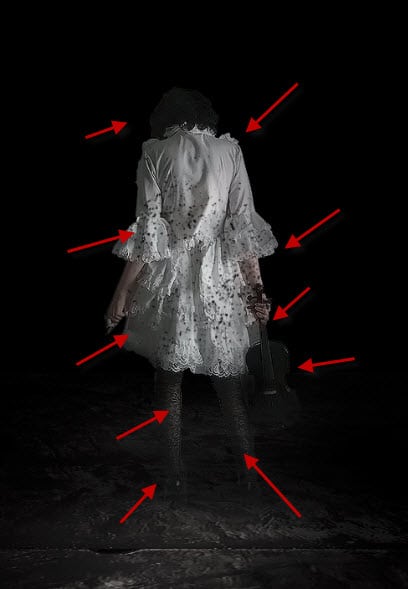
Also use some grunge brushes as eraser, remove some parts of the model as shown below so to have a shattered effect:

2 erase 2 500x263 Create Abstract Dark Photo Manipulation with Splatter Brushes in Photoshop

2 erase 3 500x426 Create Abstract Dark Photo Manipulation with Splatter Brushes in Photoshop

2 erase 4 500x344 Create Abstract Dark Photo Manipulation with Splatter Brushes in Photoshop

Use the Smudge Tool with 9% strength and 15px in size, apply some smudge effect over the lips some it looks a bit distorted as shown below:

2 smudge 500x239 Create Abstract Dark Photo Manipulation with Splatter Brushes in Photoshop

Step 3

Add the following 3 adjustment layers to this model layer as clipping mask:

Black and White

(Make sure you erase the hair portion on the layer mask of this black and white adjustment layer to reveal the red hair)

3 bw Create Abstract Dark Photo Manipulation with Splatter Brushes in Photoshop

Levels

3 lv Create Abstract Dark Photo Manipulation with Splatter Brushes in Photoshop

Curves

3 curves Create Abstract Dark Photo Manipulation with Splatter Brushes in Photoshop

and you will have the following effect so far:

3 effect1 459x700 Create Abstract Dark Photo Manipulation with Splatter Brushes in Photoshop

Step 4

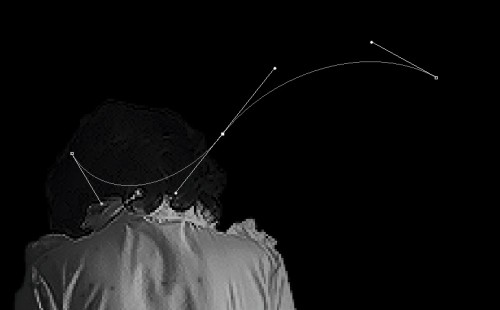
Now let’s add some hair onto the model – we can achieve via the Pen Tool and the brush tool. Firstly, draw a work path as shown below with the pen tool:

4 draw 500x402 Create Abstract Dark Photo Manipulation with Splatter Brushes in Photoshop

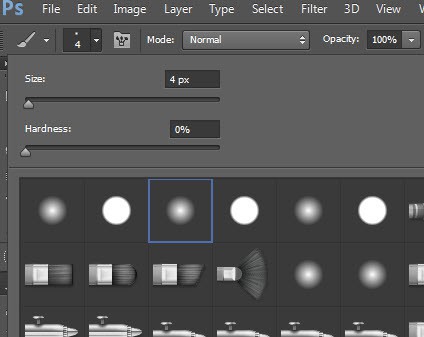
Choose a 3px hard brush as shown below:

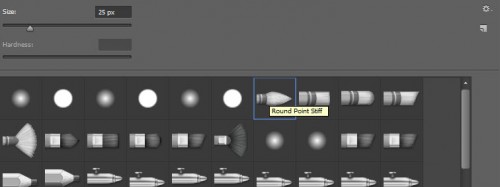
4 brush 500x355 Create Abstract Dark Photo Manipulation with Splatter Brushes in Photoshop

And pick a dark red colour similar to the hair colour:

4 color 500x369 Create Abstract Dark Photo Manipulation with Splatter Brushes in Photoshop

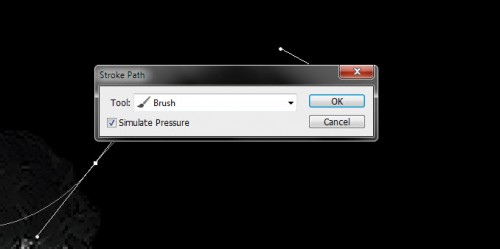
Go back and select the Pen Tool again and right-click on the path, and choose “Stroke Path”:

4 stroke Create Abstract Dark Photo Manipulation with Splatter Brushes in Photoshop

Stroke the path with the selected brush, with “simulate pressure” option on:

4 stroke brush 500x228 Create Abstract Dark Photo Manipulation with Splatter Brushes in Photoshop

and you will have the following effect:

4 effect Create Abstract Dark Photo Manipulation with Splatter Brushes in Photoshop

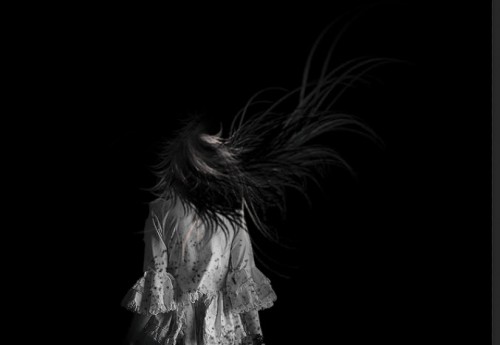
Duplicate this hair layer a few more times, resize and rotate the duplicated layers with the free transform tool, and aim to achieve the effect as shown below:

4 more 500x456 Create Abstract Dark Photo Manipulation with Splatter Brushes in Photoshop

Step 5

We will be adding some abstract brush patterns using the brush we downloaded to around the model:

5 brush Create Abstract Dark Photo Manipulation with Splatter Brushes in Photoshop

5 brush 2 Create Abstract Dark Photo Manipulation with Splatter Brushes in Photoshop

Make sure you adjust the brush size and colour (I used red) in order to add different effect to the model:

5 brush 3 500x302 Create Abstract Dark Photo Manipulation with Splatter Brushes in Photoshop

5 brush 4 500x399 Create Abstract Dark Photo Manipulation with Splatter Brushes in Photoshop

Add some brush strokes to around the hair area as well:

5 brush 5 Create Abstract Dark Photo Manipulation with Splatter Brushes in Photoshop

For artistic effect, use liquify effect to add some flowing effect on the brush paint as shown below: (use the forward warp tool on the liquify filter to achieve this effect)

5 liq Create Abstract Dark Photo Manipulation with Splatter Brushes in Photoshop

and here is the overall effect I have after apply the brushes:

5 overall Create Abstract Dark Photo Manipulation with Splatter Brushes in Photoshop

I then further added some colour effect onto the image with selective colours and image adjustment layer, and here is the final effect I have: (click to enlarge)

abstract model dark flatten 418x700 Create Abstract Dark Photo Manipulation with Splatter Brushes in Photoshop

That’s it for this tutorial! Hope you enjoy it and find it useful! Till next time, have a great day!

Create a Surreal Dark City with Meteorite Fall Scene in Photoshop

$
0
0

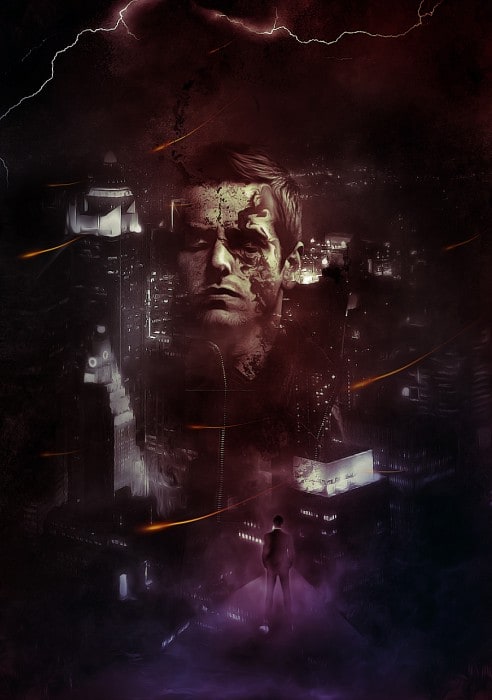
In this tutorial, I will show you the steps I took to Create a Surreal Dark City with Meteorite Fall Scene in Photoshop. This is an intermediate level Photoshop tutorial and some steps can be a bit tricky, but why not have a try!

We will go through techniques such as cloud warping, hair drawing and some photo manipulation skills in Photoshop.

Here is a preview of the final effect I have for this tutorial: (click to enlarge)

rainy city flatten 500x312 Create a Surreal Dark City with Meteorite Fall Scene in Photoshop

PSD File Download

You can download the PSD File for this tutorial via the VIP Members Area for only $6.95/Month (or less)! You will not only get this PSD File, but also 100+ other PSD Files + Extra Goodies + Exclusive Photoshop tutorials there. Signup now and get exclusive :) Find out more about the VIP Members Areas

vip sign up 250 Create a Surreal Dark City with Meteorite Fall Scene in Photoshop

OK Let’s get started!

To complete this tutorial, you will need the following stocks:

Ground

City

Model

Rock

Fire

Step 1

Create a new document size 1280px * 800px with black background. Load the ground image into Photoshop and select a portion as shown below:

1 sel 500x327 Create a Surreal Dark City with Meteorite Fall Scene in Photoshop

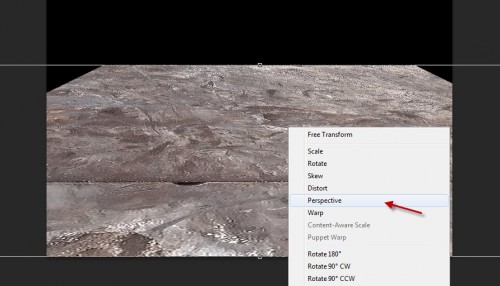
Copy and paste and selection onto our document, use free transform tool to perspective this as shown below:

1 persp 500x214 Create a Surreal Dark City with Meteorite Fall Scene in Photoshop

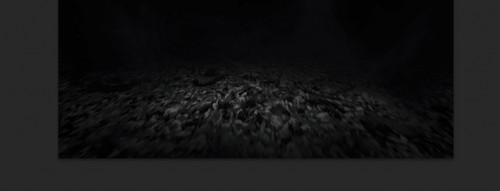
Use a soft eraser to remove some parts of the ground as shown below – this centre part will be where the model will be standing:

1 erase 500x182 Create a Surreal Dark City with Meteorite Fall Scene in Photoshop

Add the following 2 adjustment layer to this ground layer:

Black and white

1 bw Create a Surreal Dark City with Meteorite Fall Scene in Photoshop

Levels

1 lv Create a Surreal Dark City with Meteorite Fall Scene in Photoshop

and here is the effect so far:

1 effet 500x308 Create a Surreal Dark City with Meteorite Fall Scene in Photoshop

Step 2

We will add the buildings to our image – load the city image into Photoshop and cut out the building part:

2 sel 500x279 Create a Surreal Dark City with Meteorite Fall Scene in Photoshop

Paste the buildings onto our document, use a soft eraser to erase parts of the building as shown below – this will create depths and lighting variations on the image:

2 erase 500x226 Create a Surreal Dark City with Meteorite Fall Scene in Photoshop

Add the following 3 adjustment layers as clipping mask to this city layer:

Black and white

2 bw Create a Surreal Dark City with Meteorite Fall Scene in Photoshop

Levels

2 lv Create a Surreal Dark City with Meteorite Fall Scene in Photoshop

Curves

2 curves Create a Surreal Dark City with Meteorite Fall Scene in Photoshop

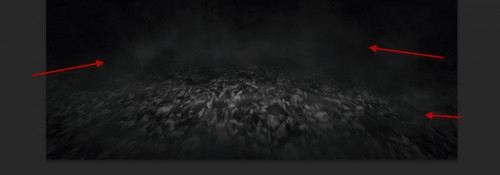
We can add some cloud over building with a cloud brush or the cloud filter, use the warp tool to warp the cloud so they form different shapes as well:

2 cloud 500x214 Create a Surreal Dark City with Meteorite Fall Scene in Photoshop

If you’re having trouble with cloud warping, please check out this video I have on PSD Vault Youtube Channel: (Skip to 4:58 min)

Make sure you have some cloud on the ground as well:

2 erase ground 500x59 Create a Surreal Dark City with Meteorite Fall Scene in Photoshop

Step 3

Now we can load the model image into Photoshop and cut out the model, copy and paste it onto our document, resize and position it as shown below:

3 model 500x287 Create a Surreal Dark City with Meteorite Fall Scene in Photoshop

Add the following 3 adjustment layers on the model layer as clipping mask:

Black and white

3 bw Create a Surreal Dark City with Meteorite Fall Scene in Photoshop

Levels

3 lv Create a Surreal Dark City with Meteorite Fall Scene in Photoshop

Erase the hair and upper body part on the layer mask of the levels adjustment layer so they’re not all dark:

3 erase 500x275 Create a Surreal Dark City with Meteorite Fall Scene in Photoshop

Curves

3 curves Create a Surreal Dark City with Meteorite Fall Scene in Photoshop

Optional: you can paint some hair on the model to add some surreal effect:

3 hair 500x226 Create a Surreal Dark City with Meteorite Fall Scene in Photoshop

You can check out this vidoe tutorial here to learn about how to draw hair in Photoshop:

Step 4

We will add a falling meteorite into the image – load the rock image into Photoshop and select a piece as shown below:

4 select 500x413 Create a Surreal Dark City with Meteorite Fall Scene in Photoshop

Copy and paste the rock onto our document, resize it and erase the edge of the rock with a soft eraser:

4 rock erase 500x284 Create a Surreal Dark City with Meteorite Fall Scene in Photoshop

Add the following 3 adjustment layers as clipping mask to this rock layer:

Black and White

4 bw Create a Surreal Dark City with Meteorite Fall Scene in Photoshop

Levels

4 lv Create a Surreal Dark City with Meteorite Fall Scene in Photoshop

Curves

4 curves Create a Surreal Dark City with Meteorite Fall Scene in Photoshop

We will add some fire texture onto rock – load fire image into Photoshop, and select the following piece:

4 select fire Create a Surreal Dark City with Meteorite Fall Scene in Photoshop

Copy and paste the selection over the rock, as shown below:

4 fire paste 500x264 Create a Surreal Dark City with Meteorite Fall Scene in Photoshop

Change the blending mode to “overlay”:

4 overlay Create a Surreal Dark City with Meteorite Fall Scene in Photoshop

and add some cloud trailing effect on the rock as shown below:

4 cloud 500x208 Create a Surreal Dark City with Meteorite Fall Scene in Photoshop

Step 5

I decided to add a fiery wing to the model for extra surreal effect. Select a curvy piece from the fire texture as shown below:

5 sel 500x308 Create a Surreal Dark City with Meteorite Fall Scene in Photoshop

and use a combination of warp tool and liquify filter to warp this into a wing shape:

5 warp 500x329 Create a Surreal Dark City with Meteorite Fall Scene in Photoshop

5 liquid 500x337 Create a Surreal Dark City with Meteorite Fall Scene in Photoshop

This effect is a little tricky to achieve, you might have to have several tries to get it.

Here is the effect you will aim to achieve: (the left wing is a duplication of the right wing, size is slightly reduced to add variety and make the human looks slightly bent to the left)

5 wing Create a Surreal Dark City with Meteorite Fall Scene in Photoshop

and here is the overall effect so far:

5 overall 500x309 Create a Surreal Dark City with Meteorite Fall Scene in Photoshop

I then further added some colour effect onto the image with selective colours and image adjustment layer, and here is the final effect I have: (click to enlarge)

rainy city flatten 500x312 Create a Surreal Dark City with Meteorite Fall Scene in Photoshop

That’s it for this tutorial! Hope you enjoy it and find it useful! Till next time, have a great day!


Create an Awesome Floating Face Manipulation with Fiery Hair in Photoshop

$
0
0

In this tutorial, I will show you the steps I took to Create an Awesome Floating Face Manipulation with Fiery Hair in Photoshop. This is an intermediate level Photoshop tutorial and some steps can be a bit tricky, but why not have a try!

Along the way, I will show a nice technique of manipulating fire texture. I will also show you some basic retouching skills for your photo.

Here is a preview of the final effect I have for this tutorial: (click to enlarge)

floating face flatten 2 500x312 Create an Awesome Floating Face Manipulation with Fiery Hair in Photoshop

PSD File Download

You can download the PSD File for this tutorial via the VIP Members Area for only $6.95/Month (or less)! You will not only get this PSD File, but also 100+ other PSD Files + Extra Goodies + Exclusive Photoshop tutorials there. Signup now and get exclusive :) Find out more about the VIP Members Areas

vip sign up 250 Create an Awesome Floating Face Manipulation with Fiery Hair in Photoshop

OK Let’s get started!

To complete this tutorial, you will need the following stocks:

Ground

Model

Fire

Attention: If you have difficulty with Step 4 of this tutorial, check out this video tutorial I have below:

Step 1

Create a new document sized 1280 * 800px with black background. Load the ground image into Photoshop and select a piece from the ground, copy and paste the selection onto the image, then perspective it as shown below:

1 persp1 500x215 Create an Awesome Floating Face Manipulation with Fiery Hair in Photoshop

Use a soft eraser to fade the top edge as shown below:

1 erase1 500x162 Create an Awesome Floating Face Manipulation with Fiery Hair in Photoshop

Add the following 3 adjustment layers on the ground layers:

Black and White

1 bw1 Create an Awesome Floating Face Manipulation with Fiery Hair in Photoshop

Levels

1 lv1 Create an Awesome Floating Face Manipulation with Fiery Hair in Photoshop

Layer mask on the levels adjustment layer:

1 lv mask 500x300 Create an Awesome Floating Face Manipulation with Fiery Hair in Photoshop

Curves

1 curves Create an Awesome Floating Face Manipulation with Fiery Hair in Photoshop

and you will have the following effect so far:

1 effect 500x269 Create an Awesome Floating Face Manipulation with Fiery Hair in Photoshop

Step 2

We will now add the face in – load the model image into Photoshop and select the face:

2 sele Create an Awesome Floating Face Manipulation with Fiery Hair in Photoshop

Copy and paste the selection into our document, use a small soft eraser to clean up the edge:

2 paste 500x405 Create an Awesome Floating Face Manipulation with Fiery Hair in Photoshop

Then we want to erase part of her face with a soft eraser:

2 mask 500x483 Create an Awesome Floating Face Manipulation with Fiery Hair in Photoshop

Step 3

Add the following 3 adjustment layers as clipping mask to this face layer:

Black and White

3 bw1 Create an Awesome Floating Face Manipulation with Fiery Hair in Photoshop

Levels

3 lv1 Create an Awesome Floating Face Manipulation with Fiery Hair in Photoshop

Curves

3 curves1 Create an Awesome Floating Face Manipulation with Fiery Hair in Photoshop

Layer mask on the curves adjustment layer:

3 curves mask 500x299 Create an Awesome Floating Face Manipulation with Fiery Hair in Photoshop

and here is the effect so far:

3 effect1 500x262 Create an Awesome Floating Face Manipulation with Fiery Hair in Photoshop

Step 4

We can add some cloud behind and around the face area with the cloud filter or a cloud brush:

4 cloud1 500x317 Create an Awesome Floating Face Manipulation with Fiery Hair in Photoshop

We will now add fire texture into the image – select a piece as shown below:

4 sel Create an Awesome Floating Face Manipulation with Fiery Hair in Photoshop

Warp this selection and aim to achieve this shape below:

4 warp Create an Awesome Floating Face Manipulation with Fiery Hair in Photoshop

Apply the following image adjustments to this fire texture layer:

4 lv1 Create an Awesome Floating Face Manipulation with Fiery Hair in Photoshop

4 curves1 Create an Awesome Floating Face Manipulation with Fiery Hair in Photoshop

and here is the effect so far:

4 effect 500x419 Create an Awesome Floating Face Manipulation with Fiery Hair in Photoshop

Go to Filter > Distort > Twirl and apply the following settings:

4 twirl Create an Awesome Floating Face Manipulation with Fiery Hair in Photoshop

Hit Ctrl + F and repeat this filter a few times, and you will have the following effect:

4 effect 2 500x204 Create an Awesome Floating Face Manipulation with Fiery Hair in Photoshop

Duplicate this layer few times and merge them together, then duplicate the merge layers a few times and scatter them around the head:

4 dup effect 500x351 Create an Awesome Floating Face Manipulation with Fiery Hair in Photoshop

Step 5

We’re almost done! For some final touches, I added some particles with this rain brush I created on the image:

5 rain 500x311 Create an Awesome Floating Face Manipulation with Fiery Hair in Photoshop

I then added some fire particles by going back to the fire image and selecting parts of it, copy and paste the selection onto our image:

Hint: make sure you change the blending mode of these fire layers to “Screen”.

5 part 500x228 Create an Awesome Floating Face Manipulation with Fiery Hair in Photoshop

5 part 2 500x196 Create an Awesome Floating Face Manipulation with Fiery Hair in Photoshop

I then added some colours and adjusted the contrast a bit with the selective color adjustment layer and curves adjustment layer, and here is the final effect I have: (click to enlarge)

floating face flatten 2 500x312 Create an Awesome Floating Face Manipulation with Fiery Hair in Photoshop

That’s it for this tutorial! Hope you enjoy it and find it useful! Till next time, have a great day!

Create a Surreal Magical Power Unleashed Scene in Photoshop

$
0
0

In this tutorial, I will show you the steps I took to Create a Surreal Magical Power Unleashed Scene in Photoshop. This is an intermediate level Photoshop tutorial and some steps can be a bit tricky, but why not have a try!

Along the way, we will render some power/energy lines by manipulating a fire texture, which is unleashed from the angelic figure. We will also add a floating rock which is chained, and the power will try to pull the rock towards to the angelic figure in order to break it.

Here is a preview of the final effect I have for this tutorial: (click to enlarge)

angel 500x312 Create a Surreal Magical Power Unleashed Scene in Photoshop

PSD File Download

You can download the PSD File for this tutorial via the VIP Members Area for only $6.95/Month (or less)! You will not only get this PSD File, but also 100+ other PSD Files + Extra Goodies + Exclusive Photoshop tutorials there. Signup now and get exclusive :) Find out more about the VIP Members Areas

vip sign up 250 Create a Surreal Magical Power Unleashed Scene in Photoshop

OK Let’s get started!

To complete this tutorial, you will need the following stocks:

Sky

Ground

Model – by ~Jaymasee

Angel Wing

Rock

Metal Chain

Fire

Step 1

Create a new document sized 1280px * 800px with black background. Load the Sky stock image into Photoshop, select a portion of the sky and paste it onto our document, adjust the size with free transform tool as you see fit:

1 sky paste 500x310 Create a Surreal Magical Power Unleashed Scene in Photoshop

Use a soft eraser to remove some parts of the sky as shown below:

1 erase 500x307 Create a Surreal Magical Power Unleashed Scene in Photoshop

Add the following 2 adjustment layers on top of the sky layer:

Black and White

1 bw Create a Surreal Magical Power Unleashed Scene in Photoshop

Levels

1 levels Create a Surreal Magical Power Unleashed Scene in Photoshop

Load the ground image into Photoshop, select a piece and copy and paste it onto our document, compress and perspective the selection with free transform tool, and form a ground texture for our image:

1 ground 500x136 Create a Surreal Magical Power Unleashed Scene in Photoshop

Add the following Black and White adjustment layer to the ground layer:

1 bw ground Create a Surreal Magical Power Unleashed Scene in Photoshop

Use a soft eraser to remove some parts of the ground as shown below:

1 erase ground 500x120 Create a Surreal Magical Power Unleashed Scene in Photoshop

and here is the effect so far:

1 effect 500x305 Create a Surreal Magical Power Unleashed Scene in Photoshop

Step 2

Let’s make an angelic figure into the image – load the model image into Photoshop and select the girl:

2 select model 500x363 Create a Surreal Magical Power Unleashed Scene in Photoshop

Copy and paste the selection onto our image, resize and position it on the bottom right:

2 paste 500x276 Create a Surreal Magical Power Unleashed Scene in Photoshop

Add the following 3 adjustment layers as clipping mask for this girl layer:

Black and white

2 bw Create a Surreal Magical Power Unleashed Scene in Photoshop

Levels

2 lvs Create a Surreal Magical Power Unleashed Scene in Photoshop

Curves

2 curves Create a Surreal Magical Power Unleashed Scene in Photoshop

Create a new layer with the blending mode “overlay”, grab a small soft brush to paint some lights on the model as shown below:

2 highlights 500x347 Create a Surreal Magical Power Unleashed Scene in Photoshop

Load the wing stock into Photoshop, move the wing onto the girl and use a soft eraser on the edge so it fades into the background:

2 wing 500x320 Create a Surreal Magical Power Unleashed Scene in Photoshop

and here is the effect so far:

2 effect Create a Surreal Magical Power Unleashed Scene in Photoshop

Step 3

Load the rock image into Photoshop, select a piece of rock and move it onto our document, use a soft eraser to fade the edges, and position the rock on the centre left of the image:

3 rock 500x274 Create a Surreal Magical Power Unleashed Scene in Photoshop

Add the following 2 adjustment layer as clipping mask for this rock layer:

Levels

3 lvs Create a Surreal Magical Power Unleashed Scene in Photoshop

Curves

3 curves Create a Surreal Magical Power Unleashed Scene in Photoshop

Load the chain image into Photoshop, use the quick selection tool to select a portion:

3 chain 500x379 Create a Surreal Magical Power Unleashed Scene in Photoshop

Copy and paste the selection onto our document, and distort and warp it with free tranform as shown below, then attach it to the bottom of the rock:

3 distort Create a Surreal Magical Power Unleashed Scene in Photoshop

Add the following black and white adjustment layer to this chain layer:

3 chain bw Create a Surreal Magical Power Unleashed Scene in Photoshop

Repeat these steps above and add another chain to the top of the rock as shown below:

3 attach chain 500x669 Create a Surreal Magical Power Unleashed Scene in Photoshop

Step 4

Let’s made some energy lines/particles for the image. Load the fire image into Photoshop, and select a portion of the with a 30px feather Lasso Tool:

4 fire sel Create a Surreal Magical Power Unleashed Scene in Photoshop

Copy and paste the selection onto our document, warp it as shown below:

4 warp 500x455 Create a Surreal Magical Power Unleashed Scene in Photoshop

Apply the following Levels adjustments to this fire layer:

4 lv 500x442 Create a Surreal Magical Power Unleashed Scene in Photoshop

Change the blending mode of this fire layer to “Screen”:

4 screen 500x350 Create a Surreal Magical Power Unleashed Scene in Photoshop

Duplicate this fire layer a few times and merge them together (revert the blending mode to “screen” after the merge), add it to the top of the wing as shown below:

4 attach 500x453 Create a Surreal Magical Power Unleashed Scene in Photoshop

We can also use the liquify filter to warp the fire texture a bit, in order to have flowing effect which links the rock and the model:

4 liquify 500x271 Create a Surreal Magical Power Unleashed Scene in Photoshop

Duplicate the liquified layer a few times for more effect:

4 attach more 500x258 Create a Surreal Magical Power Unleashed Scene in Photoshop

Step 5

Let’s add some particles into the image. Again we use the Lasso Tool with 30px feather to select a portion as shown below:

5 sel Create a Surreal Magical Power Unleashed Scene in Photoshop

Copy and paste the selection onto our image, and apply the following Levels adjustment to it:

5 lvs Create a Surreal Magical Power Unleashed Scene in Photoshop

Change the layer blending mode to “screen” for this particle layer, and here is the effect so far:

5 effect Create a Surreal Magical Power Unleashed Scene in Photoshop

Add the particles to different parts of the image as shown below, adjust its angel and shape with the free transform tool:

5 attach par Create a Surreal Magical Power Unleashed Scene in Photoshop

5 attach par 2 500x499 Create a Surreal Magical Power Unleashed Scene in Photoshop

Then, we can use the method described in this tutorial (with red colour), add some flowing pattern into image:

5 attach lines 500x316 Create a Surreal Magical Power Unleashed Scene in Photoshop

Add more flowing patterns onto the image:

5 attach lines 2 Create a Surreal Magical Power Unleashed Scene in Photoshop

Step 6

We can add the following curves adjustment layer on top of all previous layer to adjust some lighting effect:

6 curves Create a Surreal Magical Power Unleashed Scene in Photoshop

6 curves red Create a Surreal Magical Power Unleashed Scene in Photoshop

6 cur blue Create a Surreal Magical Power Unleashed Scene in Photoshop

Layer mask on this curves adjustment layer:

6 cur mask 500x312 Create a Surreal Magical Power Unleashed Scene in Photoshop

and here is the final effect I have: (click to enlarge)

angel 500x312 Create a Surreal Magical Power Unleashed Scene in Photoshop

That’s it for this tutorial! Hope you enjoy it and find it useful! Till next time, have a great day!

The Creation of “The Storm is Approaching” Artwork in Photoshop

$
0
0

In this tutorial, I will show you the process of The Creation of “The Storm is Approaching” Artwork in Photoshop. This is an intermediate level Photoshop tutorial so some steps can be a bit tricky, but why not have a try!

Along the way, we will go through some photo manipulation/combination techniques, as well as some use of custom Photoshop brushes and image adjustments.

Here is a preview of the final effect I have for this tutorial: (click to enlarge)

the storm is approaching flatten 500x285 The Creation of The Storm is Approaching Artwork in Photoshop

PSD File Download

You can download the PSD File for this tutorial via the VIP Members Area for only $6.95/Month (or less)! You will not only get this PSD File, but also 100+ other PSD Files + Extra Goodies + Exclusive Photoshop tutorials there. Signup now and get exclusive :) Find out more about the VIP Members Areas

vip sign up 250 The Creation of The Storm is Approaching Artwork in Photoshop

OK Let’s get started!

To complete this tutorial, you will need the following stocks:

Ocean

Cloud

Cliff

Model

Lightning Brushes

Water splash brush

Step 1

Create a new document sized 1400px * 800px with black background. Load the ocean image into Photoshop and use a rectangular marquee tool to select a piece from of the ocean from the image, copy and paste the selection onto our document:

Hint: Erase the top edge of the ocean with a eraser tool, or use a black gradient fill tool (Black to Transparent setting) to fade the top edge.

1 paste 500x97 The Creation of The Storm is Approaching Artwork in Photoshop

Add the following 3 adjustment layers to this ocean layer:

Black and White

1 bw1 The Creation of The Storm is Approaching Artwork in Photoshop

Levels

1 lv The Creation of The Storm is Approaching Artwork in Photoshop

Curves

1 curves The Creation of The Storm is Approaching Artwork in Photoshop

And as a result you will have a rough sea surface (transformed from a relatively calm surface), as shown below:

1 rough 500x197 The Creation of The Storm is Approaching Artwork in Photoshop

Use the cloud filter, or a cloud brush (lots of these) on the internet to add some cloud/mist over the ocean layer:

1 mist 500x81 The Creation of The Storm is Approaching Artwork in Photoshop

Step 2

Load the cloud image into Photoshop, and copy and paste a portion of it onto our document, resize and position it as shown below:

2 cloud paste 500x204 The Creation of The Storm is Approaching Artwork in Photoshop

Apply some “Reduce Noise” filter to this cloud – this will add a softening effect and reduce the cloud noise:

2 reduce noise1 500x360 The Creation of The Storm is Approaching Artwork in Photoshop

Add the following adjustment layers to this cloud layer as its clipping mask:

Black and White

2 bw1 The Creation of The Storm is Approaching Artwork in Photoshop

Levels

2 lv1 The Creation of The Storm is Approaching Artwork in Photoshop

Curves

2 curves2 The Creation of The Storm is Approaching Artwork in Photoshop

Again we erase the bottom of the cloud so it fades into the background, and merge with the ocean:

2 erase bottom 500x39 The Creation of The Storm is Approaching Artwork in Photoshop

and here is the effect so far:

2 effect2 500x281 The Creation of The Storm is Approaching Artwork in Photoshop

Step 3

We will add a cliff onto the image. Load the cliff image into Photoshop and select a portion as shown below with quick selection tool:

3 select The Creation of The Storm is Approaching Artwork in Photoshop

Copy and paste the selection onto our document, resize and position it as shown below:

3 paste 500x358 The Creation of The Storm is Approaching Artwork in Photoshop

Use an eraser tool (with around 60% hardness), remove some parts of the rock as shown below:

3 erase 500x310 The Creation of The Storm is Approaching Artwork in Photoshop

Add the following 3 adjustment layer as clipping mask for this rock layer:

Black and white

3 bw The Creation of The Storm is Approaching Artwork in Photoshop

Levels

3 lv The Creation of The Storm is Approaching Artwork in Photoshop

Layer mask on the levels adjustment layer:

3 lv mask 500x317 The Creation of The Storm is Approaching Artwork in Photoshop

Curves

3 curves1 The Creation of The Storm is Approaching Artwork in Photoshop

and you will have the following effect so far:

3 effect1 500x330 The Creation of The Storm is Approaching Artwork in Photoshop

Use the water splash brush you downloaded, paint some splash around the edge of the rock as shown below: (reduce the brush size to a small scale)

3 splash 500x252 The Creation of The Storm is Approaching Artwork in Photoshop

Step 4

We will now add the model in. Load the model image into Photoshop and copy and paste it onto our document, and resize it as shown below:

4 paste 500x304 The Creation of The Storm is Approaching Artwork in Photoshop

Add the following 3 adjustment layers to this model layer:

Black and white

4 bw The Creation of The Storm is Approaching Artwork in Photoshop

Levels

4 lv1 The Creation of The Storm is Approaching Artwork in Photoshop

Layer mask on the levels adjustment layer:

4 lv mask 500x429 The Creation of The Storm is Approaching Artwork in Photoshop

By using this levels layer mask, it will darken the lower part of the model and create some depth:

4 effect 500x275 The Creation of The Storm is Approaching Artwork in Photoshop

Add some highlights on the ground with a soft white brush painting on a new layer (set the layer blending mode to “overlay)

4 highlight The Creation of The Storm is Approaching Artwork in Photoshop

Add some cloud warping effect around the model as well:

4 cloud1 500x232 The Creation of The Storm is Approaching Artwork in Photoshop

If you’re not sure of how to achieve this cloud warp effect, check out this video tutorial below: (jump to 4:55 min)

Step 5

We can now use the lightning brush to add some lightning effect over the ocean:

5 paint lightning 500x228 The Creation of The Storm is Approaching Artwork in Photoshop

And use some water splashing brushes to add some splashes around the lightning:

5 splash 500x291 The Creation of The Storm is Approaching Artwork in Photoshop

We will also add some mist/cloud above the ocean for some more dramatic effect: (using the same cloud warp method as above)

5 cloud 500x153 The Creation of The Storm is Approaching Artwork in Photoshop

We can finish up the photo by add some colour effect with various image adjustment layers (such as colour balance, selective colour, etc) for some more effect, and here is the final effect (click to enlarge)

the storm is approaching flatten 500x285 The Creation of The Storm is Approaching Artwork in Photoshop

I have a video Photoshop tutorial showing you how to achieve this type of colour effect via image adjustment layers here:

That’s it for this tutorial! Hope you enjoy it and find it useful! Till next time, have a great day!

Design a Dark Magical Scene with Nebula Effect in Photoshop

$
0
0

In this tutorial, I will show you the steps I took to create this Dark  Magical Scene with Nebula Effect in Photoshop. This is an intermediate level Photoshop tutorial so some steps can be a bit tricky, but why not have a try!

Note: The Photoshop tutorial is done in CS6 – therefore some screenshot may have slighting different layout as in the earlier version.

Here is a preview of the final effect I have for this tutorial: (click to enlarge)

super natural scene flatten1 500x270 Design a Dark Magical Scene with Nebula Effect in Photoshop

PSD File Download

You can download the PSD File for this tutorial via the VIP Members Area for only $6.95/Month (or less)! You will not only get this PSD File, but also 100+ other PSD Files + Extra Goodies + Exclusive Photoshop tutorials there. Signup now and get exclusive :) Find out more about the VIP Members Areas

vip sign up 250 Design a Dark Magical Scene with Nebula Effect in Photoshop

OK Let’s get started!

To complete this tutorial, you will need the following stocks:

Model

Fire 1

Fire 2

Nebula Texture by Moonchilde-Stock

Explosion brush

Step 1

Create a new document sized 1400px * 800px with black background. Load the model image into Photoshop, select the model and the skull on the ground, cut them out and paste onto our document, resize and position the selection to the centre:

1 paste1 500x280 Design a Dark Magical Scene with Nebula Effect in Photoshop

Use an soft eraser to erase the edges and fade it into the background, we will also want to completely erase the raising left arm as well for attaching the fire texture later on:

1 erase1 500x518 Design a Dark Magical Scene with Nebula Effect in Photoshop

Add the following 3 adjustment layers as clipping mask to this model layer:

Black and White

1 bw2 Design a Dark Magical Scene with Nebula Effect in Photoshop

Levels

1 lvs Design a Dark Magical Scene with Nebula Effect in Photoshop

Curves

1 curves1 Design a Dark Magical Scene with Nebula Effect in Photoshop

and this is the effect so far:

1 effect2 Design a Dark Magical Scene with Nebula Effect in Photoshop

Step 2

We will be adding some textures over the model. Load the Fire 1 Texture into Photoshop and use a quick selection tool to select a portion of it:

2 sel1 Design a Dark Magical Scene with Nebula Effect in Photoshop

Copy and paste the selection onto our document, then Ctrl + Left click on the thumbnail image on the layer palette to select this layer, and press Ctrl + Alt + R to bring up the Refine Edge tool, apply the following settings:

2 refine Design a Dark Magical Scene with Nebula Effect in Photoshop

Then press Ctrl + L to bring up the levels adjustment tool, apply the following settings:

2 levels Design a Dark Magical Scene with Nebula Effect in Photoshop

You will have this similar effect for the fire texture:

2 effect3 Design a Dark Magical Scene with Nebula Effect in Photoshop

Then we can apply some warp effect with the free transform tool warp option:

2 warp 500x475 Design a Dark Magical Scene with Nebula Effect in Photoshop

We can then duplicate this fire texture layer a few times, rotate and attach them to different parts of the body as shown below: (set the layer blending mode according to the screenshot below)

2 attach Design a Dark Magical Scene with Nebula Effect in Photoshop

2 attach 2 500x186 Design a Dark Magical Scene with Nebula Effect in Photoshop

We can also put some fire texture under the body by having some duplicated fire texture layers beneath the model layer:

2 fire behind 500x608 Design a Dark Magical Scene with Nebula Effect in Photoshop

Step 3

We can add a fire pattern under the model by drawing a polygon shape with the polygon tool:

3 cos1 Design a Dark Magical Scene with Nebula Effect in Photoshop

Set the side number to “5″ from the tool options bar, draw a shape and use the free transform to distort/perspective it on the ground:

3 ground draw 500x227 Design a Dark Magical Scene with Nebula Effect in Photoshop

Then we use the line tool link each point as shown below to form a star shape:

3 join 500x210 Design a Dark Magical Scene with Nebula Effect in Photoshop

Load the “Fire 2″ image and select a portion of the fire as shown below:

3 sel 500x239 Design a Dark Magical Scene with Nebula Effect in Photoshop

Copy and paste the selection onto our document, use the free transform tool to align it to the lines we drew before:

3 attach Design a Dark Magical Scene with Nebula Effect in Photoshop

Repeat this process above and cover all lines with fire texture, then merge the fire line layers together, use the free transform too to  perspective it as shown below:

3 full fire 500x166 Design a Dark Magical Scene with Nebula Effect in Photoshop

Use a soft brush to paint some ground texture, again we can use the free transform tool and a soft eraser to achieve the desire effect:

3 ground texture 500x190 Design a Dark Magical Scene with Nebula Effect in Photoshop

Step 4

We can load the nebula texture into Photoshop and select a piece with the Lasso Tool, copy and paste it onto our document above, and place it above all previous layers:

4 nebula 500x287 Design a Dark Magical Scene with Nebula Effect in Photoshop

Use the Explosion brushset as and eraser, remove some parts of the nebula with it – this will add some cloudy effect onto the texture:

4 erase 500x309 Design a Dark Magical Scene with Nebula Effect in Photoshop

Apply the following image adjustment to this nebula layer:

Hue/Saturation

4 hue Design a Dark Magical Scene with Nebula Effect in Photoshop

Levels

4 lv2 Design a Dark Magical Scene with Nebula Effect in Photoshop

and you will have the following effect:

4 effect1 500x423 Design a Dark Magical Scene with Nebula Effect in Photoshop

Duplicate this nebula layer and warp it with the free transform tool:

4 warp1 500x320 Design a Dark Magical Scene with Nebula Effect in Photoshop

and you will have the following effect so far:

4 effect 2 500x382 Design a Dark Magical Scene with Nebula Effect in Photoshop

Step 5

We will add some aura effect to the image – firstly either paint or render some cloud on the image:

5 cloud1 500x506 Design a Dark Magical Scene with Nebula Effect in Photoshop

Go to Filter > Distort > Spherize to this cloud layer:

5 sp Design a Dark Magical Scene with Nebula Effect in Photoshop

Repeat this filter around 10 times by pressing Ctrl + F, then free transform this layer:

5 hit 10 500x300 Design a Dark Magical Scene with Nebula Effect in Photoshop

Use a soft eraser to remove the edges, and here is the effect you will have:

5 erase 500x330 Design a Dark Magical Scene with Nebula Effect in Photoshop

We will add a colour balance adjustment on top of all previous layers:

6 col bal Design a Dark Magical Scene with Nebula Effect in Photoshop

and you will have the following effect so far:

5 effect1 500x361 Design a Dark Magical Scene with Nebula Effect in Photoshop

Step 6

In the final step, we can flatten the image and duplicate the background layer, and apply some “Accented Edges” filter settings to the duplicate layer:

6 accented 500x345 Design a Dark Magical Scene with Nebula Effect in Photoshop

Add some layer mask effect so hide some parts of this layer, and here is the overall effect: (click to enlarge)

super natural scene flatten1 500x270 Design a Dark Magical Scene with Nebula Effect in Photoshop

That’s it for this tutorial! Hope you enjoy it and find it useful! Till next time, have a great day!

Create a Surreal Urban City Montage with Lightning Effect in Photoshop

$
0
0

In this tutorial, I will show you the steps I took to Create a Surreal Urban City Montage with Lightning Effect in Photoshop . This is an intermediate level Photoshop tutorial so some steps can be a bit tricky, but why not have a try!

Note: The Photoshop tutorial is done in CS6 – therefore some screenshot may have slighting different layout as in the earlier version.

Along the way, we will practice mixing a series of photos and form a surreal, urban city scene with layer blending options and image adjustments, as well using various toolbox tools to adjust and fine-tune the image.

Here is a preview of the final effect I have for this tutorial: (click to enlarge)

Version 1

poster montage flatten 492x700 Create a Surreal Urban City Montage with Lightning Effect in Photoshop

Version 2

poster montage flatten 2 492x700 Create a Surreal Urban City Montage with Lightning Effect in Photoshop

PSD File Download

You can download the PSD File for this tutorial via the VIP Members Area for only $6.95/Month (or less)! You will not only get this PSD File, but also 100+ other PSD Files + Extra Goodies + Exclusive Photoshop tutorials there. Signup now and get exclusive :) Find out more about the VIP Members Areas

vip sign up 250 Create a Surreal Urban City Montage with Lightning Effect in Photoshop

OK Let’s get started!

To complete this tutorial, you will need the following stocks:

City by ~Ealucids-Photos

Model

Man in Suit Standing

Lightning

Step 1

Create a new document sized 900px * 1278px with a black background, create a new layer and use a grunge brushset (you should be able to find lots of those on the net) and paint a background:

Hint: set the brush opacity and flow to around 30% so we can have subtle painting effect, use a soft eraser along the way to remove the area we don’t want.

1 paint 489x700 Create a Surreal Urban City Montage with Lightning Effect in Photoshop

Load the city image into Photoshop, select a piece as shown below:

1 sel 500x506 Create a Surreal Urban City Montage with Lightning Effect in Photoshop

Copy and paste the selection onto our document, resize and erase the edge as shown below:

1 erase 500x517 Create a Surreal Urban City Montage with Lightning Effect in Photoshop

Add the following adjustment layers as clipping mask to this city layer:

Black and white

1 bw Create a Surreal Urban City Montage with Lightning Effect in Photoshop

Levels

1 lv Create a Surreal Urban City Montage with Lightning Effect in Photoshop

On this levels layer mask, I used the soft eraser tool to remove some part of it to reveal the lighting behind it”

1 lvl mask 486x700 Create a Surreal Urban City Montage with Lightning Effect in Photoshop

and here is the effect so far:

1 effect 500x457 Create a Surreal Urban City Montage with Lightning Effect in Photoshop

Step 2

We will now add the face into the image. Load the model face into Photoshop and cut out the face, resize and position it into the centre of the image:

2 paste 500x627 Create a Surreal Urban City Montage with Lightning Effect in Photoshop

Erase the edge of the face with a soft erase:

2 erase 500x679 Create a Surreal Urban City Montage with Lightning Effect in Photoshop

Then attach the following 2 adjustment layers as clipping mask to this face layer:

Black and white

2 bw Create a Surreal Urban City Montage with Lightning Effect in Photoshop

Levels

2 lv Create a Surreal Urban City Montage with Lightning Effect in Photoshop

Optional: you can add a bit grungy brush paint effect on the face to as some roughness on the image:

2 paint splatter 500x477 Create a Surreal Urban City Montage with Lightning Effect in Photoshop

and here is the effect so far:

2 effect 500x565 Create a Surreal Urban City Montage with Lightning Effect in Photoshop

Step 3

We will now add a triangle platform on the bottom of the image and add a standing man on top of it. So let’s create a new layer and use the Pen Tool to draw a shape as below, and fill it with a light grey colour:

3 pen 500x289 Create a Surreal Urban City Montage with Lightning Effect in Photoshop

Apply the following Gradient Overlay blending option on this triangle layer:

3 grad 500x359 Create a Surreal Urban City Montage with Lightning Effect in Photoshop

Use a soft eraser to fade the bottom and the edge of this triangle to create some depth, also add some cloud around it:

3 cloud 500x344 Create a Surreal Urban City Montage with Lightning Effect in Photoshop

Load the “man in suit” image into Photoshop and paste it over the platform as shown below:

3 resize 500x406 Create a Surreal Urban City Montage with Lightning Effect in Photoshop

Use a soft eraser to darken the lower half of his body as shown below:

3 erase body Create a Surreal Urban City Montage with Lightning Effect in Photoshop

Add the following 2 adjustment layers on this man standing layer:

Black and white

3 bw Create a Surreal Urban City Montage with Lightning Effect in Photoshop

Levels

3 lv Create a Surreal Urban City Montage with Lightning Effect in Photoshop

and here is the effect so far:

3 effect 500x358 Create a Surreal Urban City Montage with Lightning Effect in Photoshop

Step 4

We can add some cloud on the top of the canvas as shown below, either with a cloud brush or the cloud filter:

4 sky 500x286 Create a Surreal Urban City Montage with Lightning Effect in Photoshop

Now we will create some abstract flying lines – we will create a new layer and paint an orange dot:

4 dot 500x241 Create a Surreal Urban City Montage with Lightning Effect in Photoshop

Paint a smaller yellow dot in the centre as shown below:

4 dot 2 500x263 Create a Surreal Urban City Montage with Lightning Effect in Photoshop

Then merge those two layers, duplicate it, and apply the liquify filter on it as shown below on the duplicated layer:

4 liq 500x294 Create a Surreal Urban City Montage with Lightning Effect in Photoshop

Then we adjust the shape of the original dot layer with the distort tool:

4 dot 3 500x286 Create a Surreal Urban City Montage with Lightning Effect in Photoshop

Once you’re happy with the shape, merge those two layers again and use the free transform tool to adjust the shape:

4 distort 500x155 Create a Surreal Urban City Montage with Lightning Effect in Photoshop

Duplicate and scatter those lines around the image, rotate them and adjust the layer opacity as you see fit:

4 effect Create a Surreal Urban City Montage with Lightning Effect in Photoshop

Step 5

Load the lightning image into Photoshop and select a portion of it with the Lasso Tool (30px feather):

5 sel 500x243 Create a Surreal Urban City Montage with Lightning Effect in Photoshop

Copy and paste the selection onto our document, and apply the black and white adjustment to this layer:

5 bw Create a Surreal Urban City Montage with Lightning Effect in Photoshop

Set the blending mode of this layer to  ”Screen”, duplicate this layer once and move them to the top of the canvas:

5 dup 500x214 Create a Surreal Urban City Montage with Lightning Effect in Photoshop

and you will have the following effect so far:

5 effect 484x700 Create a Surreal Urban City Montage with Lightning Effect in Photoshop

We can add some colour effect to the image, and here is the final effect I have: (click to enlarge)

Version 1

poster montage flatten 492x700 Create a Surreal Urban City Montage with Lightning Effect in Photoshop

Version 2

poster montage flatten 2 492x700 Create a Surreal Urban City Montage with Lightning Effect in Photoshop

If you wish to find out a thing or two with how to apply this colour effect, check out this video Photoshop tutorial below:

That’s it for this tutorial! Hope you enjoy it and find it useful! Till next time, have a great day!

Design a Rusted Metal Face Manipulation with Abstract Falling Lines in Photoshop

$
0
0

In this tutorial, I will show you the steps I took to Design a Rusted Metal Face Manipulation with Abstract Falling Lines in Photoshop. The Aim of this tutorial is to cover some interesting techniques when it comes to applying textures to human skin, as well as creating simple abstract lines via the Warp Tool.

This is a beginner-intermediate level Photoshop tutorial.

Note: The Photoshop tutorial is done in CS6 – therefore some screenshot may have slighting different layout as in the earlier version.

Here is a preview of the final effect I have for this tutorial: (click to enlarge)

metal portrait flatten 500x637 Design a Rusted Metal Face Manipulation with Abstract Falling Lines in Photoshop

PSD File Download

You can download the PSD File for this tutorial via the VIP Members Area for only $6.95/Month (or less)! You will not only get this PSD File, but also 100+ other PSD Files + Extra Goodies + Exclusive Photoshop tutorials there. Signup now and get exclusive :) Find out more about the VIP Members Areas

vip sign up 250 Design a Rusted Metal Face Manipulation with Abstract Falling Lines in Photoshop

OK Let’s get started!

To complete this tutorial, you will need the following stocks:

Model

Rusted Metal

Watercolor Brushes

Step 1

Create a new document sized 800px * 1020px with black background, load the model image into Photoshop and cut of the head and shoulder portion of the model, paste it onto our document. Resize and position this layer to the centre, and use a soft eraser to fade the edges as shown below:

1 paste1 500x625 Design a Rusted Metal Face Manipulation with Abstract Falling Lines in Photoshop

Use a small hard eraser to tidy up the hair:

1 hair 500x476 Design a Rusted Metal Face Manipulation with Abstract Falling Lines in Photoshop

Duplicate this layer once and apply the following Surface Blur settings to it:

1 sur Design a Rusted Metal Face Manipulation with Abstract Falling Lines in Photoshop

Duplicate this surface blurred layer once, then use the watercolour brush we downloaded earlier as eraser, remove parts of the face for some abstract break-apart effect:

1 eraser 485x700 Design a Rusted Metal Face Manipulation with Abstract Falling Lines in Photoshop

Hide the 2 previous layers and keep only the third layer visible.

Step 2

Add the following 2 adjustment layers as clipping mask on top of the third duplicated layer:

Black and White

2 bw2 Design a Rusted Metal Face Manipulation with Abstract Falling Lines in Photoshop

Levels

2 lv2 Design a Rusted Metal Face Manipulation with Abstract Falling Lines in Photoshop

Layer mask on the Levels adjustment layer:

2 lv mask 500x550 Design a Rusted Metal Face Manipulation with Abstract Falling Lines in Photoshop

and you will have the following effect so far:

2 effect2 500x633 Design a Rusted Metal Face Manipulation with Abstract Falling Lines in Photoshop

Step 3

We will now apply the rusted metal texture onto the face. Open up the texture image in Photoshop, load the selection of the model layer and drag it over onto the texture image:

3 sel 500x515 Design a Rusted Metal Face Manipulation with Abstract Falling Lines in Photoshop

Copy and paste the selection over onto the model, place the layer above the previous adjustment layers:

3 copy 500x577 Design a Rusted Metal Face Manipulation with Abstract Falling Lines in Photoshop

We will want to remove some parts of the metal texture to reveal the eyes and nose, etc with a layer mask attached:

3 texture mask 500x625 Design a Rusted Metal Face Manipulation with Abstract Falling Lines in Photoshop

Change the blending mode of this metal texture layer to “Hard Light”, you will have the following effect:

3 hard light 500x431 Design a Rusted Metal Face Manipulation with Abstract Falling Lines in Photoshop

Add the following adjustment layer as clipping mask to this metal texture layer:

Black and White

3 bw1 Design a Rusted Metal Face Manipulation with Abstract Falling Lines in Photoshop

and you will have the following effect so far:

3 effect1 500x412 Design a Rusted Metal Face Manipulation with Abstract Falling Lines in Photoshop

Step 4

We can add fading smoke/cloud around the face to add some depth to the image:

4 cloud 500x623 Design a Rusted Metal Face Manipulation with Abstract Falling Lines in Photoshop

Optionally you can add some small particles around the face to create some break apart effect:

4 particle 500x320 Design a Rusted Metal Face Manipulation with Abstract Falling Lines in Photoshop

We will make some abstract curvy lines – paint a small orange dot with soft brush:

4 dot1 Design a Rusted Metal Face Manipulation with Abstract Falling Lines in Photoshop

Use the Warp Tool to manipulate this dot as shown below:

4 warp1 500x396 Design a Rusted Metal Face Manipulation with Abstract Falling Lines in Photoshop

Duplicate this layer a few times, rotate and resize each duplicated layer and scatter them around to form the falling effect:

4 duplicate Design a Rusted Metal Face Manipulation with Abstract Falling Lines in Photoshop

Attach one line to the bottom of the right eye as well:

4 eye 500x243 Design a Rusted Metal Face Manipulation with Abstract Falling Lines in Photoshop

Step 5

We’re almost done! For some final retouches, add the following 2 adjustment layers on top:

Curves

5 curves Design a Rusted Metal Face Manipulation with Abstract Falling Lines in Photoshop

Colour Balance

Midtones

4 mid col Design a Rusted Metal Face Manipulation with Abstract Falling Lines in Photoshop

Highlights

5 col hig Design a Rusted Metal Face Manipulation with Abstract Falling Lines in Photoshop

and you will have the following final effect: (click to enlarge)

metal portrait flatten 500x637 Design a Rusted Metal Face Manipulation with Abstract Falling Lines in Photoshop

That’s it for this tutorial! Hope you enjoy it and find it useful! Till next time, have a great day!

Create a Surreal Burning Tree Scene with Falling Particle Effect in Photoshop

$
0
0

In this tutorial, I will show you the steps I took to Create a Surreal Burning Tree Scene with Falling Particle Effect in Photoshop. We will be using some of the new brush presets in Photoshop CS6 and use them to add the fire burning effect and the falling particle effect.

This is an intermediate level Photoshop tutorial so some steps can be tricky.

Note: The Photoshop tutorial is done in CS6 – therefore some screenshot may have slighting different layout as in the earlier version.

Here is a preview of the final effect I have for this tutorial: (click to enlarge)

dark tree snow scene flatten 467x700 Create a Surreal Burning Tree Scene with Falling Particle Effect in Photoshop

PSD File Download

You can download the PSD File for this tutorial via the VIP Members Area for only $6.95/Month (or less)! You will not only get this PSD File, but also 100+ other PSD Files + Extra Goodies + Exclusive Photoshop tutorials there. Signup now and get exclusive :) Find out more about the VIP Members Areas

vip sign up 250 Create a Surreal Burning Tree Scene with Falling Particle Effect in Photoshop

OK Let’s get started!

To complete this tutorial, you will need the following stocks:

Model

Tree

Fire

Crow

Step 1

Create a new document sized 800px * 1197px with black background. Use either the cloud filter or a cloud brush to paint some subtle cloud texture over on the background layer:

1 paint cloud 461x700 Create a Surreal Burning Tree Scene with Falling Particle Effect in Photoshop

Load the Tree stock image into Photoshop and select a portion of the ground, copy and paste the selection over to our document, use the free transform tool to add some perspectives on this ground texture, also erase the top edge with a soft eraser:

1 pesp 500x449 Create a Surreal Burning Tree Scene with Falling Particle Effect in Photoshop

Add the following 3 adjustment layer as clipping mask to this ground texture layer:

Black and White

1 bw Create a Surreal Burning Tree Scene with Falling Particle Effect in Photoshop

Levels

1 lv Create a Surreal Burning Tree Scene with Falling Particle Effect in Photoshop

Curves

1 curves Create a Surreal Burning Tree Scene with Falling Particle Effect in Photoshop

and here is the effect so far:

1 effect 500x191 Create a Surreal Burning Tree Scene with Falling Particle Effect in Photoshop

Add some cloud effect above the ground for some dramatic effect:

1 effect 2 500x175 Create a Surreal Burning Tree Scene with Falling Particle Effect in Photoshop

Step 2

We will now add the tree into the image. Use whatever selection tool to make a rough selection on the tree image, and cut out the centre portion of that image:

2 sel 500x549 Create a Surreal Burning Tree Scene with Falling Particle Effect in Photoshop

Paste the selection onto the image, position it as shown below:

2 paste 500x492 Create a Surreal Burning Tree Scene with Falling Particle Effect in Photoshop

We will get rid of some parts of the tree by applying the following layer mask:

2 mask 500x440 Create a Surreal Burning Tree Scene with Falling Particle Effect in Photoshop

and here is the effect after the layer mask:

2 effect after mask 500x409 Create a Surreal Burning Tree Scene with Falling Particle Effect in Photoshop

Add the following 2 adjustment layers as clipping mask to this tree layer:

Black and White

2 bw Create a Surreal Burning Tree Scene with Falling Particle Effect in Photoshop

Levels

2 lv Create a Surreal Burning Tree Scene with Falling Particle Effect in Photoshop

and here is the effect so far:

2 effect Create a Surreal Burning Tree Scene with Falling Particle Effect in Photoshop

Step 3

We will add another branch into the image – so let’s select this part of the image:

3 sel 500x267 Create a Surreal Burning Tree Scene with Falling Particle Effect in Photoshop

Copy and paste the selection onto our document:

3 attach 500x240 Create a Surreal Burning Tree Scene with Falling Particle Effect in Photoshop

Again we add a layer mask to hide some parts of this branch:

3 mask 500x274 Create a Surreal Burning Tree Scene with Falling Particle Effect in Photoshop

Add the following 2 adjustment layers as clipping mask to this branch:

Black and White

3 bw Create a Surreal Burning Tree Scene with Falling Particle Effect in Photoshop

Levels

3 lv Create a Surreal Burning Tree Scene with Falling Particle Effect in Photoshop

and you will have the following effect:

3 effect 500x267 Create a Surreal Burning Tree Scene with Falling Particle Effect in Photoshop

Step 4

We will now add the lady figure into the image. Load the model stock image into Photoshop and cut out the model, paste it onto our image and place it to the position as shown below:

4 paste 500x388 Create a Surreal Burning Tree Scene with Falling Particle Effect in Photoshop

Add the following 2 adjustment layers as clipping mask to this model:

Black and White

4 bw Create a Surreal Burning Tree Scene with Falling Particle Effect in Photoshop

Levels

4 lvs Create a Surreal Burning Tree Scene with Falling Particle Effect in Photoshop

Create a new layer and set its blending mode to overlay, use a soft white brush to paint some highlights to this model:

4 high 500x301 Create a Surreal Burning Tree Scene with Falling Particle Effect in Photoshop

and here is the effect so far:

4 effect Create a Surreal Burning Tree Scene with Falling Particle Effect in Photoshop

Step 5

OK we will get to the fun part of this tut :) Choose the following brush from brush palette (note: this brush is new to CS6, if you don’t have CS6, use alternative similar brush) and pick an dark orange colour:

5 brush 500x278 Create a Surreal Burning Tree Scene with Falling Particle Effect in Photoshop

Set the brush flow and opacity to around 50%, use the brush to paint some fire texture over the tree texture:

Hint: use a soft eraser to remove unnecessary painting off.

5 paint 431x700 Create a Surreal Burning Tree Scene with Falling Particle Effect in Photoshop

We can also add some real fire texture over the image by copy and paste from the fire stock image we downloaded:

5 sele Create a Surreal Burning Tree Scene with Falling Particle Effect in Photoshop

Choose this Round Point Stiff brush from the panel, paint some falling fire particles with it:

5 brush 2 500x201 Create a Surreal Burning Tree Scene with Falling Particle Effect in Photoshop

5 effect 493x700 Create a Surreal Burning Tree Scene with Falling Particle Effect in Photoshop

Step 6

We will add some falling particles to the image – again we use the round point stiff brush to paint some particles around the image:

6 brush 500x187 Create a Surreal Burning Tree Scene with Falling Particle Effect in Photoshop

Then we can apply the following motion blur filter effect to this particle layer:

6 mo blur Create a Surreal Burning Tree Scene with Falling Particle Effect in Photoshop

And you will see the following falling effect on the particles:

6 effect 500x312 Create a Surreal Burning Tree Scene with Falling Particle Effect in Photoshop

6 effect 2 500x302 Create a Surreal Burning Tree Scene with Falling Particle Effect in Photoshop

Step 7

We’re almost done :) For some final retouches, we will add some sky textures over the top of the image:

7 sky 500x305 Create a Surreal Burning Tree Scene with Falling Particle Effect in Photoshop

Load the crow image into Photoshop and add a pair of crows into the image, as shown below:

7 paint crow 500x521 Create a Surreal Burning Tree Scene with Falling Particle Effect in Photoshop

Use the blur tool to blur out some parts of the wings to add some motion to the flying creature:

7 wing blur 500x443 Create a Surreal Burning Tree Scene with Falling Particle Effect in Photoshop

7 wing blur 2 Create a Surreal Burning Tree Scene with Falling Particle Effect in Photoshop

I further added some colour adjustments over the image, and you will have the following final effect: (click to enlarge)

dark tree snow scene flatten 467x700 Create a Surreal Burning Tree Scene with Falling Particle Effect in Photoshop

That’s it for this tutorial! Hope you enjoy it and find it useful! Till next time, have a great day!


VIP Exclusive Photoshop Tutorial – The Digital Painting of Natalie Portman

$
0
0

Welcome to another Exclusive Photoshop tutorial written specifically for the PSD Vault VIP Members! In this tutorial, we will explain the process involved in making this Digital Painting of Natalie Portman in Photoshop CS6. Hope you enjoy it :)

If you’re VIP member, you can log in to the VIP Members Area and click on Exclusive Tutorial button to download the tutorial. If you’re yet to become a VIP member, you can simply click on the banner below to signup:

vip sign up 250 VIP Exclusive Photoshop Tutorial   The Digital Painting of Natalie Portman

To find out more about PSD Vault VIP Membership, check out this video below:

Final Image Preview

(Click to Enlarge)

Natalie Final 500x372 VIP Exclusive Photoshop Tutorial   The Digital Painting of Natalie Portman

VIP Members Only Tutorial

This tutorial is written exclusively for PSD Vault VIP members by Mario Teodosio, who is a great Freelancer Artist specialised in digital painting and illustration from Italy.

Find Mario on Facebook

What You Will Learn

In this tutorial, author will demonstrate the creation process behind this digital painting of Natalie Portman in Photoshop CS6.

Tutorial Spotlights

Natalie1 500x373 VIP Exclusive Photoshop Tutorial   The Digital Painting of Natalie Portman

Natalie3 500x373 VIP Exclusive Photoshop Tutorial   The Digital Painting of Natalie Portman

Natalie6 500x405 VIP Exclusive Photoshop Tutorial   The Digital Painting of Natalie Portman

Interested? Log in to your VIP members area to download it now :)

Not a member yet? Click on the banner below to sign up now:

vip sign up 250 VIP Exclusive Photoshop Tutorial   The Digital Painting of Natalie Portman

To find out more about PSD Vault VIP Membership, check out this video below:

Hope you enjoy it and find it useful! Thank you for your support and have a nice day!

Manipulative Human Artwork with Particles and Flying Flower Petals in Photoshop

$
0
0

In this tutorial, I will show you the steps I took to Create this Manipulative Human Artwork with Particles and Flying Flower Petals in Photoshop. We will go through several techniques such as hair drawing, particle rendering from a stock image, and making a custom flower petals brush.

This is an intermediate level Photoshop tutorial so some steps can be tricky.

Note: The Photoshop tutorial is done in CS6 – therefore some screenshot may have slighting different layout as in the earlier version.

Here is a preview of the final effect I have for this tutorial: (click to enlarge)

grungy model flatten 2 494x700 Manipulative Human Artwork with Particles and Flying Flower Petals in Photoshop

PSD File Download

You can download the PSD File for this tutorial via the VIP Members Area for only $6.95/Month (or less)! You will not only get this PSD File, but also 100+ other PSD Files + Extra Goodies + Exclusive Photoshop tutorials there. Signup now and get exclusive :) Find out more about the VIP Members Areas

vip sign up 250 Manipulative Human Artwork with Particles and Flying Flower Petals in Photoshop

OK Let’s get started!

To complete this tutorial, you will need the following stocks:

Model by mjranum-stock

Metal Texture

Step 1

Create a new document 724px * 1024px with black background. We will prepare some ground texture first, so let’s load the Metal Texture into Photoshop and select a portion of it with the rectangular marquee tool:

1 sel 500x394 Manipulative Human Artwork with Particles and Flying Flower Petals in Photoshop

Copy and paste the selection over to our document, use the free transform tool to perspective this as shown below:

1 persp 500x286 Manipulative Human Artwork with Particles and Flying Flower Petals in Photoshop

Then, use a soft eraser to remove the edges of the texture to create some depth:

1 eraser 500x235 Manipulative Human Artwork with Particles and Flying Flower Petals in Photoshop

Add the following 3 adjustment layers as clipping mask to this texture layer:

Black and White

1 bw Manipulative Human Artwork with Particles and Flying Flower Petals in Photoshop

Levels

1 lv Manipulative Human Artwork with Particles and Flying Flower Petals in Photoshop

Layer mask on the levels adjustment layer:

1 lv mask 495x700 Manipulative Human Artwork with Particles and Flying Flower Petals in Photoshop

Curves

1 curves Manipulative Human Artwork with Particles and Flying Flower Petals in Photoshop

and you will have the following effect so far:

1 effect 500x249 Manipulative Human Artwork with Particles and Flying Flower Petals in Photoshop

Step 2

Load the model image into Photoshop, and cut out the model as shown below, resize and place it above our ground texture:

2 paste Manipulative Human Artwork with Particles and Flying Flower Petals in Photoshop

Tidy up the edges of the model with a soft eraser, as well as fade the lower body a bit so it blends into the background:

Hint: set the eraser tool’s flow and opacity to around 50% for a subtle effect.

2 erase Manipulative Human Artwork with Particles and Flying Flower Petals in Photoshop

Add a levels adjustment layer as clipping mask to this model layer:

2 lves Manipulative Human Artwork with Particles and Flying Flower Petals in Photoshop

Attach the following layer mask on this levels adjustment layer:

2 lvs 470x700 Manipulative Human Artwork with Particles and Flying Flower Petals in Photoshop

and here is the effect so far:

2 effect Manipulative Human Artwork with Particles and Flying Flower Petals in Photoshop

Step 3

The hair looks a bit boring in my opinion so I decided to draw some instead. Create a a new layer and draw a path with the Pen Tool:

3 stroke 500x310 Manipulative Human Artwork with Particles and Flying Flower Petals in Photoshop

Choose a 4px hard brush:

3 brush Manipulative Human Artwork with Particles and Flying Flower Petals in Photoshop

Go back to Pen Tool and Right-click on the Path, choose “Stroke Path”:

3 path 500x394 Manipulative Human Artwork with Particles and Flying Flower Petals in Photoshop

Stroke the path with this brush, and turn on “Simulate Pressure”:

3 stroke path setting 500x249 Manipulative Human Artwork with Particles and Flying Flower Petals in Photoshop

and you will have the following effect:

3 effect 500x251 Manipulative Human Artwork with Particles and Flying Flower Petals in Photoshop

I repeated this above steps many times and adjusted the shapes, size and colour of the hair, and I have the following effect as a result:

3 effect 2 500x345 Manipulative Human Artwork with Particles and Flying Flower Petals in Photoshop

This can be a lengthy process so be patient :) If you have difficulty with this step, check out this video tutorial I have on the PSDVault Youtube Channel:

Step 4

We can now paint or render some cloud over the background with either a cloud brush, or cloud filter, make sure you adjust the layer opacity to a low value to ensure we only have a subtle effect:

4 cloud Manipulative Human Artwork with Particles and Flying Flower Petals in Photoshop

We can add some particles around the model – once again we utilise the metal texture and select a piece from it:

4 sel 500x473 Manipulative Human Artwork with Particles and Flying Flower Petals in Photoshop

Copy and paste the selection over to our document and place the layer below the model layer, add the following 2 adjustment layers as clipping mask to it:

Black and White

4 bw Manipulative Human Artwork with Particles and Flying Flower Petals in Photoshop

Levels

4 lv Manipulative Human Artwork with Particles and Flying Flower Petals in Photoshop

Warp this particle layer so it forms a flying shape:

4 warp 500x370 Manipulative Human Artwork with Particles and Flying Flower Petals in Photoshop

and here is the effect you will have:

4 effect Manipulative Human Artwork with Particles and Flying Flower Petals in Photoshop

Repeat the above steps and add some flying particles to the right hand side as well:

4 rotate 500x372 Manipulative Human Artwork with Particles and Flying Flower Petals in Photoshop

Step 5

OK we can now make a new brushset for painting the flying flower petals, create a new document (size doesn’t really matter), create a new layer and paint a single dot:

5 paint Manipulative Human Artwork with Particles and Flying Flower Petals in Photoshop

Warp this dot into a petal shape with the warp tool:

5 warp 500x383 Manipulative Human Artwork with Particles and Flying Flower Petals in Photoshop

Then hide the background layer, go to Image > Trim and trim out the transparent pixels, then go to Edit > Define brush preset:

5 define brush 500x536 Manipulative Human Artwork with Particles and Flying Flower Petals in Photoshop

Give the brush a name, and go the brushes windows and apply the following settings:

5 shape dynamics Manipulative Human Artwork with Particles and Flying Flower Petals in Photoshop

5 scattering Manipulative Human Artwork with Particles and Flying Flower Petals in Photoshop

5 transfer Manipulative Human Artwork with Particles and Flying Flower Petals in Photoshop

Use this brush to paint the flower petals according to the flying Hair path:

5 paint flower 500x440 Manipulative Human Artwork with Particles and Flying Flower Petals in Photoshop

and you will have the following effect so far:

5 effect 491x700 Manipulative Human Artwork with Particles and Flying Flower Petals in Photoshop

I further added some colour adjustments over the image, and you will have the following final effect: (click to enlarge)

grungy model flatten 2 494x700 Manipulative Human Artwork with Particles and Flying Flower Petals in Photoshop

That’s it for this tutorial! Hope you enjoy it and find it useful! Till next time, have a great day!

Create a Tangled, Horror Cracked Figure with Layer Masking Techniques in Photoshop

$
0
0

In this tutorial, I will show you the steps I took to Create a Horror Cracked Human Figure with Layer Masking Techniques in Photoshop. The primary goal of this tutorial is to show you how you can blend textures together with layer mask, and how to achieve the best end result possible.

We will also go through other skills such as image adjustments, layer blending, selection tools and some simple photo retouches.

This is an intermediate level Photoshop tutorial so some steps can be tricky.

Note: The Photoshop tutorial is done in CS6 – therefore some screenshot may have slighting different layout as in the earlier version.

Here is a preview of the final effect I have for this tutorial: (click to enlarge)

crack model flatten 2 500x618 Create a Tangled, Horror Cracked Figure with Layer Masking Techniques in Photoshop

PSD File Download

You can download the PSD File for this tutorial via the VIP Members Area for only $6.95/Month (or less)! You will not only get this PSD File, but also 100+ other PSD Files + Extra Goodies + Exclusive Photoshop tutorials there. Signup now and get exclusive :) Find out more about the VIP Members Areas

vip sign up 250 Create a Tangled, Horror Cracked Figure with Layer Masking Techniques in Photoshop

OK Let’s get started!

To complete this tutorial, you will need the following stocks:

Model by mousiestock

Metal Background Texture

Crack Texture

Tree Roots Stock

Step 1

Load the Metal background image into Photoshop – we will use it as our canvas. Duplicate the background layer and apply the following unsharp mask filter to it in order to bring out a bit more details:

1 unsharp 500x353 Create a Tangled, Horror Cracked Figure with Layer Masking Techniques in Photoshop

Add the following 2 image adjustment layers to this background layer:

Levels

1 prop Create a Tangled, Horror Cracked Figure with Layer Masking Techniques in Photoshop

Layer mask on the levels adjustment layer:

1 mask 500x620 Create a Tangled, Horror Cracked Figure with Layer Masking Techniques in Photoshop

Curves

1 curves1 Create a Tangled, Horror Cracked Figure with Layer Masking Techniques in Photoshop

and here is the effect so far:

1 effect1 500x620 Create a Tangled, Horror Cracked Figure with Layer Masking Techniques in Photoshop

Step 2

Load the model image into Photoshop and cut of the model from its background, paste it onto our document. Resize and position it to the centre of the canvas:

2 paste1 500x540 Create a Tangled, Horror Cracked Figure with Layer Masking Techniques in Photoshop

Then use the spot healing tool to clean out some dark spots as shown below:

2 spot healing Create a Tangled, Horror Cracked Figure with Layer Masking Techniques in Photoshop

2 spot 500x355 Create a Tangled, Horror Cracked Figure with Layer Masking Techniques in Photoshop

2 spot 2 500x266 Create a Tangled, Horror Cracked Figure with Layer Masking Techniques in Photoshop

Use a soft erase tool to fade the edges of the model so it blends into the background:

2 fade 500x477 Create a Tangled, Horror Cracked Figure with Layer Masking Techniques in Photoshop

Step 3

We can add the following 2 image adjustment layers this model layer as clipping mask:

Levels

3 levels Create a Tangled, Horror Cracked Figure with Layer Masking Techniques in Photoshop

Curves

3 curves Create a Tangled, Horror Cracked Figure with Layer Masking Techniques in Photoshop

and here is the effect so far:

3 effect1 500x635 Create a Tangled, Horror Cracked Figure with Layer Masking Techniques in Photoshop

Step 4

We can now add the crack texture onto the model – load the crack image into Photoshop and use the Lasso Tool to select a portion of texture:

4 lasso 500x429 Create a Tangled, Horror Cracked Figure with Layer Masking Techniques in Photoshop

Copy and paste the selection onto our document and set it as a clipping mask to the layer below, use a soft eraser  (set flow and opacity to around 60%) to remove some parts of the texture as shown below:

Hint: this effect can be a bit tricky achieve, you should try adjust the flow and opacity of the eraser tool as you see it, until parts of the body is reveal and not covered by cracks.

4 erase 500x545 Create a Tangled, Horror Cracked Figure with Layer Masking Techniques in Photoshop

Again we add the following 2 adjustment layer as clipping mask for this cracked texture layer:

Black and White

4 bw1 Create a Tangled, Horror Cracked Figure with Layer Masking Techniques in Photoshop

Levels

4 lvs Create a Tangled, Horror Cracked Figure with Layer Masking Techniques in Photoshop

and you will have the following effect so far:

4 effect1 471x700 Create a Tangled, Horror Cracked Figure with Layer Masking Techniques in Photoshop

Step 5

We will add some further crack texture around the model, so go back to the cracked image and select another piece of it, copy and paste the selection over onto our document, de-saturate its colour:

5 paste 500x580 Create a Tangled, Horror Cracked Figure with Layer Masking Techniques in Photoshop

I applied the following layer mask to this new cracked texture layer to hide some of it:

5 mask 500x568 Create a Tangled, Horror Cracked Figure with Layer Masking Techniques in Photoshop

Add the following 2 adjustment layers to this new crack layer as clipping mask:

Levels

5 lvs Create a Tangled, Horror Cracked Figure with Layer Masking Techniques in Photoshop

Curves

5 curves Create a Tangled, Horror Cracked Figure with Layer Masking Techniques in Photoshop

and you will have the following effect so far:

5 effect1 500x589 Create a Tangled, Horror Cracked Figure with Layer Masking Techniques in Photoshop

Reduce the layer opacity of the new cracked texture slightly down to around 90% for a subtle effect:

5 effect 2 500x670 Create a Tangled, Horror Cracked Figure with Layer Masking Techniques in Photoshop

Step 6

I decided to add something under the model for some extra effect. So I loaded the tree root image into Photoshop and select a piece of the roots with the quick selection tool:

6 roots Create a Tangled, Horror Cracked Figure with Layer Masking Techniques in Photoshop

Copy and paste the selection onto our document, resize and place it under the body, add the following layer mask to it to soften its edges:

6 mask Create a Tangled, Horror Cracked Figure with Layer Masking Techniques in Photoshop

Add the following 2 adjustment layers as clipping mask to this root layer:

Black and white

6 bw Create a Tangled, Horror Cracked Figure with Layer Masking Techniques in Photoshop

Levels

6 lvs Create a Tangled, Horror Cracked Figure with Layer Masking Techniques in Photoshop

and you will have the following effect so far:

6 effect 500x273 Create a Tangled, Horror Cracked Figure with Layer Masking Techniques in Photoshop

Step 7

We’re almost done! For some final touches, I rendered some cloud down the bottom of the canvas:

7 cloud 500x282 Create a Tangled, Horror Cracked Figure with Layer Masking Techniques in Photoshop

I also used the brush created in Step 5 of this tutorial to added a few leaves around the model:

7 leaves 500x541 Create a Tangled, Horror Cracked Figure with Layer Masking Techniques in Photoshop

I also used a 2px hard brush to paint some lines around the model for some dramatised tangling effect:

7 effect 500x622 Create a Tangled, Horror Cracked Figure with Layer Masking Techniques in Photoshop

I further added some colour adjustments over the image, and you will have the following final effect: (click to enlarge)

crack model flatten 2 500x618 Create a Tangled, Horror Cracked Figure with Layer Masking Techniques in Photoshop

That’s it for this tutorial! Hope you enjoy it and find it useful! Till next time, have a great day!

Design Vintage Artwork with Old Newspaper and Watercolor Brush in Photoshop

$
0
0

In this tutorial, I will show you the steps I took to Design this Watercolour Vintage Artwork with Old Newspaper in Photoshop.

Along the way, I will show you how to mix custom watercolour brushes and old newspaper to create vintage feel in Photoshop. This is an intermediate level Photoshop tutorial so some steps can be tricky – if you think you’re up to the challenge, please go ahead :)

The inspiration of this tutorial comes from one the artwork displayed in this post on Abduzeedo.

Note: The Photoshop tutorial is done in CS6 – therefore some screenshot may have slighting different layout as in the earlier version.

Here is a preview of the final effect I have for this tutorial: (click to enlarge)

watercolor newspaper model1 480x700 Design Vintage Artwork with Old Newspaper and Watercolor Brush in Photoshop

PSD File Download

You can download the PSD File for this tutorial via the VIP Members Area for only $6.95/Month (or less)! You will not only get this PSD File, but also 100+ other PSD Files + Extra Goodies + Exclusive Photoshop tutorials there. Signup now and get exclusive :) Find out more about the VIP Members Areas

vip sign up 250 Design Vintage Artwork with Old Newspaper and Watercolor Brush in Photoshop

OK Let’s get started!

To complete this tutorial, you will need the following stocks:

Watercolour Brushes (choose one from the list)

Paper Texture

Model

Newspaper

Step 1

Create a new document sized 700px * 1020px with white background, use the watercolour brush you download, paint some texture over the background:

Hint: set brush flow and opacity to around 40% for a subtle effect.

1 paint 478x700 Design Vintage Artwork with Old Newspaper and Watercolor Brush in Photoshop

Load the paper texture into Photoshop, select a portion as shown below:

1 sel2 500x677 Design Vintage Artwork with Old Newspaper and Watercolor Brush in Photoshop

Copy and paste the selection over our document, set blending mode to “overlay” for this new layer:

1 overlay 475x700 Design Vintage Artwork with Old Newspaper and Watercolor Brush in Photoshop

Add the following 2 adjustment layers on top:

Levels

1 lv1 Design Vintage Artwork with Old Newspaper and Watercolor Brush in Photoshop

Curves

1 curves2 Design Vintage Artwork with Old Newspaper and Watercolor Brush in Photoshop

and you will have the following effect so far:

1 effect3 476x700 Design Vintage Artwork with Old Newspaper and Watercolor Brush in Photoshop

Step 2

Load the model image into Photoshop, cut out the model and place it to the position shown below:

2 paste2 433x700 Design Vintage Artwork with Old Newspaper and Watercolor Brush in Photoshop

Apply the following Watercolour Filter to this new layer:

2 water 500x380 Design Vintage Artwork with Old Newspaper and Watercolor Brush in Photoshop

Add a layer mask to this model layer, and use the watercolour brush as eraser to remove some parts of the model, as shown below:

2 erase1 500x441 Design Vintage Artwork with Old Newspaper and Watercolor Brush in Photoshop

Apply the following “Reduce Noise” filter to this model layer (Filter > Noise > Reduce Noise):

2 reduce noise Design Vintage Artwork with Old Newspaper and Watercolor Brush in Photoshop

and you will have the following effect so far:

2 effect2 454x700 Design Vintage Artwork with Old Newspaper and Watercolor Brush in Photoshop

Step 3

Add the following adjustment layers as clipping mask to this model layer:

Black and White

3 bw Design Vintage Artwork with Old Newspaper and Watercolor Brush in Photoshop

Layer mask on black and white adjustment layer:

3 bw mask 500x630 Design Vintage Artwork with Old Newspaper and Watercolor Brush in Photoshop

Levels

3 lv Design Vintage Artwork with Old Newspaper and Watercolor Brush in Photoshop

Layer mask on levels adjustment layer:

3 lv mask 475x700 Design Vintage Artwork with Old Newspaper and Watercolor Brush in Photoshop

Curves

3 cuves Design Vintage Artwork with Old Newspaper and Watercolor Brush in Photoshop

and you will have the following effect so far:

3 effect2 472x700 Design Vintage Artwork with Old Newspaper and Watercolor Brush in Photoshop

Step 4

Load the Newspaper image into Photoshop, use Lasso Tool with a 10px feather to select a portion of it:

4 sel1 Design Vintage Artwork with Old Newspaper and Watercolor Brush in Photoshop

Copy and paste the selection below the model layer, duplicate this layer a few times, rotate and resize them, then place them around the model as shown below:

4 paste 500x572 Design Vintage Artwork with Old Newspaper and Watercolor Brush in Photoshop

Also place a copy above the model layer to the position shown below:

4 paste 2 500x318 Design Vintage Artwork with Old Newspaper and Watercolor Brush in Photoshop

Use a soft eraser to remove the edge of the newspaper texture to fade it into the background:

4 erase1 500x295 Design Vintage Artwork with Old Newspaper and Watercolor Brush in Photoshop

Paint some more watercolour texture on the model as shown below:

4 paint 500x262 Design Vintage Artwork with Old Newspaper and Watercolor Brush in Photoshop

I further adjusted the colour balance a bit to give it a bit of old paper feel, and here is my final effect:

watercolor newspaper model1 480x700 Design Vintage Artwork with Old Newspaper and Watercolor Brush in Photoshop

That’s it for this tutorial! Hope you enjoy it and find it useful! Till next time, have a great day!

Freestyle Human Portrait Manipulation in Photoshop with Brush Painting and Layer Masking

$
0
0

In this tutorial, I will show you the steps I took to create this Freestyle Human Portrait Manipulation in Photoshop with Brush Painting and Layer Masking. We will show you how you can apply brush painting and layer masking techniques to create unique and interesting effect for your portrait manipulation.

Note: The Photoshop tutorial is done in CS6 – therefore some screenshot may have slighting different layout as in the earlier version. Some brushes are exclusive to Photoshop CS6.

Here is a preview of the final effect I have for this tutorial: (click to enlarge)

freestyle debris portrait flatten 3 500x500 Freestyle Human Portrait Manipulation in Photoshop with Brush Painting and Layer Masking

PSD File Download

You can download the PSD File for this tutorial via the VIP Members Area for only $6.95/Month (or less)! You will not only get this PSD File, but also 100+ other PSD Files + Extra Goodies + Exclusive Photoshop tutorials there. Signup now and get exclusive :) Find out more about the VIP Members Areas

vip sign up 250 Freestyle Human Portrait Manipulation in Photoshop with Brush Painting and Layer Masking

OK Let’s get started!

To complete this tutorial, you will need the following stocks:

Model

Debris Brush

Stone Wall Texture

Step 1

Create a new document sized 1000px * 1000px with white background. Load the stone wall texture into Photoshop and select a portion as shown below:

1 sel 500x491 Freestyle Human Portrait Manipulation in Photoshop with Brush Painting and Layer Masking

Copy and paste the selection onto our document, resize it to fix the document size:

1 paste 500x495 Freestyle Human Portrait Manipulation in Photoshop with Brush Painting and Layer Masking

Use a soft eraser with 50% flow and opacity, erase the following portions of this texture layer:

1 mask 500x494 Freestyle Human Portrait Manipulation in Photoshop with Brush Painting and Layer Masking

Add the following 3 adjustment layers on top of this texture layer:

Black and White

1 bw1 Freestyle Human Portrait Manipulation in Photoshop with Brush Painting and Layer Masking

Levels

1 lvs1 Freestyle Human Portrait Manipulation in Photoshop with Brush Painting and Layer Masking

Curves

1 curves Freestyle Human Portrait Manipulation in Photoshop with Brush Painting and Layer Masking

and here is the effect so far:

1 effect1 500x491 Freestyle Human Portrait Manipulation in Photoshop with Brush Painting and Layer Masking

Step 2

Load the model image into Photoshop and cut the model out, paste it onto our document. Resize and position it as shown below:

2 paste 500x504 Freestyle Human Portrait Manipulation in Photoshop with Brush Painting and Layer Masking

Apply the following Surface Blur filter to this model layer:

2 surface blur Freestyle Human Portrait Manipulation in Photoshop with Brush Painting and Layer Masking

Use a combination of soft and hard brush, as well as the debris brush, apply the following layer mask on this model layer:

2 mask 500x483 Freestyle Human Portrait Manipulation in Photoshop with Brush Painting and Layer Masking

and here is the effect so far:

2 effect 500x573 Freestyle Human Portrait Manipulation in Photoshop with Brush Painting and Layer Masking

Step 3

Add the following 3 adjustment layers as clipping masks to the model layer:

Black and White

3 bw Freestyle Human Portrait Manipulation in Photoshop with Brush Painting and Layer Masking

Layer mask on the black and white adjustment  layer:

3 bw mask 500x521 Freestyle Human Portrait Manipulation in Photoshop with Brush Painting and Layer Masking

Levels

3 lvs Freestyle Human Portrait Manipulation in Photoshop with Brush Painting and Layer Masking

Layer mask on this Levels adjustment layer:

3 lv mask 500x621 Freestyle Human Portrait Manipulation in Photoshop with Brush Painting and Layer Masking

Curves

3 curves Freestyle Human Portrait Manipulation in Photoshop with Brush Painting and Layer Masking

and here is the effect so far:

3 effect1 500x535 Freestyle Human Portrait Manipulation in Photoshop with Brush Painting and Layer Masking

Step 4

This is the fun part of this tutorial :) Let’s grab this “Round Fan Stiff Thin Bristles” brush, make sure you set the brush setting according to the screenshot below (click to enlarge):

4 brush 500x181 Freestyle Human Portrait Manipulation in Photoshop with Brush Painting and Layer Masking

Use this brush to paint some pattern on a new layer, to the area shown below:

4 paint 2 500x465 Freestyle Human Portrait Manipulation in Photoshop with Brush Painting and Layer Masking

4 paint1 500x275 Freestyle Human Portrait Manipulation in Photoshop with Brush Painting and Layer Masking

We can also grab this “Round Paint Stiff” brush and paint something on a new layer:

4 brush 2 500x229 Freestyle Human Portrait Manipulation in Photoshop with Brush Painting and Layer Masking

Use the liquify filter to warp this painting so it forms a flowing pattern:

4 liquify filter 500x323 Freestyle Human Portrait Manipulation in Photoshop with Brush Painting and Layer Masking

Attach this to the right eye as shown below:

4 after liq 500x368 Freestyle Human Portrait Manipulation in Photoshop with Brush Painting and Layer Masking

Step 5

I decided to have a play with the hair area and add some effect to it. So I used the Quick Selection Tool with a 10px size setting:

5 quick Freestyle Human Portrait Manipulation in Photoshop with Brush Painting and Layer Masking

Draw a selection of the hair area:

5 quick sel 500x369 Freestyle Human Portrait Manipulation in Photoshop with Brush Painting and Layer Masking

Fill the selection with white colour and use a soft eraser to remove the top portion of this fill, as shown below:

5 fill 500x409 Freestyle Human Portrait Manipulation in Photoshop with Brush Painting and Layer Masking

Change the blending mode to “Overlay”, slightly reduce the layer opacity to around 90%:

5 overlay 500x393 Freestyle Human Portrait Manipulation in Photoshop with Brush Painting and Layer Masking

Duplicate this layer once and keep its blending mode as “Overlay”, move it down a bit to the forehead area:

5 dup 500x219 Freestyle Human Portrait Manipulation in Photoshop with Brush Painting and Layer Masking

Step 6

Ok we’re almost done. For some final touches, I painted some particles aroudn the model with the debris brush we downloaded earlier (make sure you reduce the brush size before you paint):

6 debris 500x487 Freestyle Human Portrait Manipulation in Photoshop with Brush Painting and Layer Masking

To add some more colour into the image, I added a Vibrance adjustment layer with the following settings:

6 vib Freestyle Human Portrait Manipulation in Photoshop with Brush Painting and Layer Masking

and here is my final effect: (click to enlarge)

freestyle debris portrait flatten 3 500x500 Freestyle Human Portrait Manipulation in Photoshop with Brush Painting and Layer Masking

That’s it for this tutorial! Hope you enjoy it and find it useful! Till next time, have a great day!

Viewing all 248 articles
Browse latest View live


Latest Images