In this tutorial, I will show you the steps I took to Create a Surreal Burning Tree Scene with Falling Particle Effect in Photoshop. We will be using some of the new brush presets in Photoshop CS6 and use them to add the fire burning effect and the falling particle effect.
This is an intermediate level Photoshop tutorial so some steps can be tricky.
Note: The Photoshop tutorial is done in CS6 – therefore some screenshot may have slighting different layout as in the earlier version.
Here is a preview of the final effect I have for this tutorial: (click to enlarge)
Image may be NSFW.
Clik here to view.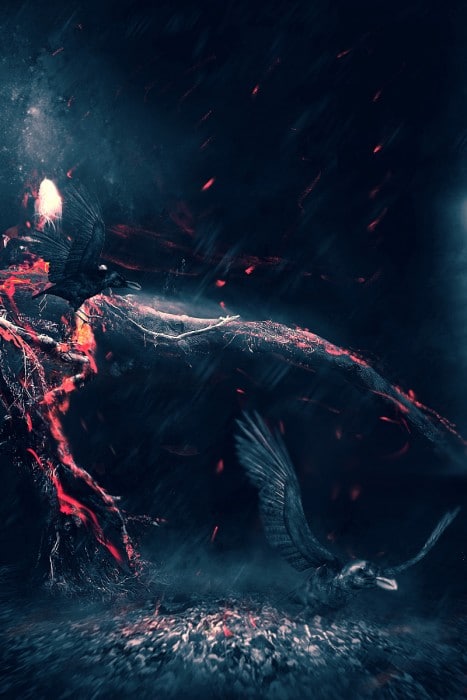
PSD File Download
You can download the PSD File for this tutorial via the VIP Members Area for only $6.95/Month (or less)! You will not only get this PSD File, but also 100+ other PSD Files + Extra Goodies + Exclusive Photoshop tutorials there. Signup now and get exclusive :) Find out more about the VIP Members Areas
Image may be NSFW.
Clik here to view.
OK Let’s get started!
To complete this tutorial, you will need the following stocks:
Step 1
Create a new document sized 800px * 1197px with black background. Use either the cloud filter or a cloud brush to paint some subtle cloud texture over on the background layer:
Image may be NSFW.
Clik here to view.
Load the Tree stock image into Photoshop and select a portion of the ground, copy and paste the selection over to our document, use the free transform tool to add some perspectives on this ground texture, also erase the top edge with a soft eraser:
Image may be NSFW.
Clik here to view.
Add the following 3 adjustment layer as clipping mask to this ground texture layer:
Black and White
Image may be NSFW.
Clik here to view.
Levels
Image may be NSFW.
Clik here to view.
Curves
Image may be NSFW.
Clik here to view.
and here is the effect so far:
Image may be NSFW.
Clik here to view.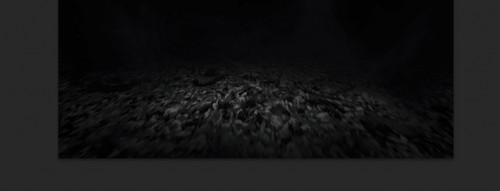
Add some cloud effect above the ground for some dramatic effect:
Image may be NSFW.
Clik here to view.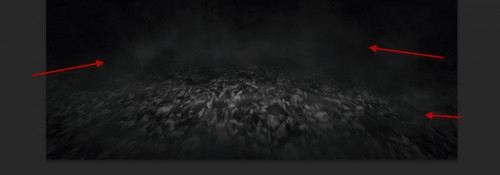
Step 2
We will now add the tree into the image. Use whatever selection tool to make a rough selection on the tree image, and cut out the centre portion of that image:
Image may be NSFW.
Clik here to view.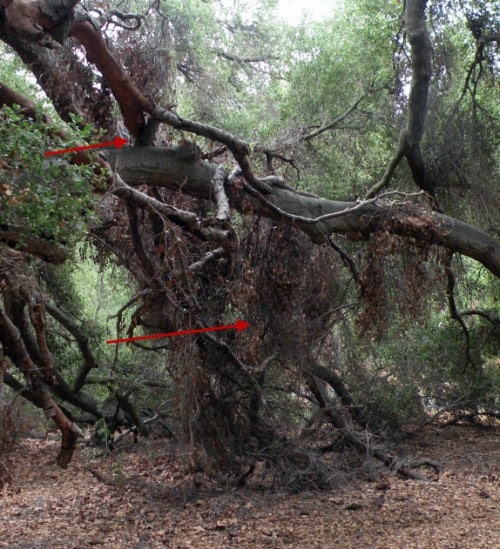
Paste the selection onto the image, position it as shown below:
Image may be NSFW.
Clik here to view.
We will get rid of some parts of the tree by applying the following layer mask:
Image may be NSFW.
Clik here to view.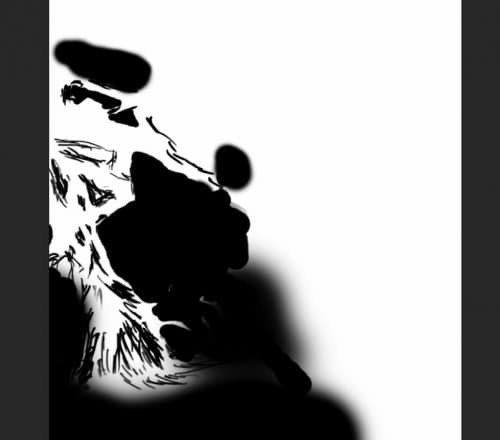
and here is the effect after the layer mask:
Image may be NSFW.
Clik here to view.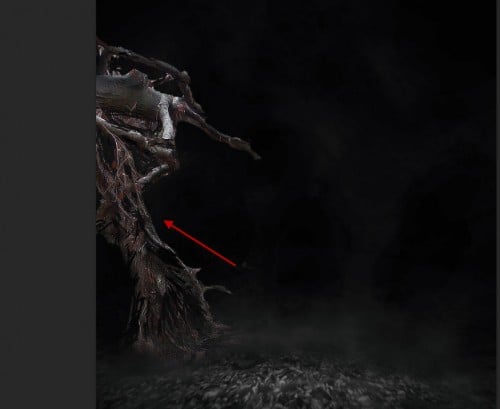
Add the following 2 adjustment layers as clipping mask to this tree layer:
Black and White
Image may be NSFW.
Clik here to view.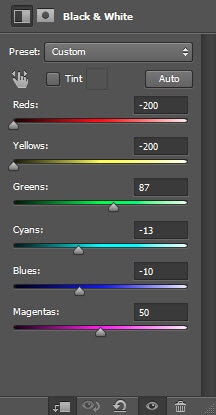
Levels
Image may be NSFW.
Clik here to view.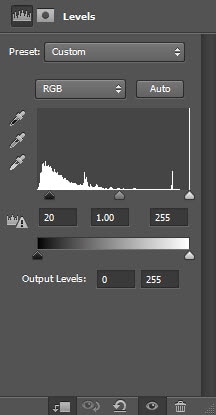
and here is the effect so far:
Image may be NSFW.
Clik here to view.
Step 3
We will add another branch into the image – so let’s select this part of the image:
Image may be NSFW.
Clik here to view.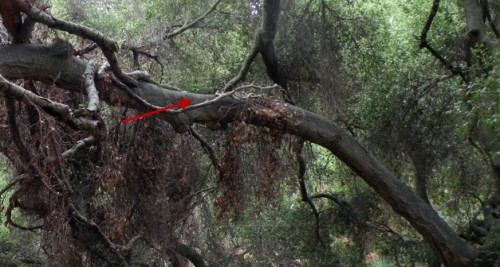
Copy and paste the selection onto our document:
Image may be NSFW.
Clik here to view.
Again we add a layer mask to hide some parts of this branch:
Image may be NSFW.
Clik here to view.
Add the following 2 adjustment layers as clipping mask to this branch:
Black and White
Image may be NSFW.
Clik here to view.
Levels
Image may be NSFW.
Clik here to view.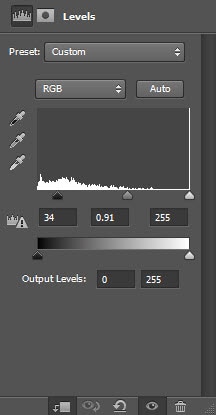
and you will have the following effect:
Image may be NSFW.
Clik here to view.
Step 4
We will now add the lady figure into the image. Load the model stock image into Photoshop and cut out the model, paste it onto our image and place it to the position as shown below:
Image may be NSFW.
Clik here to view.
Add the following 2 adjustment layers as clipping mask to this model:
Black and White
Image may be NSFW.
Clik here to view.
Levels
Image may be NSFW.
Clik here to view.
Create a new layer and set its blending mode to overlay, use a soft white brush to paint some highlights to this model:
Image may be NSFW.
Clik here to view.
and here is the effect so far:
Image may be NSFW.
Clik here to view.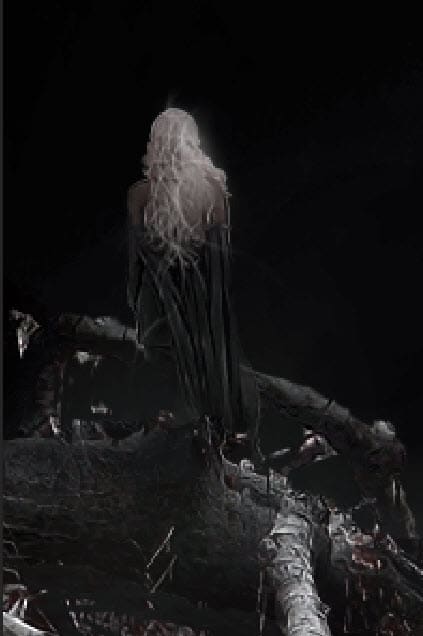
Step 5
OK we will get to the fun part of this tut :) Choose the following brush from brush palette (note: this brush is new to CS6, if you don’t have CS6, use alternative similar brush) and pick an dark orange colour:
Image may be NSFW.
Clik here to view.
Set the brush flow and opacity to around 50%, use the brush to paint some fire texture over the tree texture:
Hint: use a soft eraser to remove unnecessary painting off.
Image may be NSFW.
Clik here to view.
We can also add some real fire texture over the image by copy and paste from the fire stock image we downloaded:
Image may be NSFW.
Clik here to view.
Choose this Round Point Stiff brush from the panel, paint some falling fire particles with it:
Image may be NSFW.
Clik here to view.
Image may be NSFW.
Clik here to view.
Step 6
We will add some falling particles to the image – again we use the round point stiff brush to paint some particles around the image:
Image may be NSFW.
Clik here to view.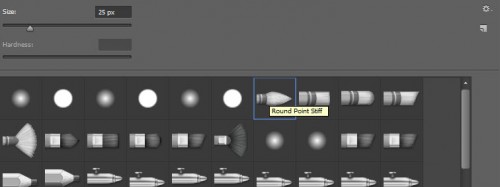
Then we can apply the following motion blur filter effect to this particle layer:
Image may be NSFW.
Clik here to view.
And you will see the following falling effect on the particles:
Image may be NSFW.
Clik here to view.
Image may be NSFW.
Clik here to view.
Step 7
We’re almost done :) For some final retouches, we will add some sky textures over the top of the image:
Image may be NSFW.
Clik here to view.
Load the crow image into Photoshop and add a pair of crows into the image, as shown below:
Image may be NSFW.
Clik here to view.
Use the blur tool to blur out some parts of the wings to add some motion to the flying creature:
Image may be NSFW.
Clik here to view.
Image may be NSFW.
Clik here to view.
I further added some colour adjustments over the image, and you will have the following final effect: (click to enlarge)
Image may be NSFW.
Clik here to view.
That’s it for this tutorial! Hope you enjoy it and find it useful! Till next time, have a great day!