Learn how to create this beautiful photo manipulation of appearance of a mysterious angel in Photoshop. In this tutorial, you’ll learn how to create amazing atmosphere with realistic effects and a unique effect for the angel. We will study the limitless possibilities of adjustment layers and blending modes. Create effects, use a lot of interesting tricks and techniques, tools and much more!
The PSD file of this tutorial is available to buy on PSD Vault Shop, or via the PSD Vault VIP members area.
![]()
This Photoshop tutorial is written exclusively for PSD Vault by Digital Artist Maria Semelevich.
What you’ll be creating
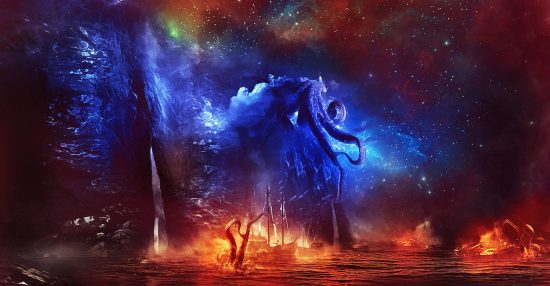
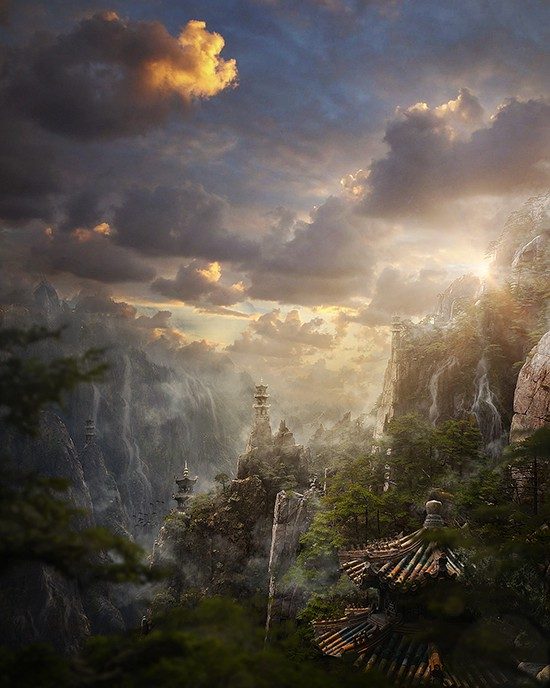
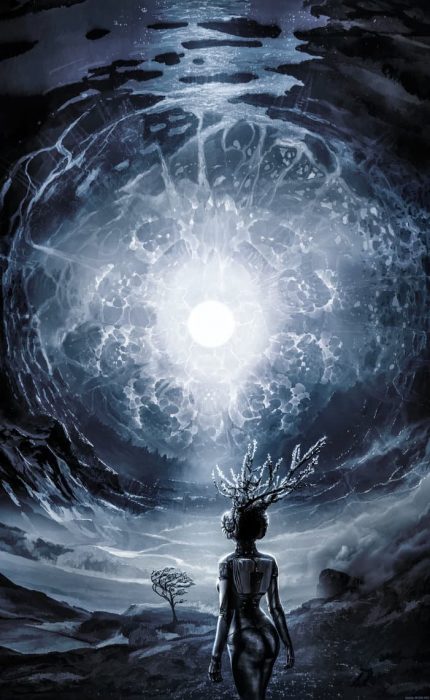
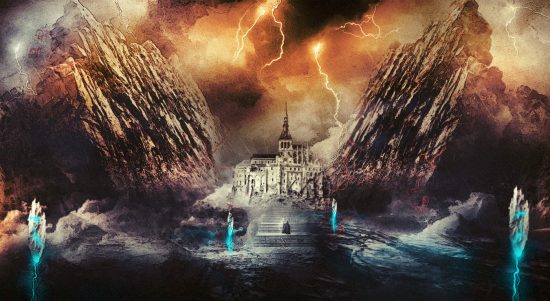
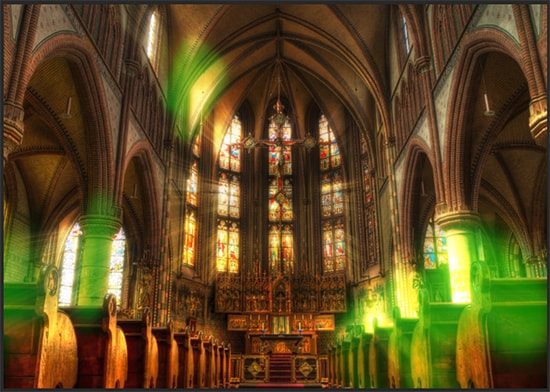
I really wanted to convey the mood of magic and tranquility. The most interesting thing about this angel is that I tried to make it transparent, but also visible at the same time. I’ll start tutorial by creating a background, color correction, image toning, adding sun rays and glowing candles. Then we will compose the image of the angel from the resources. We will work with layer masks and adjustment layers, Next, we will apply various techniques and blending modes to create the effect of levitation and transparency. We complete the image of an angel with smoke and color effects. Then harmoniously integrate the result into the finished composition. The final step will be to add special effects and sharpening. All that you need in this tutorial is good mood, free mind, inspiration, and Photoshop starting from CS version. I use Photoshop CC 2017.0.1
Final Result Preview
![]()
PSD Vault VIP Membership
You can download the PSD File for this tutorial via the VIP Members Area for only $6.95/Month (or less)! You will not only get this PSD File, but also 200+ other PSD Files + Extra Goodies + Exclusive Photoshop tutorials there. Signup now and get exclusive!

Tutorial Resources
Step 1
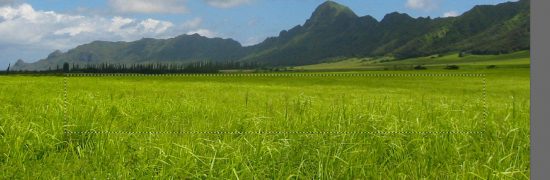
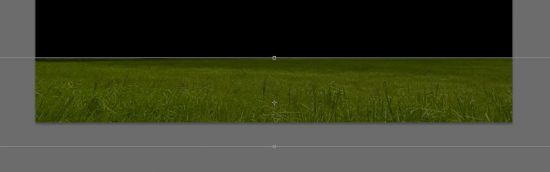
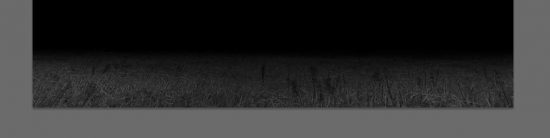
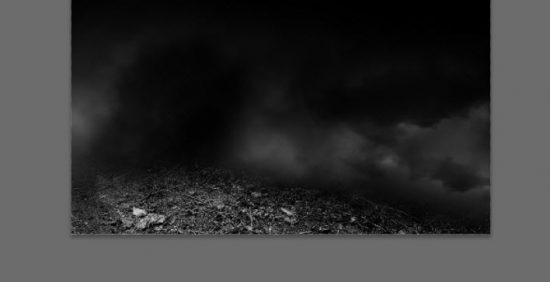
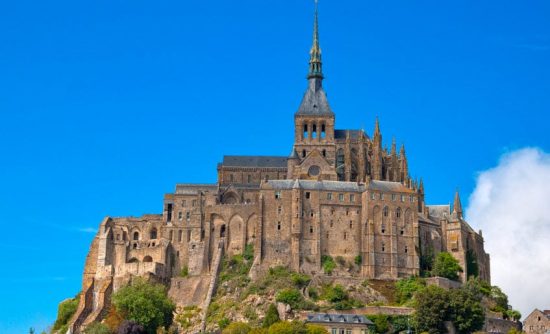
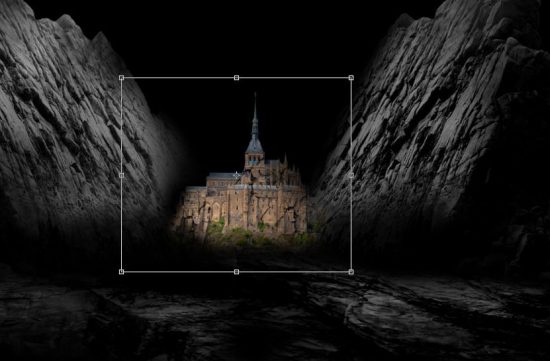
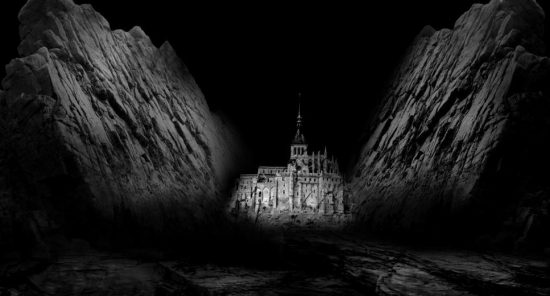
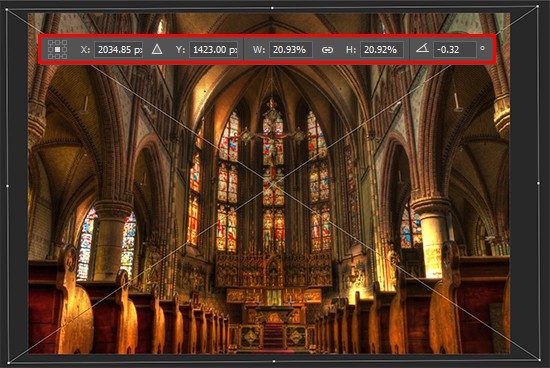
Before you start, I strongly recommend to you download all the resources in a convenient place and in the best quality! Go to File > New… or use Cmd/Ctrl + N to create a new document and use the following settings: Width: 4000px, Height: 2828px, resolution 300ppi, Background Contents: Black. Our background is only one image, so use File > Place/ Place Embedded… or just drag and drop “church-498525” image into working document. In Free Transform mode (Cmd/Ctrl + T or Edit > Free Transform) scale image proportionally to around 20.92% for horizontal and vertical scale, Rotate on -0.32 degrees and apply changes.
![]()
Step 2
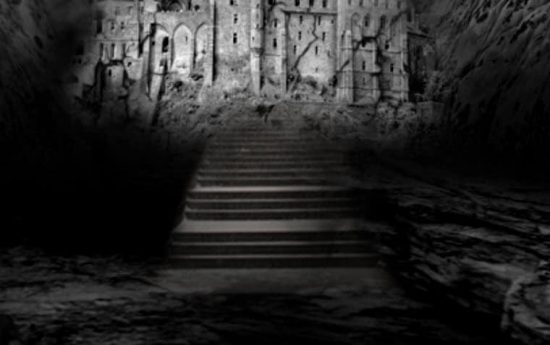
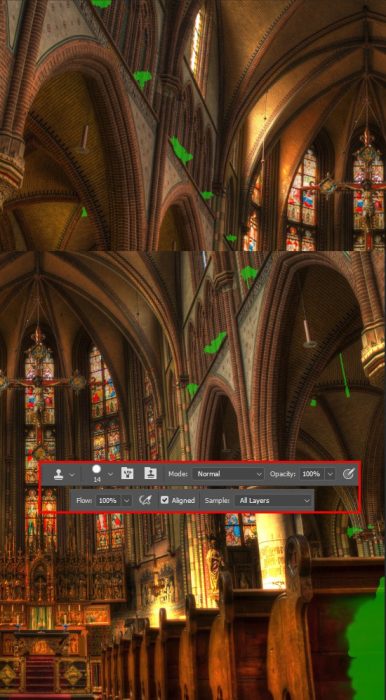
I did not like the lighting equipment in the church, so I remove it. Take Clone Stamp Tool (S) with Hard Round brush preset and set following settings: Size: 10 – 70px Opacity: 100%, Sample: All layers. You can use “Rotate the clone source” option from Clone Source panel (Window > Clone Source) to more accurately apply the correction. Be attentive and careful! Use appropriate sources to clone the texture, follow the architectural style and do not forget to create a new layer for each item or several brush strokes. When you’re done with it, select all created layers and merge it (Cmd/Ctrl + E or Right click > Merge Layers).
![]()
Step 3
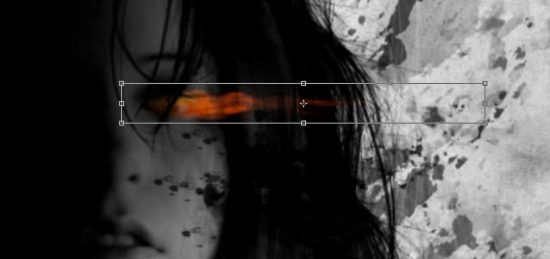
To create a more magical atmosphere, I created rays of light from the stained glass in the temple. For this, go to Select > Color Range… In the window that appears I choice Select mode “Highlights” and set Fuzziness: 20%, Range: 190. It is very important to find the right combination of values so as less as possible is unnecessary appear in the selection. Select a layer with the temple and use Cmd/Ctrl + J to separate content on a new layer. Duplicate this layer three times and change Blending Mode for all four layers to “Linear Dodge (Add)”. Group layers, by using Cmd/Ctrl + G or go to Layer > Group layers and set same Blending Mode.
![]()
Step 4
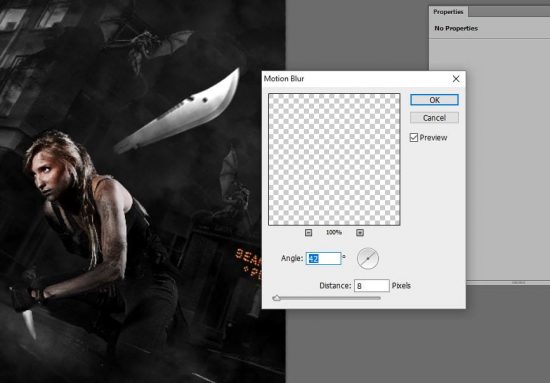
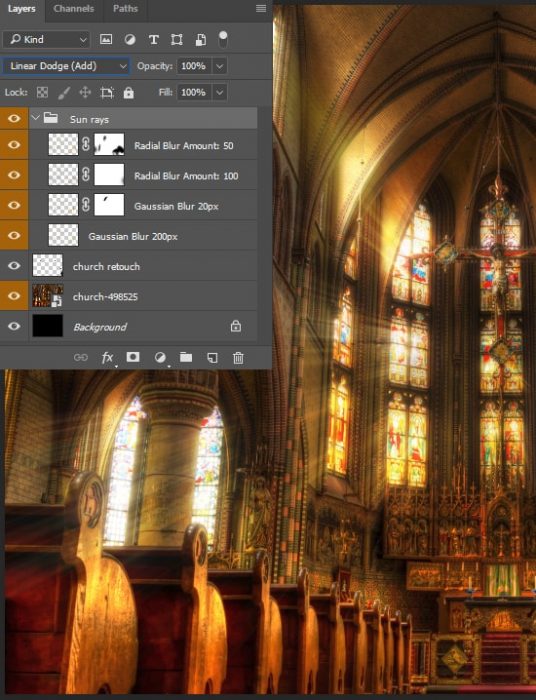
Now we need to add a blur to get the shine from the stained glass and the rays. I used two filters “Gaussian Blur” and “Radial Blur” from Filter > Blur. Apply the following filters with settings, starting with the bottom glass layer.
- “Gaussian Blur” filter with Radius: 200px;
- “Gaussian Blur” filter with Radius: 20px;
- “Radial Blur” filter with Amount: 100, Blur Method: Zoom, Quality: Best;
- “Radial Blur” filter with Amount: 50, Blur Method: Zoom, Quality: Best. Layer Opacity: 50%
It should look something like shown in the image below. Do not be afraid to experiment and use other settings or blending modes and their combinations. It is important to use the original colors of the image, rather than light gray or white, because this is stained glass, also texture is more gently combined with the environment, which helps achieve greater realism.
![]()
Step 5
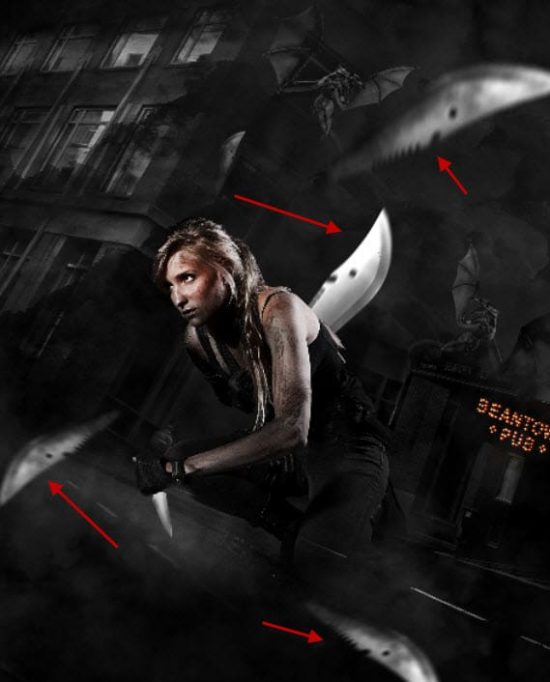
Use Eraser Tool (E) or add layer masks (Layer > Layer Mask > Reveal All) to layers with rays and with a big soft brush, with Opacity around 20-50%, remove where the texture looks badly or too bright. For example, on the lowest layer, blurring on the benches gives an incomprehensible glow. Also, I partially remove an effect from the other layers near the column on the right side of the image and slightly in the depth of the temple, because these elements have become too bright and spoil the image. Also, you should pay attention to the edges in the foreground from the blurred stained glass. It is necessary to make the transition more smoothly and naturally.
![]()
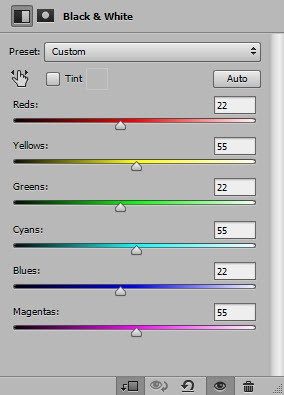
Step 6
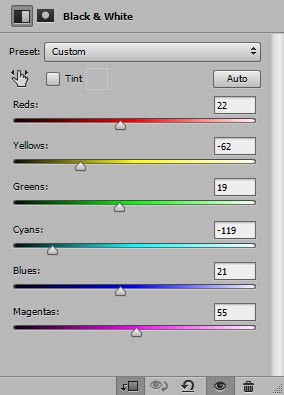
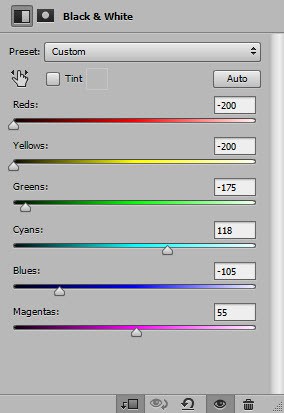
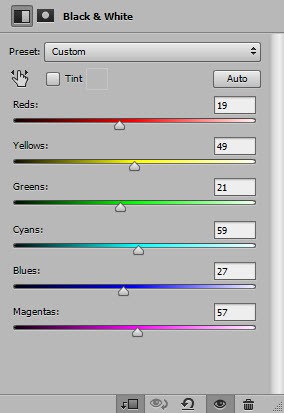
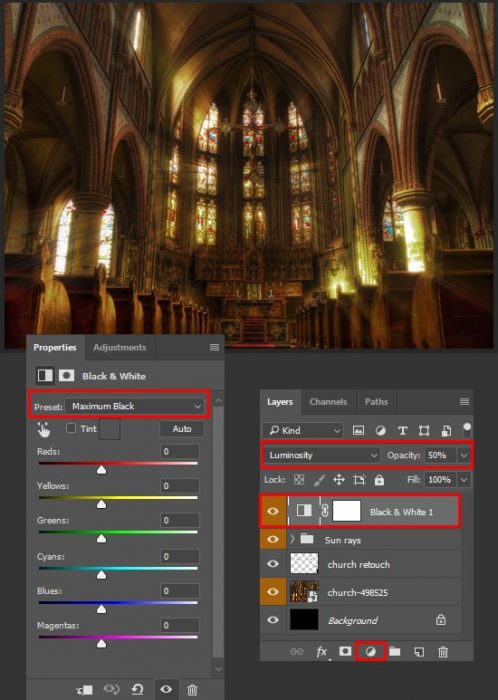
Now I’m starting to create a color atmosphere. The temple looks very bright and colorful, but I want to create an atmosphere of mystery, so I’ll make the tone more muted and less bright. So, I add some adjustment layers and first of them is “Black & White” (Layer > New Adjustment Layer > Black & White or use “Create new fill or adjustment layer” icon). Use preset “Maximum Black”, change Blending Mode to “Luminosity” and reduce Opacity to 50%. This will slightly change the chiaroscuro of the room and remove unnecessary saturation.
![]()
Step 7
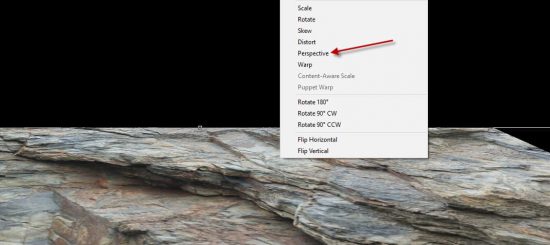
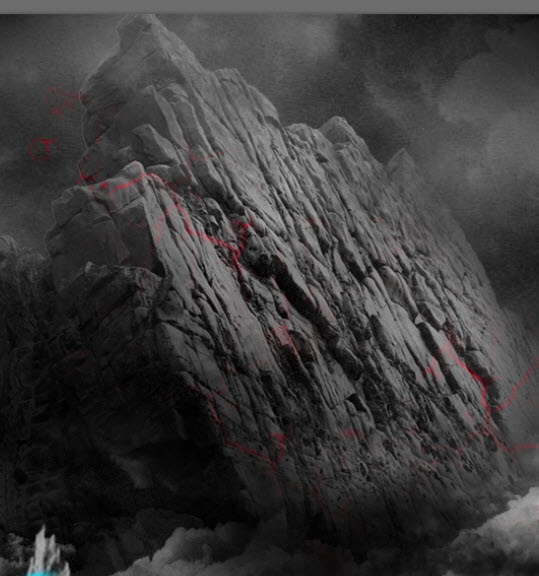
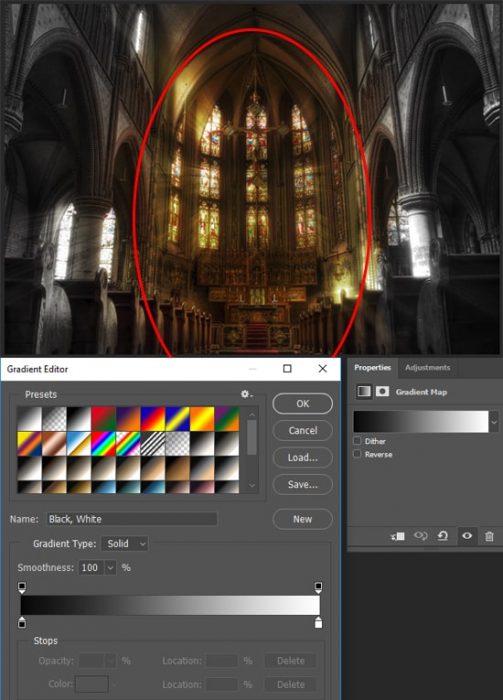
Now I have darkened the edges of the image to create the main light spot, increase the depth of the image and hide the color. Add “Gradient Map” adjustment layer with “Black, White” preset. Remove effect in the center of the image and make the transition of color at the level of the columns of the building on adjustment layer mask, by using Brush Tool (B) with soft round form, black color, and Opacity: 100%.
![]()
Step 8
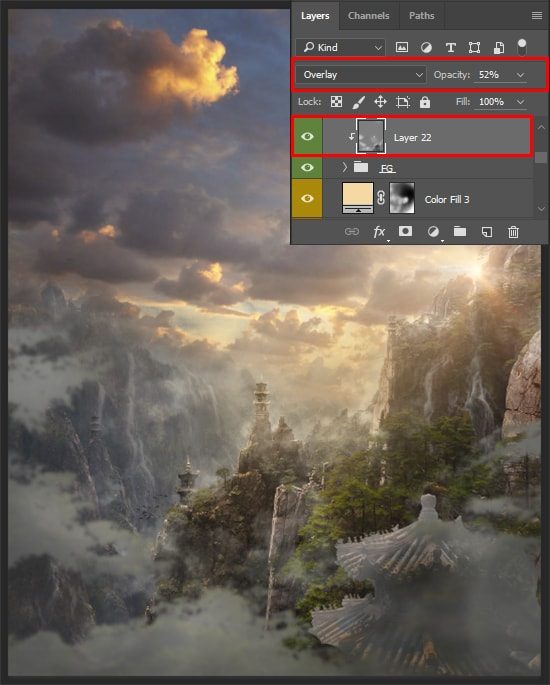
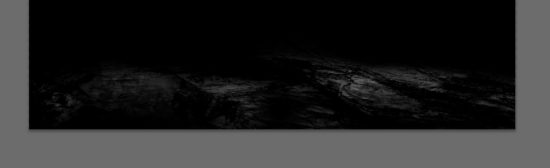
Go to Layer > New Fill Layer > Gradient, in the window that appears set Style: Radial, Angle: 90 degrees, Scale: 180%, Preset “Black, White” with a Reverse option. Change Blending Mode to “Overlay”, Opacity: 55%. The hall is very changed. I like the center of the image, where the solar atmosphere remains in combination with the dark hall. This will focus the viewer on the main thing.
![]()
Step 9
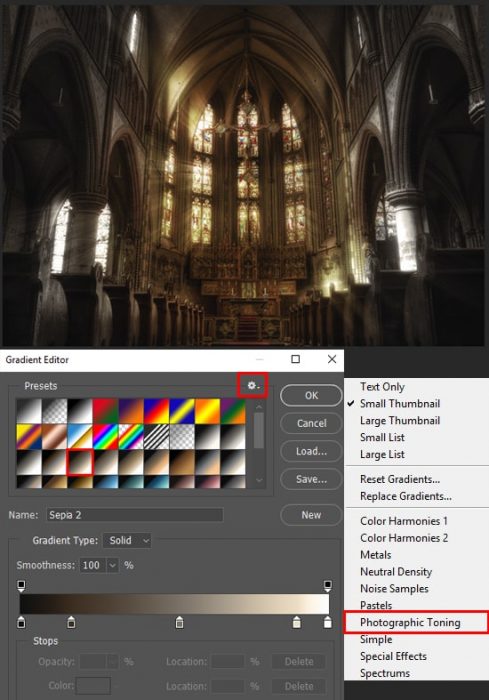
Add one more “Gradient Map” adjustment layer with “Sepia 2” preset from “Photographic Toning” gradient set. You can find it among others additional sets by clicking on an icon in the form of a gear. Now the shadows have ceased to be too contrasting and a nice haze appeared in the image. This is very complementary to the atmosphere, but it is necessary to restore effect of other colors, so reduce Opacity to 45%.
![]()
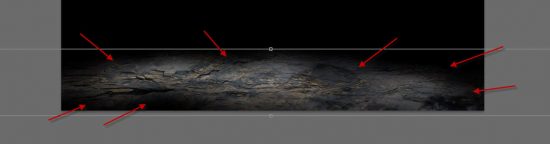
Step 10
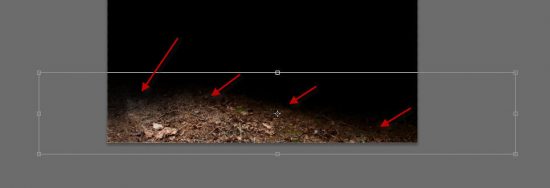
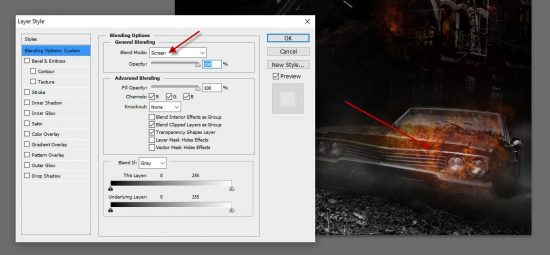
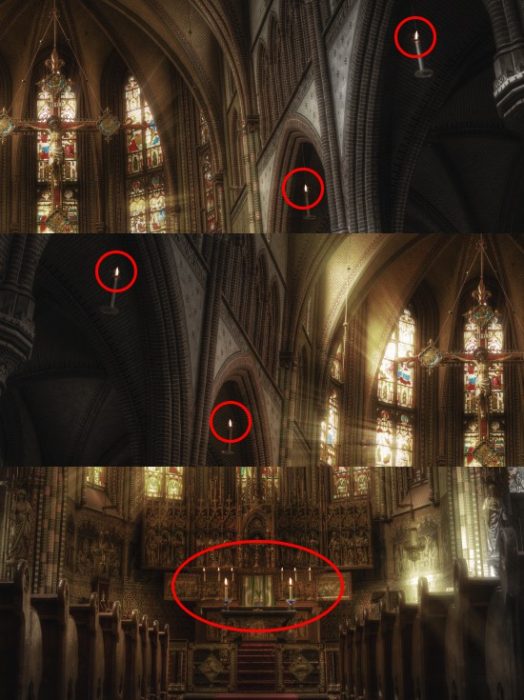
On this, the image toning is over and now I will add some fire to the candles. This will help reveal the story in the picture. I decided not to be lazy and photographed a candle. You can follow my example or use my image or any other. In any case, I place “003” image from my resource set into working document and resized to the appropriate scale. Use several copies (Cmd/Ctrl + J) of different sizes, and place them on lamps on the foreground and on the altar. The flame must be in proportion to candles, remoteness of objects, as shown in the image below. Use “Screen” Blending Mode to hide blacks and blend a flame.
![]()
Step 11
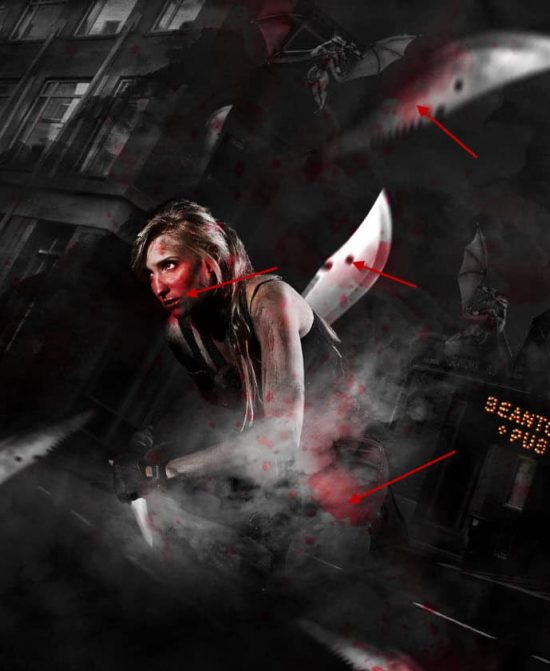
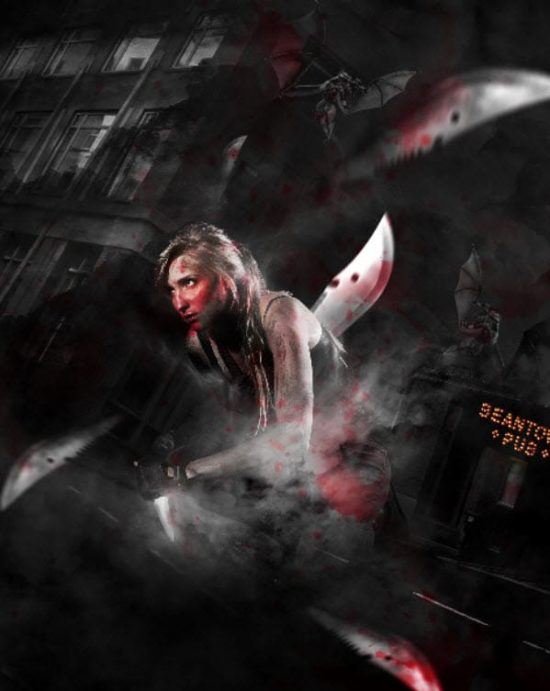
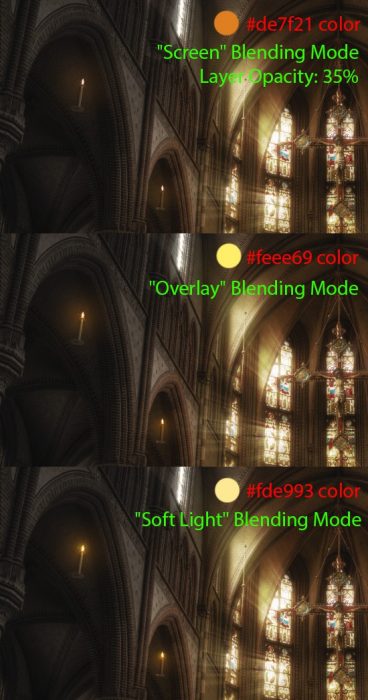
Create a new layer (Cmd/Ctrl + Shift + N) with “Screen” Blending Mode and Opacity: 35%. Take Brush Tool (B) with soft round form, Size: 300px, Opacity: 50% and #de7f21 color. Pointwise draw light from the candle, trying to brush center was on a candle. Create a new layer with “Overlay” Blending Mode. Brush Size: 45-150px and #feee69 color and repeat the same with a smaller brush size. On the last new layer with “Soft Light” Blending Mode, use a lighter color: #fde993, Brush Opacity: 100% and with the same brush to create a glow.
![]()
![]()
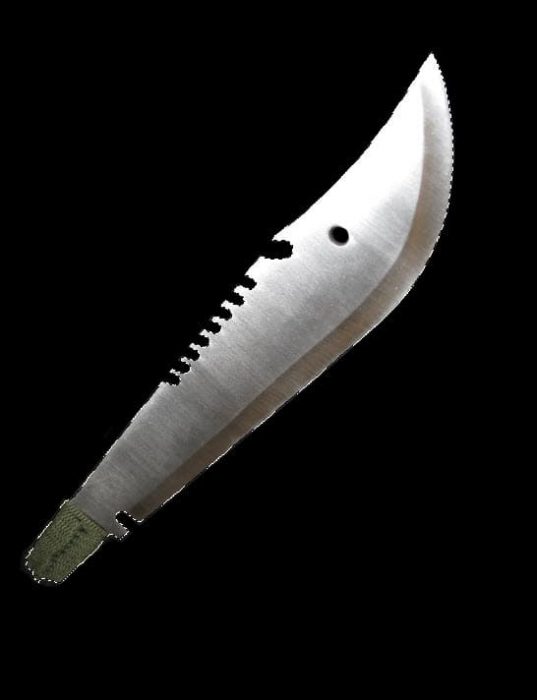
Step 12
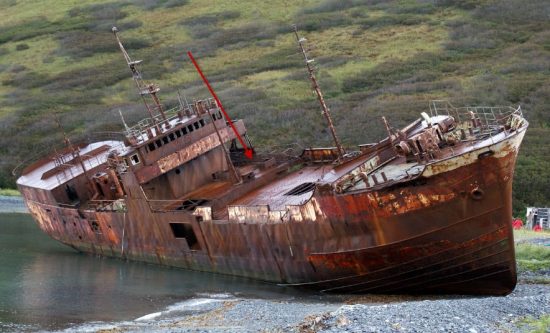
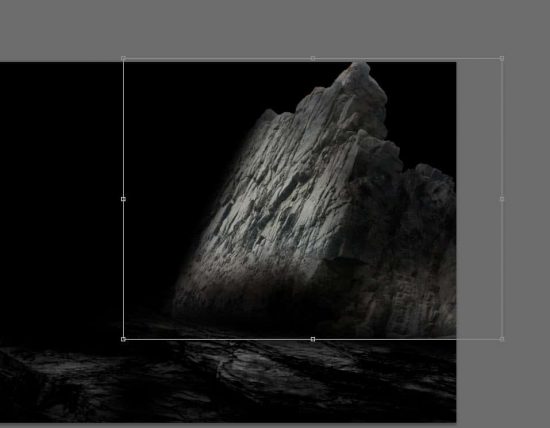
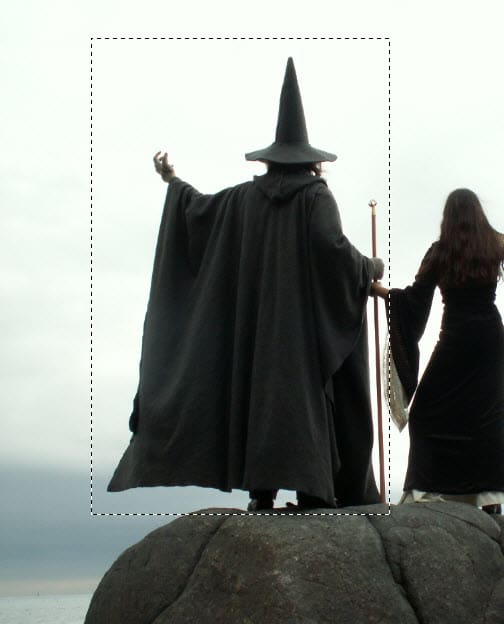
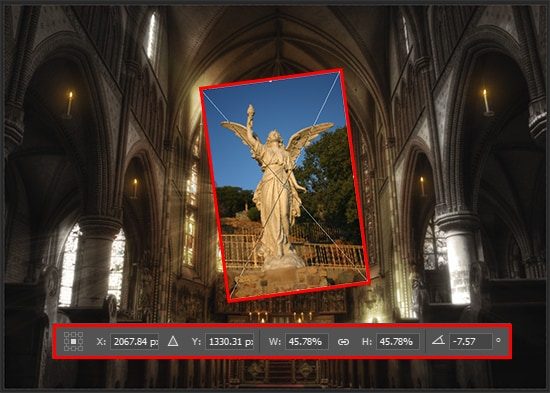
At this work with the background is over and we begin to create an angel. Go to File > Place/ Place Embedded… and open “file0001117378127” statue image. Resize it (Cmd/Ctrl + T or Edit > Free Transform) proportionally to around 45.77% for horizontal and 45.79% for vertical scale.
![]()
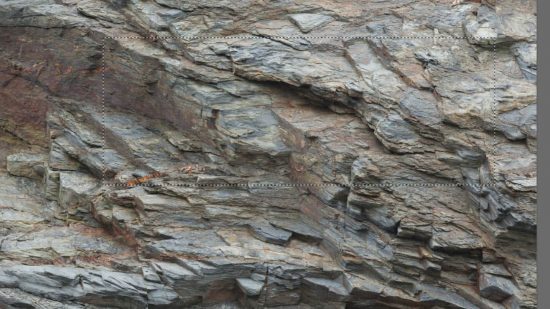
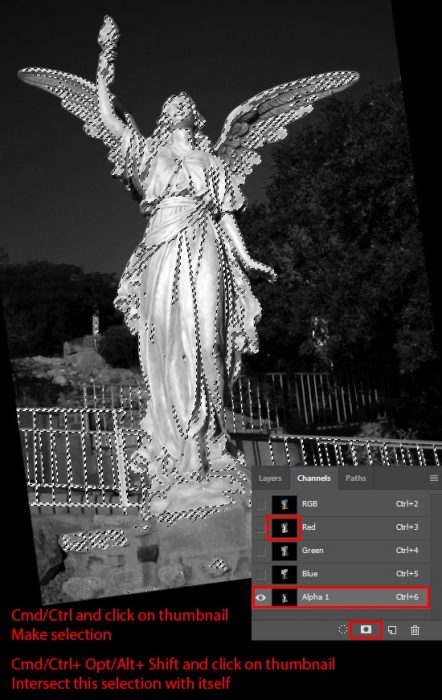
Step 13
To separate the statue from the background, I used Chromatic key compositing technique. Open Channels panel (Window > Channels), hold Cmd/Ctrl+ Opt/Alt+ Shift and click two times on Red channel thumbnail (or another channel with good visibility of the desired object and contrast) to make the selection of intersecting with itself. In this exceptional case, it will help create a better contrast. Then, click on “Save selection as channel” icon to separate it on a new channel, which we will edit. Use Cmd/Ctrl + D to deselect and edit the entire image. In general, it is better to work with a duplicate of the original channel, but if the result is certainly good, then you can cut corners a little.
![]()
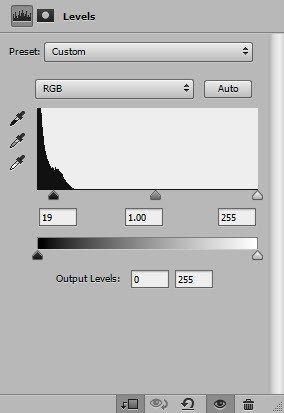
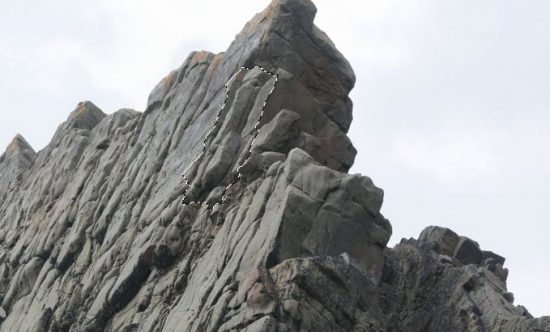
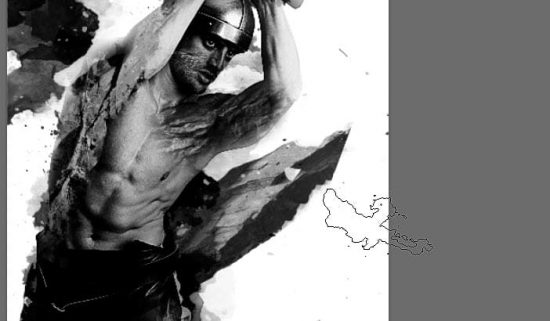
Step 14
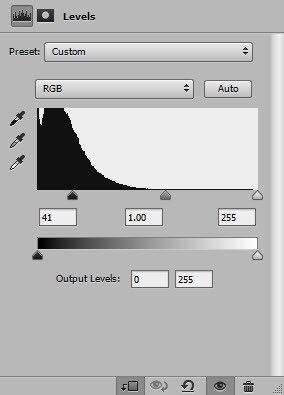
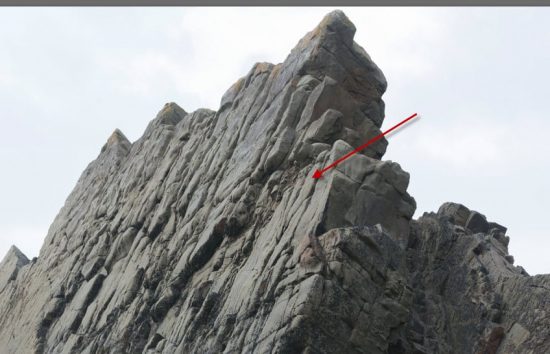
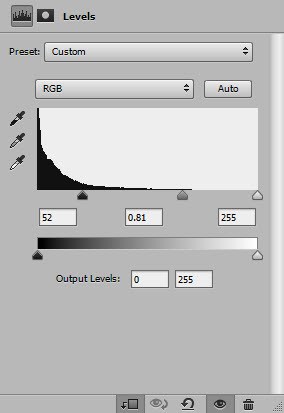
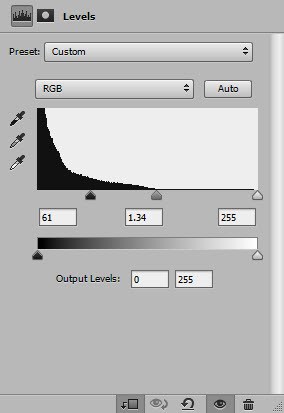
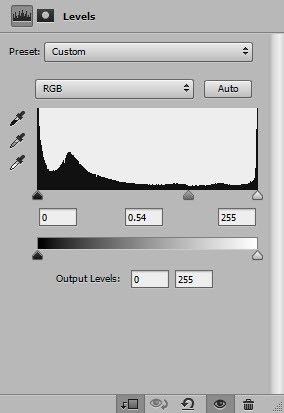
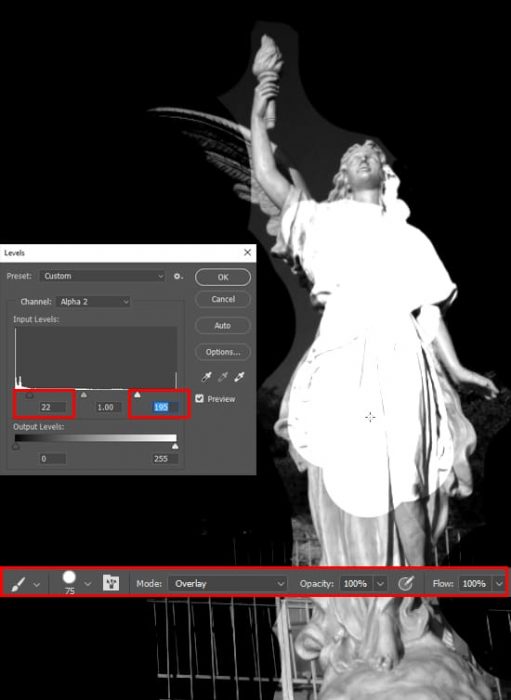
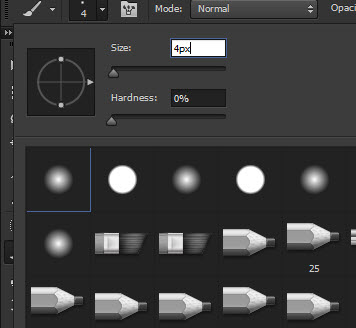
Take a Brush Tool (B) with hard round form, Size: 20-85px, set brush Blend mode to “Overlay” (Shift+ Opt/Alt + O) or “Normal” (Shift+ Opt/Alt + N) (depending on the editing areas), Opacity: 50-100%. Set Default Foreground and Background colors (D). Carefully restore the statue with white color and remove the background with black color, until you get a clear silhouette without halftones. I also removed wings because I’ll replace them with more realistic ones a bit later. Also, some details like the sleeve of the dress will not fall into the selection and this will give the form a slightly abstract look, which is quite good in this case. Optional, you can apply “Levels” adjustment (Cmd/Ctrl + L or Image > Adjustments > Levels) with a slight shift for whites and blacks (values depending on your result), to increase the contrast between the statue and the environment and remove debris and noise, if any.
![]()
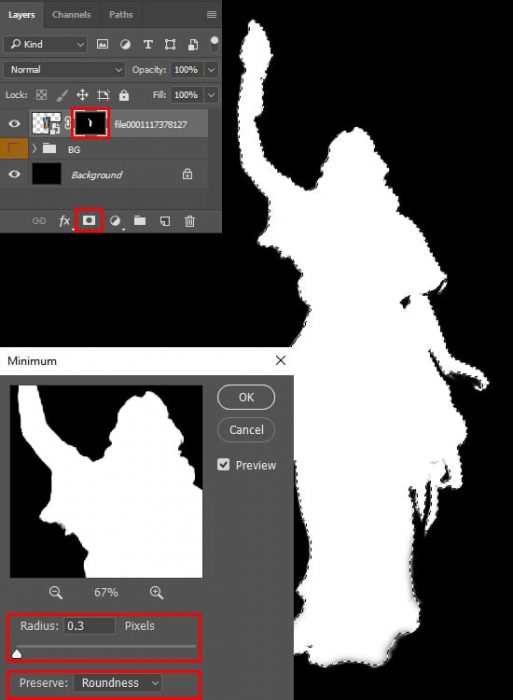
Step 15
Hold Cmd/Ctrl and click on channel thumbnail, which you edited to create a selection and go back to Layers panel. Click on “Add a layer mask” icon (Layer > Layer Mask > Reveal Selection) to hide the background. I also apply a “Minimum” filter (Filter > Other > Minimum) with Radius: 0.3px and Preserve: Roundness to make the selection smoother, directly on the layer mask.
![]()
Step 16
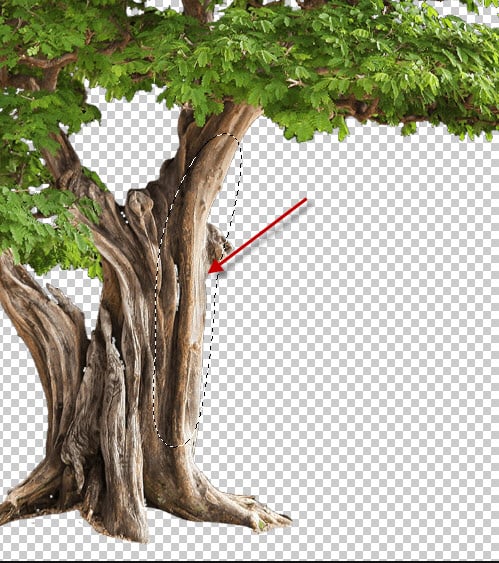
Duplicate layer with statue (Cmd/Ctrl + J) and flip it horizontally (Edit > Transform > Flip Horizontal). Place the duplicated layer under the layer with the original statue and move the image, so that the hand is aligned with the trunk. Use layer masks of both layers and soft black brush to hide hand with a torch on the first layer and blend folds of clothing and hand with the original image of a statue.
![]()
Step 17
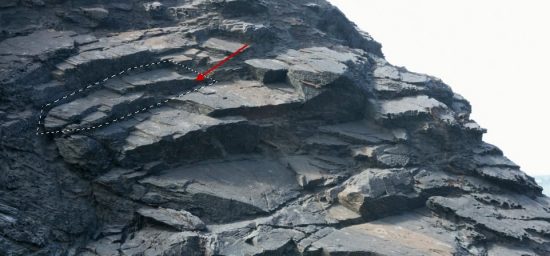
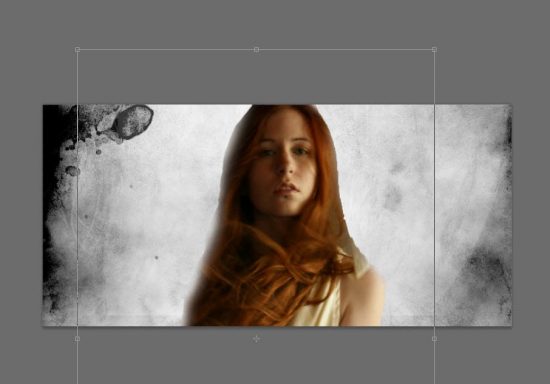
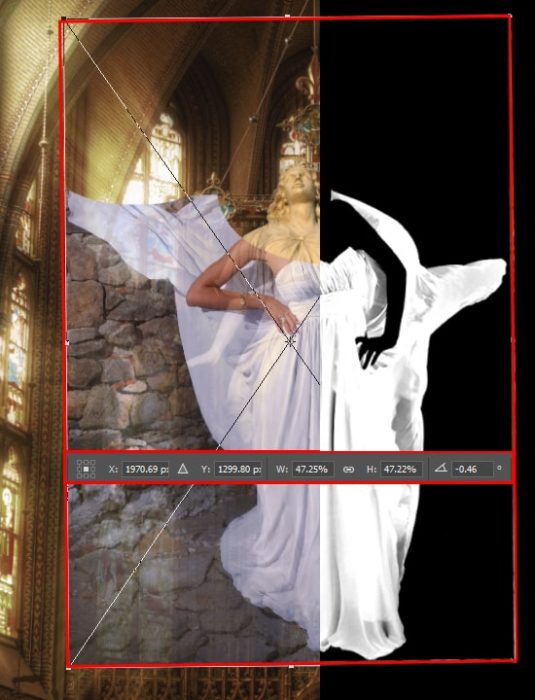
Next, I replaced the dress with a more realistic one. Place image “woman-1905520” and transform this layer, so that the skirt would fit and become a continuation of the statue, as shown in the image below. Repeat Steps 13-15 to separate the dress from the background, but leave the halftone in the fabric folds to get the transparency effect.
![]()
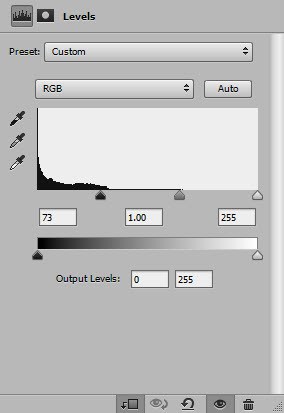
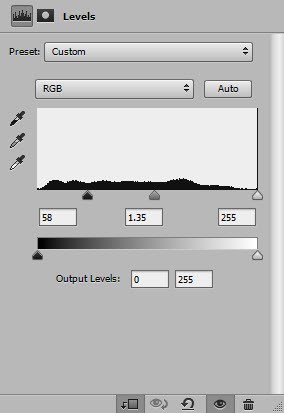
Step 18
Use a layer mask and soft black brush to blend cloth and statue. Everything is similar to the steps in which we worked with the statue. Except for one thing – add “Levels” adjustment as a Smart Filter (click on layer thumbnail and use Cmd/Ctrl + L), and move a gray slider to value 0.47. It’s darkening the dress, but it’s necessary. You will see the effect of this a little later.
![]()
Step 19
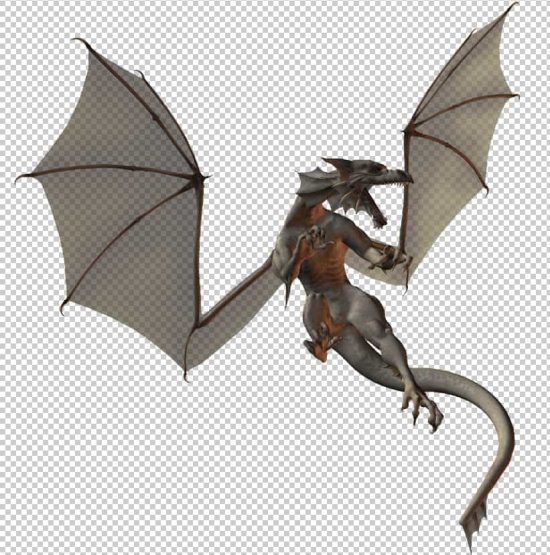
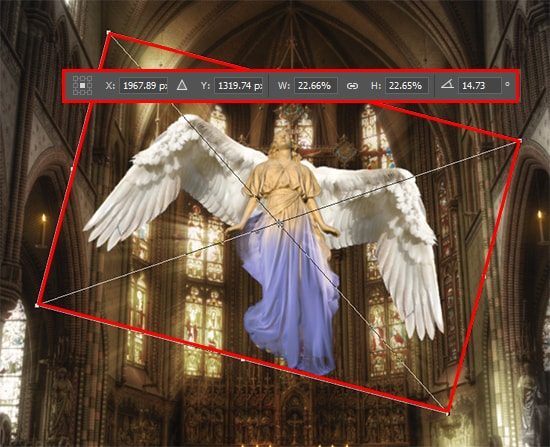
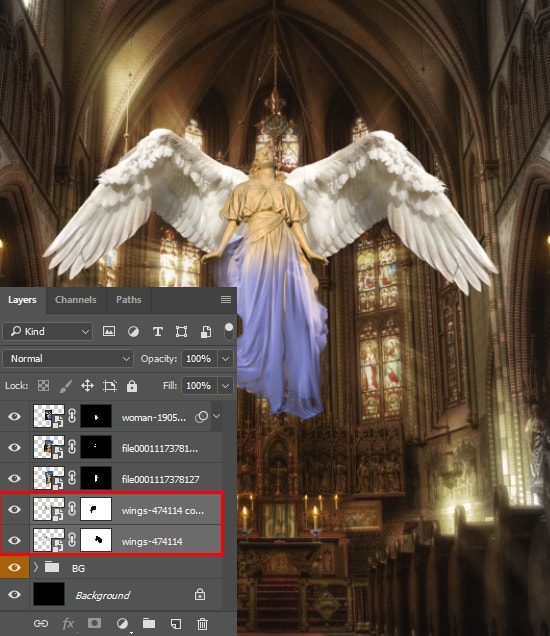
Place image “wings-474114” into working document. In Free Transform mode scale image proportionally to around 22.65% for horizontal and vertical scale, Rotate on 14.73 degrees. Duplicate this layer (Cmd/Ctrl + J) and flip it horizontally (Edit > Transform > Flip Horizontal). With Move Tool (V), arrange both wings relative to the statue, as shown in the image below. In order not to move the wing vertically, hold Shift key during the movement. Place both images under layers with a statue in a layer stack. Hide excess wing from each side, by using layer masks.
![]()
![]()
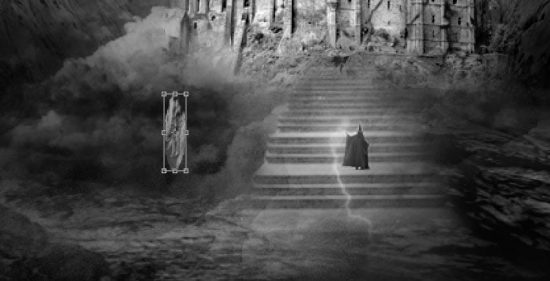
Step 20
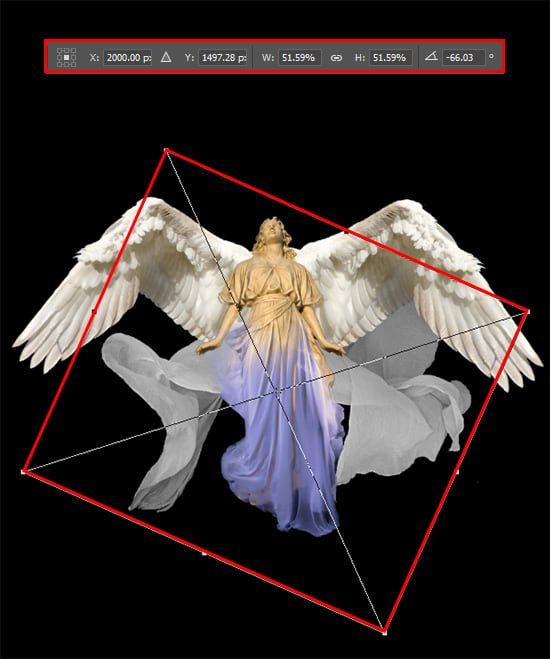
And the last thing I’ll add is the flying fabric. Just place image “Flying fabric” from my resource set and transform it, as shown in the image below. This is a ready-made element and it only needs to be placed behind the rest of the layers with the angel. You can use other images and various pieces of fabric and make your own version. Everything is completely in the power of your imagination. Be sure to group all the layers with the angel (Cmd/Ctrl + G) and change Blending Mode to “Screen”.
![]()
Step 21
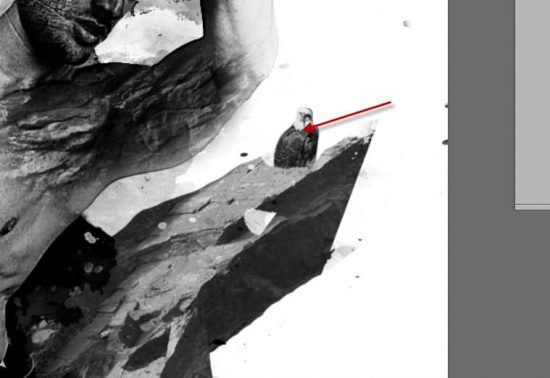
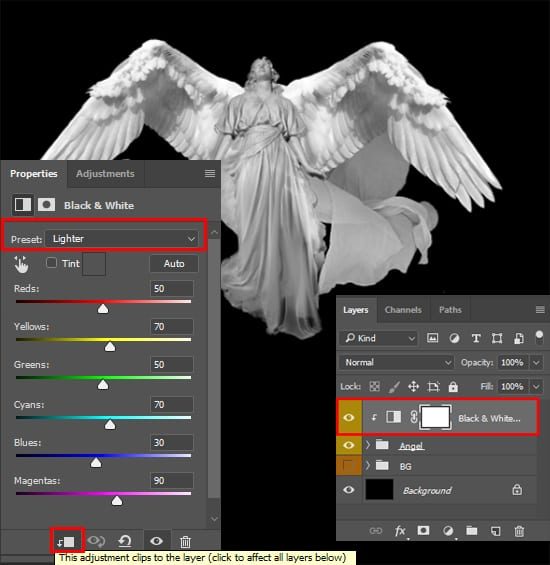
Now let’s start the effects! I recommend you to hide the group with the background and work on a black color, so you can more accurately see the details, effects and the color applied. Periodically open the background to see the composition as a whole and the quality of the effect. Add “Black & White” adjustment layer with preset “Lighter”, as Clipping Mask (Cmd/Ctrl + Opt/Alt + G or use icon at the bottom of opened window).
![]()
Step 22
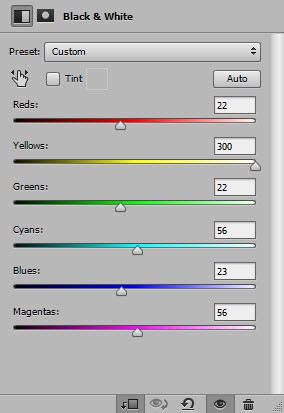
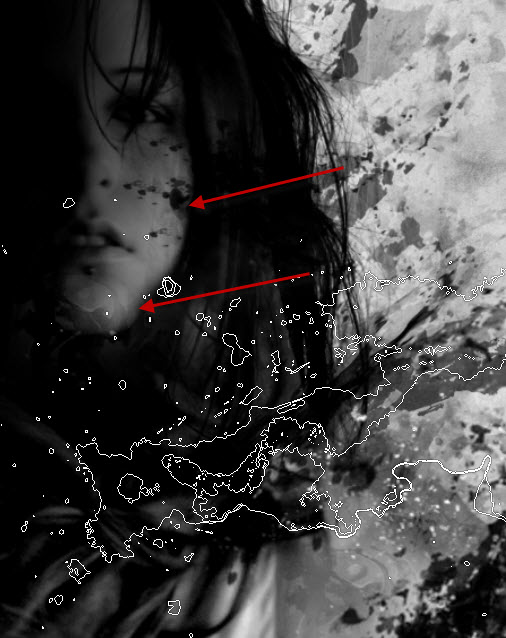
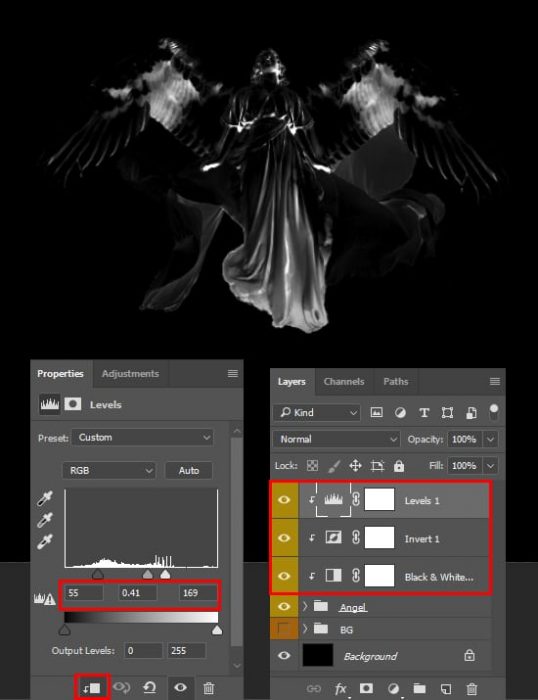
Next, add “Invert” adjustment layer and adjust the contrast with “Levels” adjustment layer with Blacks: 55, Midtones: 0.41, Whites: 169. All these layers are used as Clipping Masks, so carefully check your Layer panel to avoid misunderstandings. At this stage, you have several options. You can change settings and achieve good contrast with the help of “Levels” which we added or darken more than necessary (current settings) and restore the details in the right places. I chose the second way to control lighting and detail. So, create a new layer above “Black & White” adjustment layer. Use Brush Tool (B) with Opacity: 5-20%, Size: 10-150px and black color to restore or white to hide necessary elements and details.
![]()
![]()
Step 23
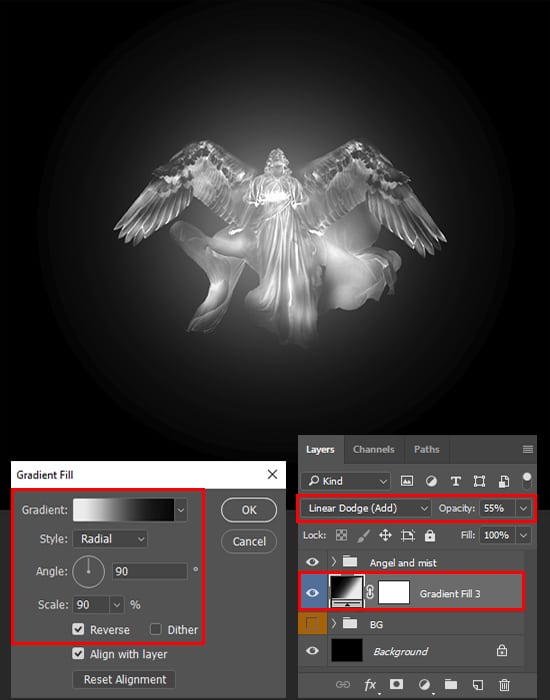
Group all these layers (Cmd/Ctrl + G), and change group Blending Mode to “Screen”. Add “Gradient Fill” adjustment layer between background and angel groups, with following settings – Gradient: #000000 > #1a1a1a (Location: 29%) > #727272 (Location: 58%) > #ececec (Location: 90%), Style: Radial, Angle: 90 degrees, Scale: 90%, Preset “Black, White” with Reverse option. Move the gradient a little up, closer to the body of the statue, when “Gradient Fill” window is opened. Change Blending Mode to “Linear Dodge (Add)” and reduce layer Opacity to 55%.
![]()
Step 24
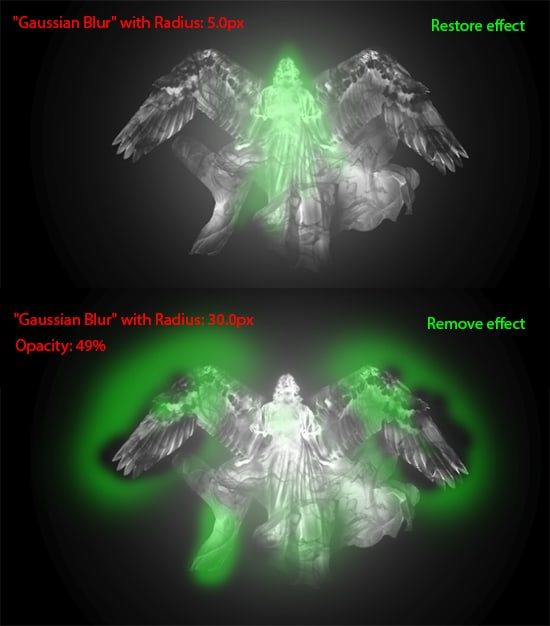
Select a group “Angel and mist” and use Cmd/Ctrl + Opt/Alt + E to create a copy of the content on a new layer. Duplicate this layer (Cmd/Ctrl + J) and change Blending Mode of both layers to “Color Dodge”. To the first layer apply “Gaussian Blur” with Radius: 5.0px, add inverted layer mask (hold Opt/Alt key and click on “Add layer mask” icon) and with soft white brush restore details on the face of an angel and a dress. Apply the same filter to the second layer, but with a larger radius, around 30px. Add a layer mask and remove the excess glow from the angel’s wings. Reduce layer Opacity to 50%. Move both layers to group with an angel on Layer panel.
![]()
Step 25
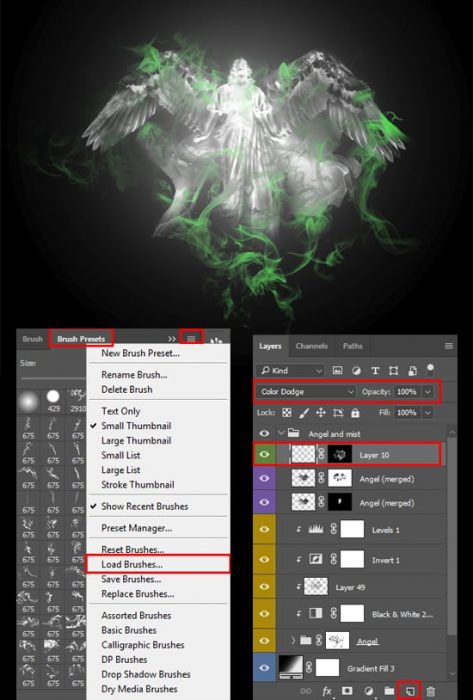
Now add smoke and fog to an angel. Load “Real Smoke Brush set” into Photoshop. Create a new layer topmost in a group “Angel and mist” and with “Color Dodge” Blending Mode. Using different brushes from brush set and Size: 700-1500px, Opacity: 70-100%, color: #cbcbcb, apply the texture to the angel, paying more attention to the dress and flying cloth. Try to create a soft transition from the angel to the smoke, as if it dissolves in the smoke. Where the effect looks excessively, remove it with a soft round brush on an inverted layer mask or with Eraser Tool (E).
![]()
Step 26
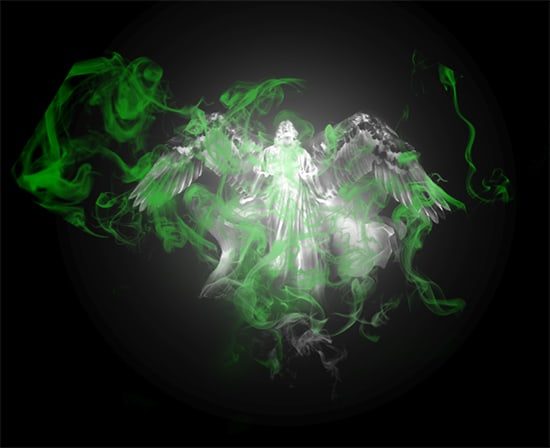
Hold Cmd/Ctrl and click on a layer thumbnail to create a selection. Add an inverted layer mask (Opt/Alt + click on “Add layer mask icon”) to a group “Angel”, with a soft round brush partially remove the effect from the fabric folds and face. Work with layer and mask of the group to achieve the transition effect from light smoke to dark. I got the result, shown in the picture below.
![]()
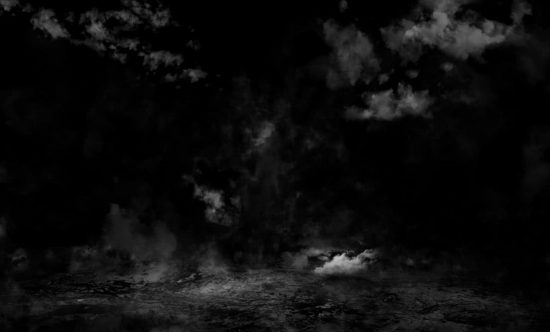
Step 27
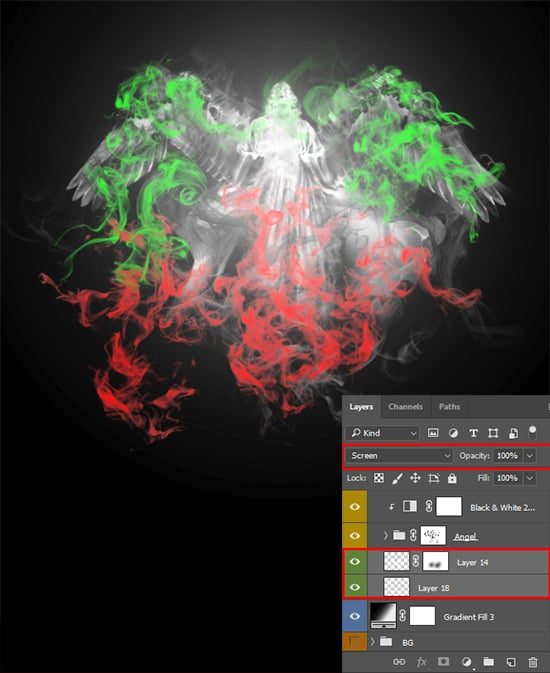
Create two more layers with “Screen” Blending Mode below “Angel” group. Use smoke brushes with settings for the brush, as in Step 25, but reduce the size. Add more details and create a transition from multiple streams of smoke to the angel’s image. Use the transformation tools (within reasonable limits) and many layers, which you can then easily merge (Cmd/Ctrl + E) into one. Feel free to experiment! Your creative decisions are very welcome! Also, do not forget that you can adjust the texture mapping using layer Opacity and layer masks or Eraser Tool (E).
![]()
Step 28
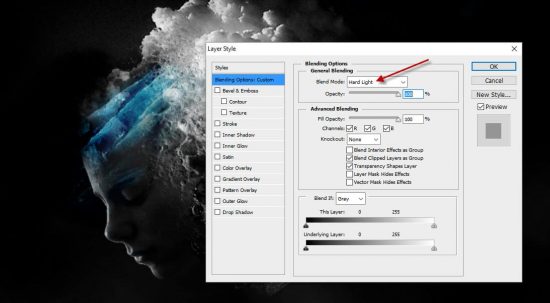
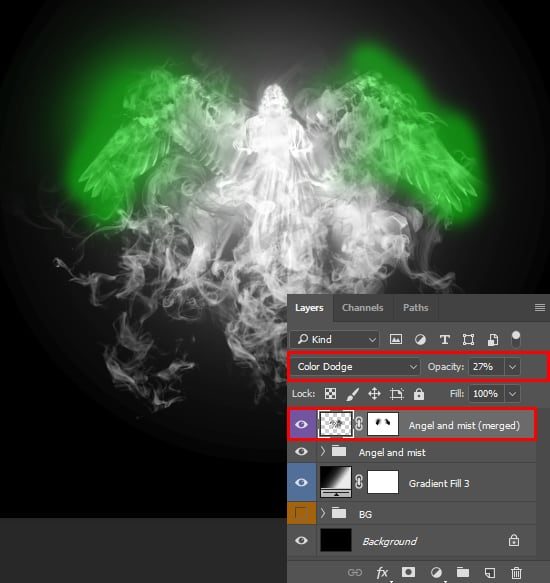
Again, create a copy of “Angel and mist” group on a new layer (Cmd/Ctrl + Opt/Alt + E), add a white layer mask and remove glow from wings with a soft round black brush (Opacity around 30%). Set Blending Mode to “Color Dodge”, Opacity to 27%.
![]()
Step 29
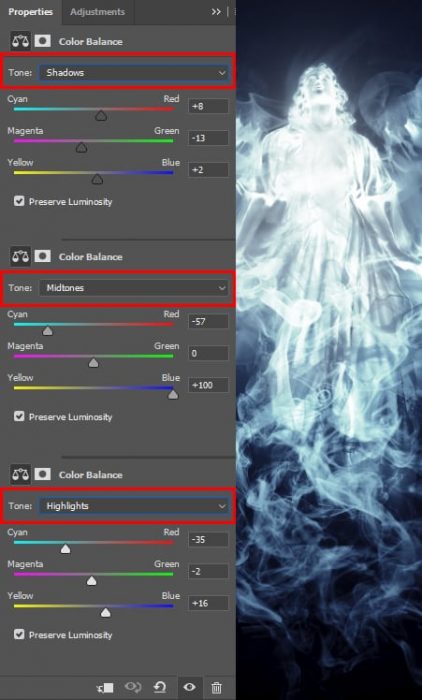
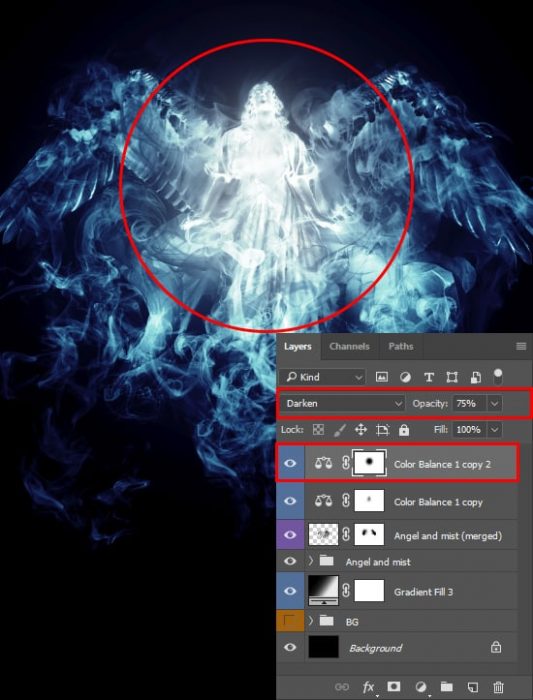
Now add a little color. I created a tint in bluish tones so that the angel contrasted with the lighting of the temple. Add “Color Balance” adjustment layer with the settings, as shown in the image below. Change Blending Mode to “Multiply” and on adjustment layer mask remove an effect from and angel body with soft round brush and brush Opacity to around 30%. Duplicate this layer and change Blending Mode to “Darken”, Opacity to 75%. And again remove the effect on the layer mask, but with a larger brush and with greater opacity value, to create a transition from the contrived blue tone to the gently green.
![]()
![]()
Step 30
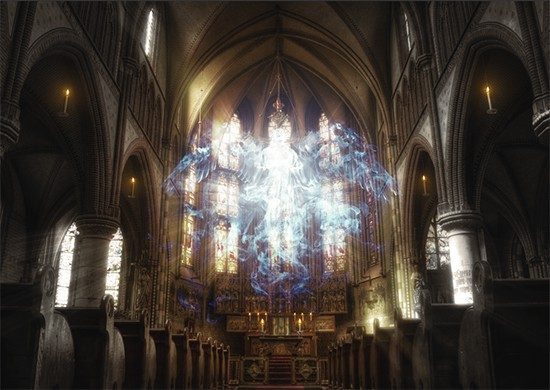
This completes the work with the angel, but since many different blending modes have been used, you cannot just open the background and enjoy the result. If you apply the adjustment layers with the color to the group with the angel, the result is not very good. Consequently, create a merged copy of the entire image via Cmd/Ctrl + Opt/Alt + Shift + E and change Blending Mode to “Screen”. Now hide all layers and groups with the angel, except gradient fill layer above background group. For this layer you need to reduce Opacity to 35%. Now you can enjoy the work that has been done, as soon as you open the group with the background. You can duplicate this layer and try other blending modes or adjustment layers and get a completely different result. Do not hesitate to edit the layers with the angel, especially from the Step 22, if the effect in some places will be invisible or in excess.
![]()
![]()
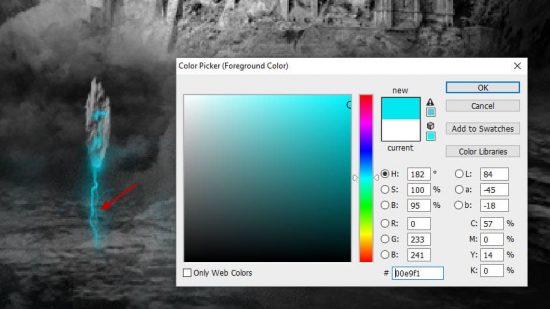
Step 31
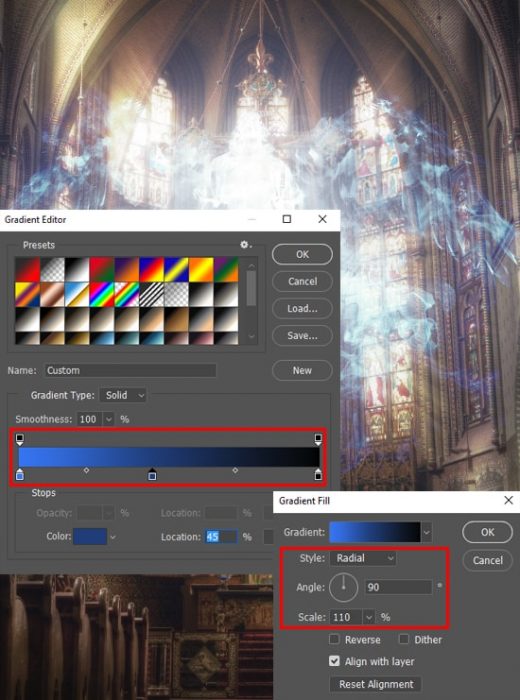
Add a little blue glow from the angel, to harmonize it in the picture. Go to Layer > New Fill Layer > Gradient Layer… In window “Gradient Fill” that appears, set following gradient #3376f3 > #1a3b7a (Location: 45%) > #000000, Style: Radial, Angle: 90 degrees, Scale: 110%. change Blending Mode to “Screen”, Opacity to 20%.
![]()
Step 32
Take a Brush Tool (B) with Size: 400px, Opacity: 40% Color: #3767bf and on a new layer with “Color Dodge” Blending Mode, draw a reflection of the shining angel on the temple walls. Just a small oval to emphasize realism. Reduce layer Opacity to 50%.
![]()
Step 33
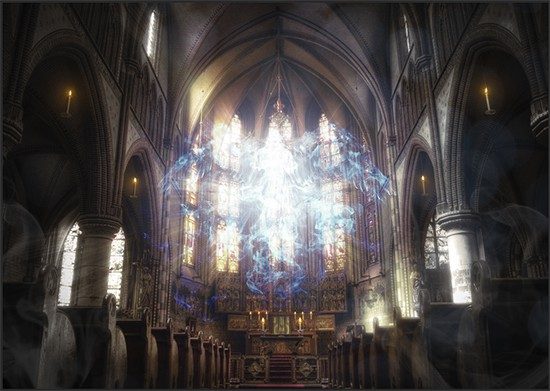
Now I will create an imitation of a vignette by adding “Gradient Fill” adjustment layer with “Black, White” preset, white slider Location: 45%, Style: Radial, Angle: 90 degrees, Scale: 180%, checked “Reverse”. Use Blending Mode “Multiply”, Opacity: 80%.
![]()
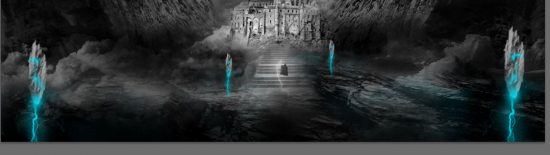
Step 34
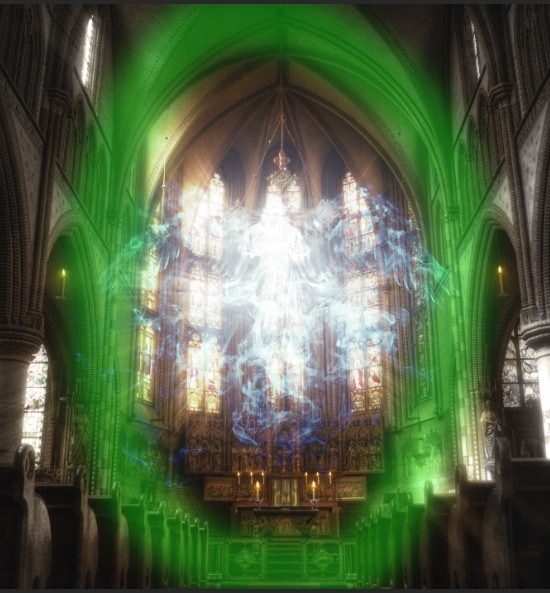
This is an additional step, but if you want, you can add to your work a few foreground elements such as bokeh or use a larger smoke brush(as shown in the image). Also, if you want, you can add a few lens flares and various lighting effects. All for your taste and discretion!
![]()
Step 35
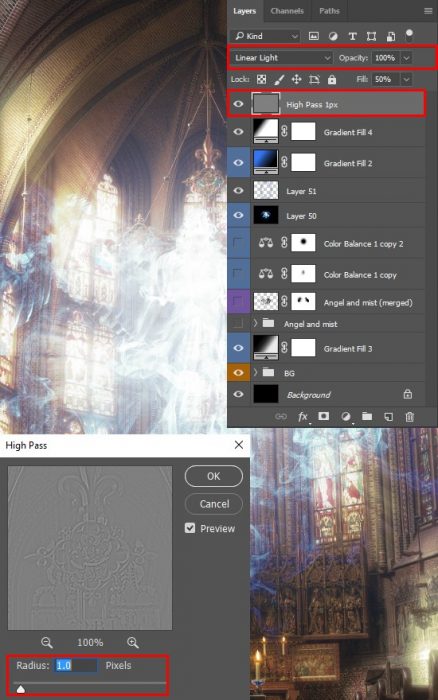
Create a merged copy of finished artwork (Cmd/Ctrl + Shift + E). Go to Filter > Other > High Pass… and set Radius: 1.0px. Set Blending Mode of this layer to “Linear Light” and reduce Fill to 50%. This layer will increase the clarity of all details.
![]()
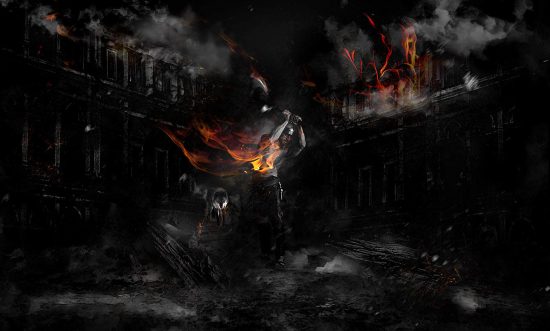
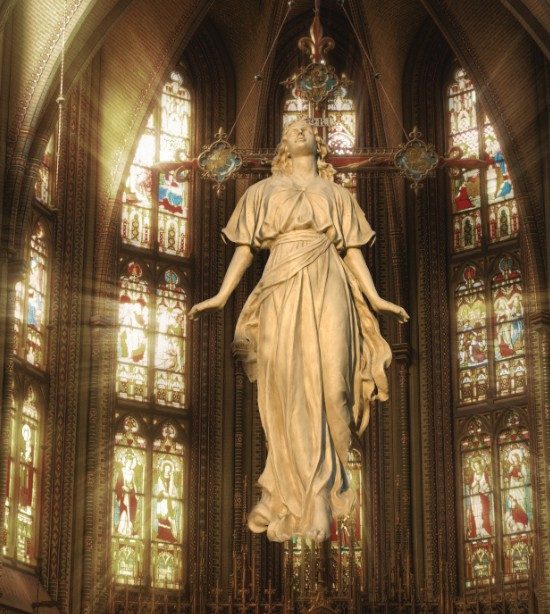
Conclusion
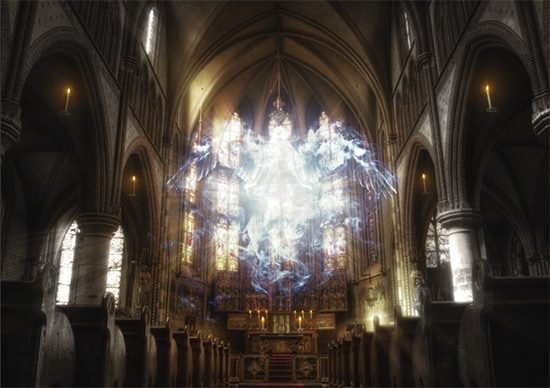
That’s all! This artwork is completely ready. Here my final result. Thank you very much for taking the time to study this tutorial! Do not be afraid to experiment and good luck to you! Have a question or a comment? Leave it in comment section below :)
![]()
The post Create Mysterious Angel Artwork in Photoshop appeared first on PSD Vault.